Logo
Dutch Driving Theory Courses

Lesson 2 of the Curve Negotiation and Advanced Cornering unit

Dutch Motorcycle Theory (A2): The Ideal Line: Entry, Apex, and Exit

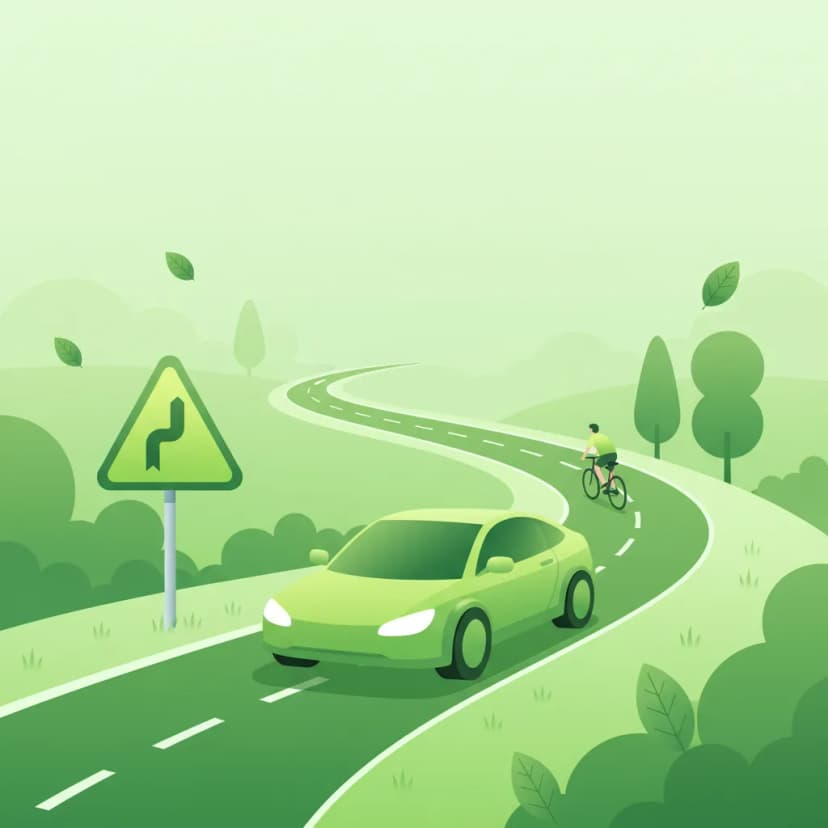
Welcome to the art of motorcycle cornering! This lesson focuses on the 'ideal line' – the optimal path your A2 motorcycle takes through a curve. Understanding how to approach curves safely by mastering entry, apex, and exit points is crucial for your Dutch theory exam and for building confidence on the road.

ideal linecorneringmotorcycle safetyA2 licensecurve negotiation
Dutch Motorcycle Theory (A2): The Ideal Line: Entry, Apex, and Exit
Dutch Motorcycle Theory (A2)

Mastering Motorcycle Cornering: The Ideal Line Explained

Navigating curves safely and efficiently is a fundamental skill for every motorcyclist. This lesson, part of your Complete CBR Theory Course for the Dutch Motorcycle License (Category A2), introduces you to the crucial concept of the 'ideal line' – the optimal path your motorcycle should follow through any bend. Understanding and applying the ideal line enhances your control, boosts your safety, and allows you to enjoy the ride with greater confidence.

Understanding the Ideal Line: Key to Safe and Efficient Cornering

The ideal line is not a rigid legal requirement, but a proven best-practice principle derived from the physics of motorcycle dynamics and extensive road safety research. It provides a strategic approach to cornering that prioritizes visibility, stability, and efficient use of tire traction.

What is the Ideal Line in Motorcycle Riding?

The ideal line refers to the optimal geometric path a motorcyclist should trace through a curve. This path is characterized by a "wide-deep-wide" trajectory, meaning you enter the curve from the outer edge of your lane, move towards the innermost point (the apex) of the curve, and then exit by returning to the outer edge of your lane. This approach allows you to effectively straighten the curve's radius, reducing the lean angle required and maximizing your view.

Why Following the Ideal Line Matters for Motorcycle Safety and Control

Adopting the ideal line significantly influences several critical aspects of your riding:

  • Enhanced Safety: By reducing the lean angle needed for a given speed, the ideal line lessens the risk of tire slip and maintains greater stability. A lower lean angle means more of your tire's contact patch is on the road, improving grip.
  • Improved Visibility: The wide-deep-wide path opens up your line of sight through the corner, allowing you to see further ahead. This crucial increase in vision enables earlier detection of potential hazards such as debris, potholes, or oncoming traffic, giving you more time to react.
  • Greater Efficiency and Confidence: Following the ideal line allows for smoother, more controlled cornering. This efficiency means you can maintain appropriate speeds through bends without exceeding your motorcycle's or tires' grip limits, contributing to better traffic flow and significantly increasing your confidence as a rider.

Deconstructing the Corner: Entry, Apex, and Exit Points

Every curve can be broken down into three fundamental stages: the entry, the apex, and the exit. Mastering each of these points is essential for successfully executing the ideal line.

The Entry Point: Setting Up Your Motorcycle Turn

The entry point is the specific location on the road where you begin to turn your motorcycle into the curve. For the ideal line, this point is strategically positioned near the outer edge of your lane or the road shoulder (where safe and permitted). This wide entry is crucial because it allows you to effectively broaden the curve's radius.

Choosing the correct entry point determines the initial steering angle required to initiate the turn and significantly influences the "sight triangle" – your visual corridor through the curve. A well-chosen wide entry sets you up for a smooth transition into the apex and a stable exit. Conversely, entering too early or too tightly can lead to an abrupt steering input, requiring a greater lean angle, and potentially compromising stability and vision.

The Apex: The Innermost Point of Your Curve

The apex is the innermost point of the curve where your motorcycle's path is closest to the inside edge of the road (e.g., the center line or curb). It represents the deepest point of your trajectory within the turn. While there's no single "correct" apex point for all situations, its timing is critical.

  • A late apex is generally preferred on public roads and in racing to allow for earlier acceleration out of the curve. It occurs later in the curve, opening up the exit.
  • An early apex occurs sooner in the turn and is typically used only when the exit is constrained by factors like heavy traffic or specific road geometry (e.g., a rapidly tightening curve).

The apex serves as a vital reference for the magnitude of your steering input and the precise moment to smoothly transition from braking to applying throttle. It is crucial to aim for the apex with a smooth, progressive steering input rather than a sharp, sudden movement.

The Exit Point: Straightening Up and Accelerating Out

The exit point is where you complete the turn and gradually straighten your motorcycle, returning to an upright position. Ideally, this involves moving towards the outer edge of your lane again, mirroring the wide entry. This wide exit allows for maximum visibility of the road ahead and provides the best possible alignment for upcoming traffic flow.

The exit point dictates the final reduction of your lean angle and determines the amount of usable tire traction available for acceleration. A smooth and controlled exit ensures stability as you roll on the throttle. Rushing the acceleration before the motorcycle has significantly straightened can overload the rear tire and lead to a loss of grip, which is a common error.

The Wide-Deep-Wide Path: Maximising Vision and Minimising Lean

The fundamental principle of the ideal line is its geometric path, often described as "wide-deep-wide." This trajectory is specifically engineered to enhance safety and control on a motorcycle.

Geometry of the Wide-Deep-Wide Motorcycle Line

The wide-deep-wide geometry describes a trajectory where you:

  1. Enter Wide: Position your motorcycle on the outer edge of your lane as you approach the curve. This initial wide position makes the curve's effective radius as large as possible.
  2. Cut Deep: Aim for the apex, the innermost point of the curve, bringing your motorcycle close to the inside edge of the lane (without crossing the centre line or encroaching on opposing traffic).
  3. Exit Wide: As you pass the apex, gradually move back towards the outer edge of your lane, allowing the motorcycle to straighten up smoothly while accelerating.

This path provides the greatest lateral clearance within your lane and optimizes your sight line through the bend. For example, in a 70 km/h urban curve with a 30-meter radius, a rider might enter 1.2 meters from the outer lane marking, reach 0.3 meters from the inner curb at the apex, and exit at 1.2 meters again.

Optimising Lean Angle for Enhanced Motorcycle Stability

One of the primary benefits of the wide-deep-wide path is lean angle optimisation. By effectively widening the radius of the curve you are taking, you reduce the overall lean angle required for a given speed. Lower lean angles are highly advantageous because they:

  • Increase Tire Contact Patch: A more upright motorcycle means a larger area of tire tread is in contact with the road, providing better grip and stability.
  • Reduce Shear Forces: Less lean reduces the lateral forces acting on the tires, which lowers the risk of sliding, especially in less-than-ideal road conditions.
  • Improve Rider Comfort: A less aggressive lean angle is generally more comfortable and less strenuous for the rider.
  • Provide a Safety Margin: Should you encounter an unexpected hazard mid-corner, having less lean angle provides a crucial safety buffer, allowing you to lean further if necessary to avoid an obstacle.

For instance, at 50 km/h in a 25-meter radius curve, the theoretical lean required is approximately 30°. Using the ideal line helps ensure this lean is achievable within safe limits.

The Sight Triangle: Your Visual Corridor Through Curves

The sight triangle, or line-of-sight triangle, is a vital conceptual tool for cornering. It is an imaginary visual corridor formed by your eye point, the apex of the curve, and the exit point. Maintaining a clear and continuous sight triangle ensures that you are always looking as far ahead as possible through the curve.

  • Full-Sight Triangle: Achieved when there are no visual obstructions and you maintain the ideal line, allowing you to see the entire curve and its exit. This allows for early hazard detection and smoother decision-making.
  • Partial-Sight Triangle: Occurs when your view is reduced due to obstacles (e.g., hedges, parked cars), road geometry (e.g., blind corners), or an incorrect line choice (e.g., cutting the apex too early). A compromised sight triangle significantly reduces your reaction time.

Proper technique involves looking far ahead through the exit point, rather than just at the apex. Your gaze should lead your motorcycle, allowing your brain to process information and prepare for the next action.

Dynamic Control: Speed Management and Throttle Transition

Beyond choosing the right line, your interaction with the motorcycle's controls – particularly speed and throttle – is paramount for safe cornering.

Entry Speed Management: Braking Before the Turn

Entry speed management involves adjusting your motorcycle's speed before you lean into a curve. The goal is to complete most, if not all, of your necessary braking while the motorcycle is still upright and traveling in a straight line. This approach prevents excessive braking while leaned over, which can destabilize the motorcycle by transferring too much weight to the front wheel, reducing rear tire grip, and potentially causing a slide.

  • Full Braking Before Curve: This is the preferred method for most public road riding. Decelerate to a safe speed that allows you to confidently adopt the ideal line without needing further significant braking once you've initiated the lean.
  • Partial Braking in Curve (Trail Braking): This is an advanced technique where you continue to apply a small amount of front brake pressure as you initiate the lean and move towards the apex. It helps settle the front suspension and tighten your line slightly. However, trail braking demands high levels of skill, precise feel, and ideal road conditions (dry, good grip). It is generally not recommended for novice riders or in adverse conditions like wet roads.

Warning

Avoid late braking while already leaned into a curve, especially on public roads. This significantly increases the risk of losing traction and control. Always aim to adjust your speed fully before entering the turn.

For example, approaching a 60 km/h curve, a rider might reduce speed to 35 km/h while still straight, then enter the curve and smoothly apply throttle.

Smooth Throttle Transition: Accelerating Out of the Apex

Throttle transition is the controlled application of throttle after you pass the apex of the curve, synchronizing it with the gradual reduction of your lean angle as you straighten the motorcycle. This smooth roll-on of the throttle is critical for several reasons:

  • Stabilizes the Motorcycle: Applying a small amount of throttle after the apex helps to load the rear tire, which in turn stabilizes the motorcycle and helps it stand up from the lean.
  • Efficient Traction Use: A smooth, progressive increase in throttle ensures that you utilize the available tire grip efficiently without overwhelming it. Applying too much throttle too early, especially while still heavily leaned, can cause the rear wheel to slip, leading to a loss of control.
  • Prepares for Exit: As you accelerate out of the curve, the motorcycle naturally begins to straighten, preparing you for the next straight section of road or subsequent maneuver.

After crossing the apex at, for example, 30 km/h, the rider should smoothly increase the throttle to 45 km/h while gradually straightening the bike. This progressive rear-wheel torque control is vital for safe and stable cornering.

While the ideal line is a principle of optimal riding, specific Dutch traffic regulations (RVV 1990) govern how you must behave on the road, including when navigating curves. Adhering to these rules is non-negotiable for safety and legal compliance.

RVV 1990 Article 45: Lane Keeping and Centre Line Adherence

Definition

RVV 1990, Article 45

Motorcyclists must stay within their designated lane and are prohibited from crossing the continuous centre line into oncoming traffic, except when safely avoiding an obstacle.

This article directly impacts how you implement the ideal line. You must always ensure that your wide entry, deep apex, and wide exit remain entirely within your lane. Crossing the centre line to "cut" a corner tighter, even if you perceive it as safer or faster, is a violation and extremely dangerous due to the risk of head-on collisions. For example, riding the inside edge of your lane while cornering is acceptable, but riding over the centre line to tighten a curve is not.

RVV 1990 Article 46: Safe Distance from Curb and Obstacles

Definition

RVV 1990, Article 46

The rider must maintain a safe distance from the curb and any roadside obstacles (e.g., parked cars, trees, hedges).

This rule reinforces the "wide" aspects of the ideal line. While aiming for a deep apex, you must never compromise your safety margin by riding too close to the curb or other fixed objects. Maintaining a buffer, for instance, positioning your motorcycle 0.8 meters from the curb on a wide lane turn, reduces the risk of collision and allows for minor corrections if needed. Riding within 0.1 meters of the curb, for example, would be an incorrect and dangerous practice.

RVV 1990 Article 55: The General Duty of Care in Motorcycle Riding

Definition

RVV 1990, Article 55

Drivers must always operate their vehicles in a manner that does not endanger other road users or pose a risk to themselves.

This overarching principle of Dutch traffic law applies to all aspects of your riding, including cornering. It dictates that your chosen line, speed, and lean angle must always be safe and responsible. Choosing a line that gives sufficient sight distance and allows for a controllable lean angle is compliant. Conversely, cutting a corner sharply to gain speed, which significantly reduces sight distance and increases risk, would be a violation of your duty of care. This article indirectly covers exceeding safe lean limits or causing rear-wheel slips.

Other Relevant Regulations: Braking and Obstacle Avoidance

  • RVV 1990, Article 49 – Braking Distance: Braking must be performed safely, without endangering following traffic. This supports the principle of completing most deceleration before entering the curve, maintaining adequate following distance.
  • RVV 1990, Article 53 – Obstacle Avoidance: You must avoid obstacles on the road. While the ideal line helps create a safety buffer, if an unforeseen obstacle appears mid-corner, you are obliged to avoid it safely, which might require a temporary deviation from your ideal line. Using the shoulder briefly to avoid a stalled vehicle is an example of compliance, whereas riding permanently on the shoulder to tighten a curve is not.

Adapting Your Line: Conditional Variations for Motorcycle Cornering

The ideal line is a flexible principle, not a rigid rule. Its application must be dynamically adjusted based on various environmental and situational factors.

Cornering in Adverse Weather Conditions (Rain, Snow, Wind)

  • Wet / Rain: Reduce your entry speed by 20-30% compared to dry conditions. Widen your entry and exit points even further to maximize your tire's contact patch and minimize the required lean angle. Absolutely avoid trail braking, as wet surfaces drastically reduce available grip.
  • Ice / Snow: These conditions demand extreme caution. Adopt a much wider line, keep your motorcycle as upright as possible with minimal lean, and reduce your speed to a crawl. Consider using a "low-speed" technique, ready to put a foot down.
  • Strong Cross-winds: Before entering the apex, you may need to apply a slight counter-steer into the wind to maintain a stable trajectory. Be prepared for sudden gusts that can push your motorcycle, and adjust your exit trajectory accordingly.

Managing Different Lighting and Visibility Scenarios (Night, Fog)

  • Night: Use your high-beam only when there is no oncoming traffic. Keep your line wide to stay within the illuminated portion of the lane, as hazards outside your light cone are almost invisible. Your perception of depth and speed is reduced at night.
  • Fog: Reduce your speed significantly. Increase your entry width to allow for maximum sight distance, as your visual range will be severely limited. Stay well away from the road edges where visibility is often poorest and unseen hazards might lurk.

Adjusting for Road Type and Surface Changes

  • Urban Street: These often feature parking, pedestrians, manhole covers, and intersections. Prioritize safety and visibility over speed. Maintain a generous sight triangle and be prepared for sudden stops or deviations.
  • Rural Two-Lane Road: While speed limits may be higher, these roads often lack shoulders and can have unexpected debris, gravel, or wildlife. Still apply the wide-deep-wide principle but adapt for the absence of safety margins.
  • Motorway (Autosnelweg) Exit Ramps: Curves on exit ramps can be long and sweeping, but also rapidly tightening. The ideal line may be less "deep" than on a tight bend but still requires proper entry and exit positioning to manage speed safely as you merge into other traffic flows.
  • Gravel/Dirt: On unpaved surfaces, traction is greatly reduced. Keep your lean angle minimal, reduce speed significantly, and adopt a wider, smoother line. Avoid sudden inputs to brakes or throttle.

Considerations for Vehicle State and Load (Passenger, Cargo, Tire Condition)

  • Heavy Load / Passenger: Additional mass raises the motorcycle's center of gravity and increases overall inertia. This demands lower entry speeds and a broader, wider line to keep lean angles within safe tire limits. Be cautious of reduced braking performance and increased tire load.
  • Tire Condition: Worn or under-inflated tires have reduced grip. This necessitates lower speeds and reduced lean angles to avoid exceeding the tire's diminished traction capabilities. Regularly check your tire pressure and tread depth.
  • Suspension Issues: A poorly maintained or incorrectly adjusted suspension (e.g., excessive sag) can negatively affect handling and stability. If your suspension isn't performing optimally, you may need to reduce your cornering speed and adjust your lean angle tolerances.

Interacting with Vulnerable Road Users in Curves

  • Pedestrians on the Curb: When making a left turn in a city center with pedestrians waiting at the curb, maintain a wide entry and keep your apex at least 0.5 meters from the curb. This provides an extra margin of safety for pedestrian movement and preserves your sight line around them.
  • Cyclists in Adjacent Lane: Be acutely aware of cyclists. Maintain your lane position and avoid cutting inside them during a turn, especially if they are also turning or continuing straight. Give them ample space.

Common Motorcycle Cornering Mistakes and How to Avoid Them

Understanding common errors is as important as learning correct techniques. Here are some pitfalls to avoid:

  1. Late Braking Inside the Curve: Braking while already leaned over significantly reduces tire grip and can cause a slide or loss of control.
    • Correction: Complete all necessary deceleration on the straight section before initiating the lean into the curve.
  2. Cutting the Apex Too Tightly: Riding too close to the inside curb shortens your sight triangle, reduces reaction time, and often forces a higher lean angle than necessary.
    • Correction: Aim for a deep but safe apex that maintains visual clearance through the entire curve.
  3. Taking a Narrow Exit on a Multi-Lane Road: Exiting too close to the curb or road edge can force a sudden lane change or conflict with other traffic.
    • Correction: Exit wide, aligning your motorcycle smoothly with the center of your lane to prepare for subsequent maneuvers or traffic flow.
  4. Trail Braking in Wet Conditions: Continuing to brake while leaned in rain dramatically reduces friction and almost guarantees a wheel lock or slide.
    • Correction: Perform all braking before the curve, then maintain a neutral or very gentle throttle through the turn in wet conditions.
  5. Accelerating Too Early After Apex: Rolling on the throttle before the motorcycle has started to straighten or while still heavily leaned can overload the rear tire, causing it to slip.
    • Correction: Apply throttle gradually and progressively after the apex, synchronized with the reduction of your lean angle.
  6. Riding on the Shoulder to "Save Time": Using non-designated lane space (the shoulder) is often illegal, dangerous, and increases collision risk with other vehicles that might unexpectedly use the shoulder.
    • Correction: Always stay within your lane limits unless an emergency avoidance maneuver is absolutely necessary.
  7. Ignoring Road Surface Changes Mid-Turn: Encountering gravel, sand, oil, or wet patches unexpectedly while leaned can lead to a sudden loss of grip.
    • Correction: Constantly scan the road surface. If you see changes, adjust your line to be as wide as possible, reduce speed early, and minimize lean.
  8. Misjudging Curve Radius at High Speed: Overestimating the permissible speed for a given curve radius leads to excessive lean, potentially exceeding tire limits.
    • Correction: Learn to estimate curve radius and reduce speed before the curve to match a safe, controllable lean angle.
  9. Overtaking Inside a Curve: Attempting to pass another vehicle on the inside of a curve reduces both riders' sight lines and lean margins, creating a dangerous situation.
    • Correction: Overtake only on straight sections where visibility is excellent and it's legally permitted, respecting lane rules.
  10. Failing to Adjust for Heavy Load: Carrying a passenger or heavy cargo shifts the center of gravity, affecting handling and requiring different inputs.
    • Correction: Reduce speed, potentially widen your line, and be extra smooth with all inputs to compensate for the altered dynamics.

Essential Vocabulary for Motorcycle Cornering

Ideal Line
The optimal curve trajectory (wide‑deep‑wide) that minimizes lean angle and maximises sight distance.
Entry Point
The location on the road where the rider begins the turn, ideally positioned near the outer edge of the lane.
Apex
The innermost point of the curve where the rider’s path is closest to the road centreline or curb.
Exit Point
The location where the rider finishes the turn and straightens the motorcycle, ideally returning to the outer edge of the lane.
Wide-Deep-Wide Geometry
A geometric description of the ideal line: entering from the outer edge of the lane, cutting close to the inside at the apex, then returning to the outer edge for exit.
Lean Angle
The angle between the motorcycle and the road surface required to negotiate a curve at a given speed.
Sight Triangle
The triangular visual corridor formed by the rider’s eye point, the apex, and the exit point, ensuring continuous visibility.
Entry Speed Management
Adjusting the motorcycle’s speed prior to entering the curve to allow a smooth, stable line without excessive braking while cornering.
Throttle Transition
The controlled application of throttle after the apex, synchronised with lean reduction, to accelerate onto the exit.
Trail Braking
An advanced technique of continuing to apply light brake pressure while the motorcycle is leaned into a turn.
Counter-Steering
The fundamental technique of applying a brief, slight push on the handlebar opposite to the desired turn direction to initiate a lean and start a turn.
RVV 1990
The Dutch traffic regulations (Reglement Verkeersregels en Verkeerstekens 1990) that govern road behaviour.
Load Distribution
The effect of passenger or cargo weight on a motorcycle's centre of gravity and handling dynamics.
Road Surface Condition
The state of the road (e.g., dry, wet, icy, gravel) which directly affects tire grip and safe lean/speed limits.

Learn more with these articles

Check out these practice sets


Search topics related to The Ideal Line: Entry, Apex, and Exit

Explore search topics learners often look for when studying The Ideal Line: Entry, Apex, and Exit. These topics reflect common questions about road rules, driving situations, safety guidance, and lesson level theory preparation for learners in the Netherlands.

ideal line motorcycle cornering A2motorcycle cornering entry apex exit explainedwide deep wide motorcycle techniquehow to take corners on a motorcycle A2 Netherlandsmotorcycle theory exam cornering rulesbest path through a motorcycle curveA2 license motorcycle riding curveslean angle reduction motorcycle cornering

Related driving theory lessons for The Ideal Line: Entry, Apex, and Exit

Browse additional driving theory lessons that cover connected traffic rules, road signs, and common driving situations related to this topic. Improve your understanding of how different rules interact across everyday traffic scenarios.

Advanced Motorcycle Cornering: Mastering Curve Dynamics

Explore advanced motorcycle cornering techniques beyond the ideal line. Learn to manage dynamic control, adapt to varying road conditions, and understand how vehicle load impacts curve negotiation for safer, more confident riding in the Netherlands.

corneringadvanced techniquesmotorcycle dynamicsroad conditionsDutch A2 license
Managing Hazards in Curves lesson image

Managing Hazards in Curves

This lesson prepares you for real-world cornering challenges where conditions are not always perfect. You will learn how to identify clues that a corner may be tightening (a decreasing radius) and how to adjust your line accordingly. The content covers strategies for dealing with unexpected hazards like gravel or wet patches mid-corner and emphasizes the importance of always riding in a way that leaves you an escape route or a margin for error.

Dutch Motorcycle Theory (A2)Curve Negotiation and Advanced Cornering
View lesson
Handling Low-Grip Surfaces in Curves lesson image

Handling Low-Grip Surfaces in Curves

This lesson addresses the specific challenge of cornering when road grip is compromised. It teaches riders how to identify potential low-traction surfaces like wet manhole covers, painted lines, gravel, or oil patches. The content focuses on techniques to mitigate risk, such as reducing speed, minimizing lean angle, and applying all control inputs—braking, steering, and throttle—with exceptional smoothness to avoid overwhelming the available grip.

Dutch A1 Motorcycle TheoryCornering, Leaning and Stability
View lesson
Proper Corner Entry and Exit Techniques lesson image

Proper Corner Entry and Exit Techniques

This lesson details the correct, systematic procedure for safely navigating a corner. It teaches the 'slow in, fast out' principle, where all necessary braking and downshifting is completed before entering the turn. The content covers how to choose the correct line, identify the apex, and use smooth throttle application on the exit to maintain stability and traction, ensuring a safe and controlled passage through the bend.

Dutch A1 Motorcycle TheoryCornering, Leaning and Stability
View lesson
Corner Entry, Apex, and Exit Strategies lesson image

Corner Entry, Apex, and Exit Strategies

This lesson teaches a systematic approach to cornering by breaking it down into three distinct phases: entry, apex, and exit. It explains how to choose the correct road position and entry speed, identify the safest apex (not always the geometric one), and apply the throttle smoothly on exit to maximize stability and safety. This 'slow in, fast out' methodology provides a structured, repeatable process for navigating any corner with confidence and control.

Dutch Motorcycle Theory AAdvanced Riding Techniques and High-Speed Control
View lesson
Braking Before and Accelerating Through Curves lesson image

Braking Before and Accelerating Through Curves

This lesson focuses on the critical relationship between speed, braking, and throttle control in cornering. You will learn the golden rule: complete your braking while the motorcycle is still upright, before initiating your lean. The content then explains how to use a neutral or slightly positive 'maintenance throttle' to keep the suspension settled mid-corner, followed by smoothly rolling on the throttle as you exit the turn to aid stability.

Dutch Motorcycle Theory (A2)Curve Negotiation and Advanced Cornering
View lesson
Counter-Steering in Emergency Cornering lesson image

Counter-Steering in Emergency Cornering

This lesson explains how to apply the principle of counter-steering decisively in an emergency situation to perform a rapid swerve. It covers the importance of looking where you want to go, avoiding 'target fixation' on the obstacle, and executing a firm push on the appropriate handlebar to initiate a quick lean and change of direction. This skill is a critical component of collision avoidance for any motorcyclist.

Dutch A1 Motorcycle TheoryCornering, Leaning and Stability
View lesson
Body Positioning and Leaning lesson image

Body Positioning and Leaning

This lesson explains how you, the rider, are an active part of the motorcycle's dynamics. You will learn how shifting your body weight into the turn can reduce the required lean angle of the motorcycle itself, increasing the margin of safety and grip. The content covers correct posture, the importance of looking through the turn with your head up, and how to stay relaxed on the controls to allow the bike to work effectively.

Dutch Motorcycle Theory (A2)Curve Negotiation and Advanced Cornering
View lesson
Warning Signs and Hazard Anticipation lesson image

Warning Signs and Hazard Anticipation

This lesson details the interpretation of Dutch warning signs, which alert riders to potential dangers and changing road conditions. You will study signs indicating sharp curves, road narrowing (BORD 30), and temporary hazards like road works (BORD 36), learning to adjust speed and road position proactively. The content emphasizes how the A2 motorcycle's characteristics require earlier hazard recognition and response compared to other vehicles for maintaining control.

Dutch Motorcycle Theory (A2)Road Signs and Motorcycle-Specific Indicators
View lesson
Handling Road Surface Hazards lesson image

Handling Road Surface Hazards

This lesson prepares you to deal with sudden changes in road surface that can cause a loss of traction. You will learn to scan for these hazards and, if they cannot be avoided, how to ride over them safely. The key technique is to keep the motorcycle upright and maintain smooth, steady control inputs—no abrupt braking, accelerating, or steering—to minimize the risk of a skid.

Dutch Motorcycle Theory (A2)Emergency Evasive Manoeuvres and Hazard Anticipation
View lesson
Counter-Steering and Body Positioning lesson image

Counter-Steering and Body Positioning

This lesson demystifies the concept of counter-steering, the primary method for steering a motorcycle at speed. It explains how a small push on the handlebar initiates a lean, allowing the bike to turn effectively. The lesson also details how a rider's body position and weight shifting are used in conjunction with steering inputs to control the motorcycle's center of gravity, ensuring stability and precision while cornering.

Dutch A1 Motorcycle TheoryVehicle Controls and Riding Techniques
View lesson

Common Motorcycle Cornering Mistakes and Hazard Avoidance

Identify and learn to avoid frequent errors in motorcycle cornering. This lesson details issues with speed management, lean angle, throttle control, and reacting to road surface changes, crucial for passing your Dutch A2 theory exam.

corneringcommon mistakeshazard avoidancemotorcycle safetyDutch driving theory
Handling Low-Grip Surfaces in Curves lesson image

Handling Low-Grip Surfaces in Curves

This lesson addresses the specific challenge of cornering when road grip is compromised. It teaches riders how to identify potential low-traction surfaces like wet manhole covers, painted lines, gravel, or oil patches. The content focuses on techniques to mitigate risk, such as reducing speed, minimizing lean angle, and applying all control inputs—braking, steering, and throttle—with exceptional smoothness to avoid overwhelming the available grip.

Dutch A1 Motorcycle TheoryCornering, Leaning and Stability
View lesson
Corner Entry, Apex, and Exit Strategies lesson image

Corner Entry, Apex, and Exit Strategies

This lesson teaches a systematic approach to cornering by breaking it down into three distinct phases: entry, apex, and exit. It explains how to choose the correct road position and entry speed, identify the safest apex (not always the geometric one), and apply the throttle smoothly on exit to maximize stability and safety. This 'slow in, fast out' methodology provides a structured, repeatable process for navigating any corner with confidence and control.

Dutch Motorcycle Theory AAdvanced Riding Techniques and High-Speed Control
View lesson
Managing Hazards in Curves lesson image

Managing Hazards in Curves

This lesson prepares you for real-world cornering challenges where conditions are not always perfect. You will learn how to identify clues that a corner may be tightening (a decreasing radius) and how to adjust your line accordingly. The content covers strategies for dealing with unexpected hazards like gravel or wet patches mid-corner and emphasizes the importance of always riding in a way that leaves you an escape route or a margin for error.

Dutch Motorcycle Theory (A2)Curve Negotiation and Advanced Cornering
View lesson
Cornering Techniques and Lean Angles lesson image

Cornering Techniques and Lean Angles

Proper cornering technique is vital for safety and stability on a two-wheeler. This lesson explains the physics of turning, including the concepts of lean angle and counter-steering. You will learn the importance of adjusting your speed before the turn, looking where you want to go, and maintaining a smooth throttle through the corner. These techniques help you maximize grip and maintain control, ensuring you can navigate bends safely.

Dutch Driving Theory AMVehicle Control & Maneuvers
View lesson
Proper Corner Entry and Exit Techniques lesson image

Proper Corner Entry and Exit Techniques

This lesson details the correct, systematic procedure for safely navigating a corner. It teaches the 'slow in, fast out' principle, where all necessary braking and downshifting is completed before entering the turn. The content covers how to choose the correct line, identify the apex, and use smooth throttle application on the exit to maintain stability and traction, ensuring a safe and controlled passage through the bend.

Dutch A1 Motorcycle TheoryCornering, Leaning and Stability
View lesson
Body Positioning and Lean Angle Management lesson image

Body Positioning and Lean Angle Management

This lesson explains the critical role of the rider's body in controlling the motorcycle's dynamics, especially during cornering. It details how shifting body weight alters the combined center of gravity, allowing for greater cornering speed at a given lean angle or a safer lean angle for a given speed. Techniques for correct posture, footpeg weighting, and active body positioning are covered to enhance stability, maximize grip, and provide more precise control.

Dutch Motorcycle Theory AAdvanced Riding Techniques and High-Speed Control
View lesson
Body Positioning and Leaning lesson image

Body Positioning and Leaning

This lesson explains how you, the rider, are an active part of the motorcycle's dynamics. You will learn how shifting your body weight into the turn can reduce the required lean angle of the motorcycle itself, increasing the margin of safety and grip. The content covers correct posture, the importance of looking through the turn with your head up, and how to stay relaxed on the controls to allow the bike to work effectively.

Dutch Motorcycle Theory (A2)Curve Negotiation and Advanced Cornering
View lesson
Counter-Steering in Emergency Cornering lesson image

Counter-Steering in Emergency Cornering

This lesson explains how to apply the principle of counter-steering decisively in an emergency situation to perform a rapid swerve. It covers the importance of looking where you want to go, avoiding 'target fixation' on the obstacle, and executing a firm push on the appropriate handlebar to initiate a quick lean and change of direction. This skill is a critical component of collision avoidance for any motorcyclist.

Dutch A1 Motorcycle TheoryCornering, Leaning and Stability
View lesson
Handling Road Surface Hazards lesson image

Handling Road Surface Hazards

This lesson prepares you to deal with sudden changes in road surface that can cause a loss of traction. You will learn to scan for these hazards and, if they cannot be avoided, how to ride over them safely. The key technique is to keep the motorcycle upright and maintain smooth, steady control inputs—no abrupt braking, accelerating, or steering—to minimize the risk of a skid.

Dutch Motorcycle Theory (A2)Emergency Evasive Manoeuvres and Hazard Anticipation
View lesson
Counter-Steering and Body Positioning lesson image

Counter-Steering and Body Positioning

This lesson demystifies the concept of counter-steering, the primary method for steering a motorcycle at speed. It explains how a small push on the handlebar initiates a lean, allowing the bike to turn effectively. The lesson also details how a rider's body position and weight shifting are used in conjunction with steering inputs to control the motorcycle's center of gravity, ensuring stability and precision while cornering.

Dutch A1 Motorcycle TheoryVehicle Controls and Riding Techniques
View lesson

Frequently asked questions about The Ideal Line: Entry, Apex, and Exit

Find clear answers to common questions learners have about The Ideal Line: Entry, Apex, and Exit. Learn how the lesson is structured, which driving theory objectives it supports, and how it fits into the overall learning path of units and curriculum progression in the Netherlands. These explanations help you understand key concepts, lesson flow, and exam focused study goals.

What is the 'ideal line' in motorcycle riding?

The 'ideal line' refers to the optimal path a motorcycle rider takes through a curve to maximize safety, visibility, and efficiency. For A2 license riders, it typically involves a 'wide-deep-wide' approach, starting wide on the approach, touching the apex at the innermost point, and exiting wide again.

Why is the 'wide-deep-wide' line recommended for A2 motorcycles?

The 'wide-deep-wide' line is recommended because it allows for the smallest possible lean angle at the apex, leading to greater stability and a wider field of vision. It also prepares you for a smoother, straighter exit, enabling controlled acceleration and better hazard anticipation on Dutch roads.

What is the 'apex' of a curve?

The apex is the innermost point of a curve. On the ideal line, you aim to reach the apex precisely as you transition from braking or steady speed to accelerating out of the turn. Hitting the apex correctly is key to a smooth and controlled exit.

How does the ideal line help reduce lean angle?

By starting the turn wider and taking a shallower arc towards the apex, you maintain a more upright position for longer. This reduces the maximum lean angle required in the curve, which is beneficial for rider stability, especially for A2 motorcycles with their specific power limitations.

Are there different ideal lines for different types of curves?

Yes, while the 'wide-deep-wide' principle is a strong guideline, the exact ideal line can vary slightly depending on the radius of the curve (tight or sweeping), road conditions, and traffic. However, the core concepts of smooth entry, precise apex, and controlled exit remain consistent for safe A2 motorcycle riding.

Continue your Dutch driving theory learning journey

Dutch road signsDutch article topicsSearch Dutch road signsDutch driving theory homeDutch road sign categoriesSearch Dutch theory articlesDutch driving theory coursesDutch Driving Theory B courseDutch driving theory articlesDutch driving theory practiceDutch practice set categoriesDutch Driving Theory AM courseDutch Motorcycle Theory A courseDutch A1 Motorcycle Theory courseDutch Motorcycle Theory (A2) courseSearch Dutch driving theory practiceTowing, Trailers, and Loads unit in Dutch Driving Theory BRoadway Access & Navigation unit in Dutch Driving Theory AMVehicle Positioning and Lane Use unit in Dutch Driving Theory BHuman Factors & Risk Management unit in Dutch Driving Theory AMInfrastructure and Special Roads unit in Dutch Driving Theory BLegal Foundations & Vehicle Types unit in Dutch Driving Theory AMLegal Responsibilities & Incident Procedures unit in Dutch Driving Theory AMManaging Hazards in Curves lesson in Curve Negotiation and Advanced CorneringBody Positioning and Leaning lesson in Curve Negotiation and Advanced CorneringHighway (Autosnelweg) Rules for Motorcycles unit in Dutch Motorcycle Theory (A2)Advanced Riding Techniques and High-Speed Control unit in Dutch Motorcycle Theory AFundamentals of Counter-Steering lesson in Curve Negotiation and Advanced CorneringThe Ideal Line: Entry, Apex, and Exit lesson in Curve Negotiation and Advanced CorneringAccident Management, Legal Responsibilities & Substance Use unit in Dutch A1 Motorcycle TheoryBraking Before and Accelerating Through Curves lesson in Curve Negotiation and Advanced Cornering