Logo
Dutch Driving Theory Courses

Lesson 1 of the Speed Management & Braking unit

Dutch Driving Theory AM: Speed Adaptation to Conditions

Welcome to the lesson on Speed Adaptation to Conditions. In this part of the 'Speed Management & Braking' unit for your AM category (moped/scooter) theory, you'll learn why simply following the speed limit isn't always safe. We'll explore how real-world factors affect your ability to stop and react, preparing you for crucial exam questions and safer riding on Dutch roads.

speed adaptationdriving conditionstheory examAM categorymoped
Dutch Driving Theory AM: Speed Adaptation to Conditions
Dutch Driving Theory AM

Adapting Your Moped or Scooter Speed to Driving Conditions in the Netherlands

As a rider of a moped or scooter (Category AM vehicle) on Dutch roads, understanding speed is fundamental to your safety and the safety of others. While traffic signs clearly indicate the maximum permissible speed for a given road segment, this limit is rarely a target to be maintained at all times. Instead, it represents the absolute highest speed allowed under ideal circumstances.

This lesson delves into the crucial skill of continuously evaluating prevailing conditions and proactively adjusting your speed downwards when necessary. Mastering speed adaptation ensures you have sufficient time to perceive hazards, react appropriately, and bring your vehicle to a safe stop, significantly reducing the risk of collisions and maintaining control in diverse situations.

Understanding Speed Limits: Maximum vs. Safe Speed

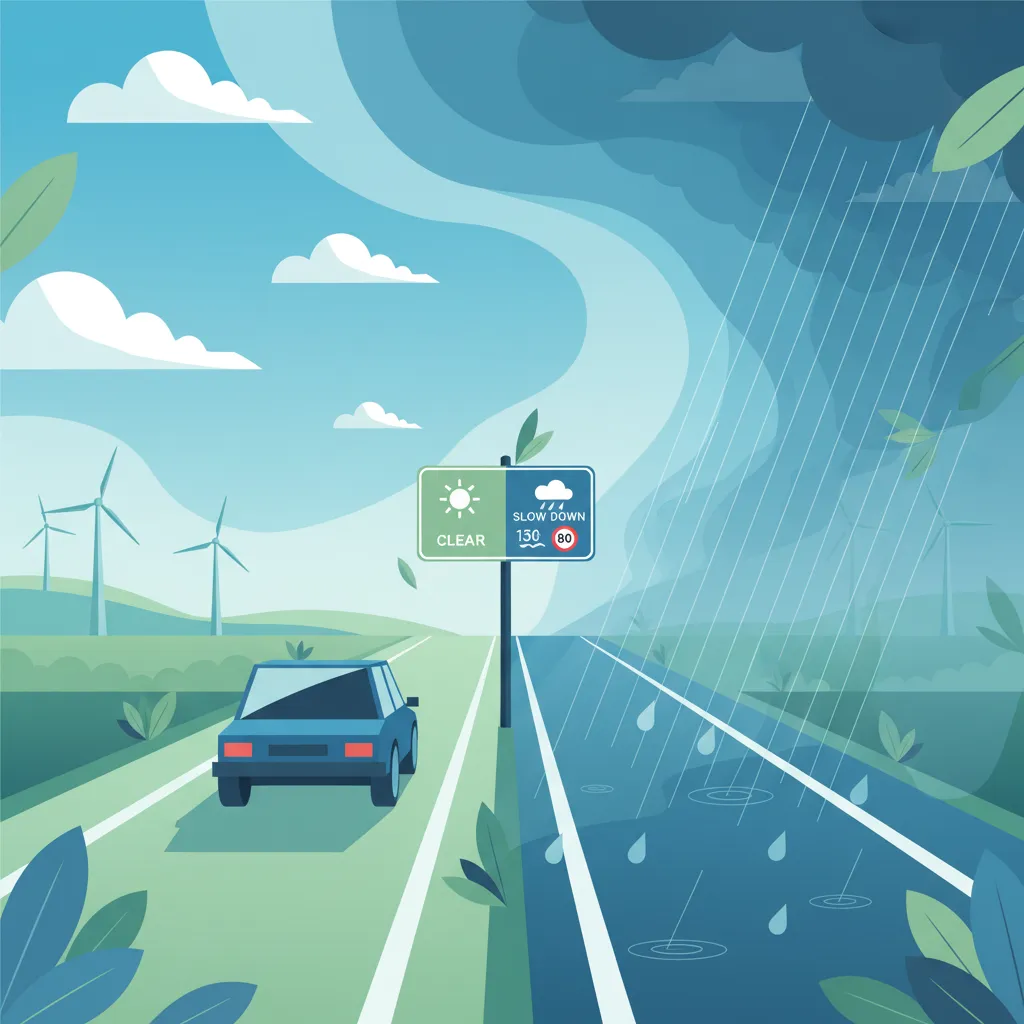
A posted speed limit, indicated by a circular sign with a red border and a number, defines the maximum legal speed you are permitted to travel on that specific road section. For example, a sign showing '50' inside a red circle means you may not exceed 50 kilometers per hour. However, this is distinct from a safe speed, which is the speed at which you can maintain complete control of your moped or scooter, react to any potential hazard, and stop safely given the actual driving conditions.

A safe speed is dynamic and varies constantly. It accounts for factors like weather, road surface, traffic density, visibility, your vehicle's condition, and the presence of vulnerable road users. Even if the posted limit is 50 km/h, your safe speed could be 30 km/h or even lower in adverse conditions. Failing to reduce your speed from the maximum limit when conditions demand it is a common cause of accidents and a legal offense in the Netherlands.

The Legal Obligation for Speed Adaptation (RVV 1990 Article 7.2)

Dutch traffic law places a clear responsibility on every driver to adapt their speed. The Reglement Verkeersregels en Verkeerstekens (RVV 1990), specifically Article 7.2, mandates that: "The driver shall adjust speed to the prevailing conditions, such as weather, road surface, traffic, visibility, and vehicle state."

This article is paramount. It means that you are legally obliged to reduce your speed if any of these factors compromise your ability to ride safely. Disregarding this duty of care can lead to serious legal consequences, including fines, points on your license, and increased liability in the event of a collision. It underlines that simply obeying the posted maximum limit is not enough; you must also drive at a speed appropriate for the circumstances.

Key Factors Requiring Speed Adjustment

Successful speed adaptation requires continuous assessment of your surroundings. Several critical factors influence what constitutes a safe speed at any given moment. Understanding these factors will help you make informed decisions on the road.

Weather Conditions: Rain, Fog, Snow, Ice, and Wind

Weather significantly impacts driving conditions by affecting both road surface grip and visibility.

  • Rain: Even light rain can drastically reduce the friction between your tyres and the road, increasing braking distances and the risk of skidding or aquaplaning (when tyres lose contact with the road due to a layer of water). In heavy rain, visibility also decreases. You should reduce your speed by at least 10-15% in light rain and up to 25-30% in heavy downpours.
  • Fog: Fog severely limits your visibility range, making it difficult to see hazards, other vehicles, or even the road itself until you are very close. Your speed must be low enough to stop within the distance you can clearly see. In dense fog (visibility less than 50 metres), your speed should often be no more than 20 km/h. Remember to use your dipped beams, not high beams, as high beams will reflect off the fog and worsen visibility.
  • Snow and Ice: These are arguably the most dangerous conditions. Snow and especially ice dramatically reduce tyre-road friction, making braking and steering extremely difficult. Braking distances can increase by a factor of 5 to 10. A minimum speed reduction of 40% from the posted limit is often necessary, and sometimes even a crawl is the only safe option. Smooth, gentle inputs are critical.
  • Wind: Strong crosswinds, particularly on exposed bridges or open roads, can severely affect the stability of mopeds and scooters, making them difficult to control. Reduce your speed to maintain stability and be prepared for sudden gusts that can push your vehicle sideways.

Warning

Never assume your experience or vehicle features like ABS will compensate for excessive speed in adverse weather. Physics dictates reduced grip, and speed must be adjusted accordingly.

Road Surface Conditions: Grip and Traction

The type and condition of the road surface directly affect the available grip, or friction, for your tyres.

  • Dry Asphalt: Provides good grip under normal conditions, allowing for efficient braking and maneuvering. This is the baseline for posted speed limits.
  • Wet Asphalt: As mentioned, water reduces friction. The first few minutes of rain on a dry road are often the most slippery, as oil and dust mix with water to form a slick film.
  • Gravel, Dirt, or Loose Surfaces: These surfaces offer significantly less grip than asphalt. Reduce your speed substantially, often by 30% or more, and use smooth throttle and steering inputs to prevent skidding.
  • Cobblestones or Potholes: Uneven surfaces can destabilize your moped or scooter. Slow down to navigate these safely, especially if wet, as cobblestones can become very slippery.
  • Leaves or Debris: Piles of wet leaves, sand, or other debris can conceal hazards and reduce traction. Approach such areas with caution and reduced speed.

Traffic Density and Flow

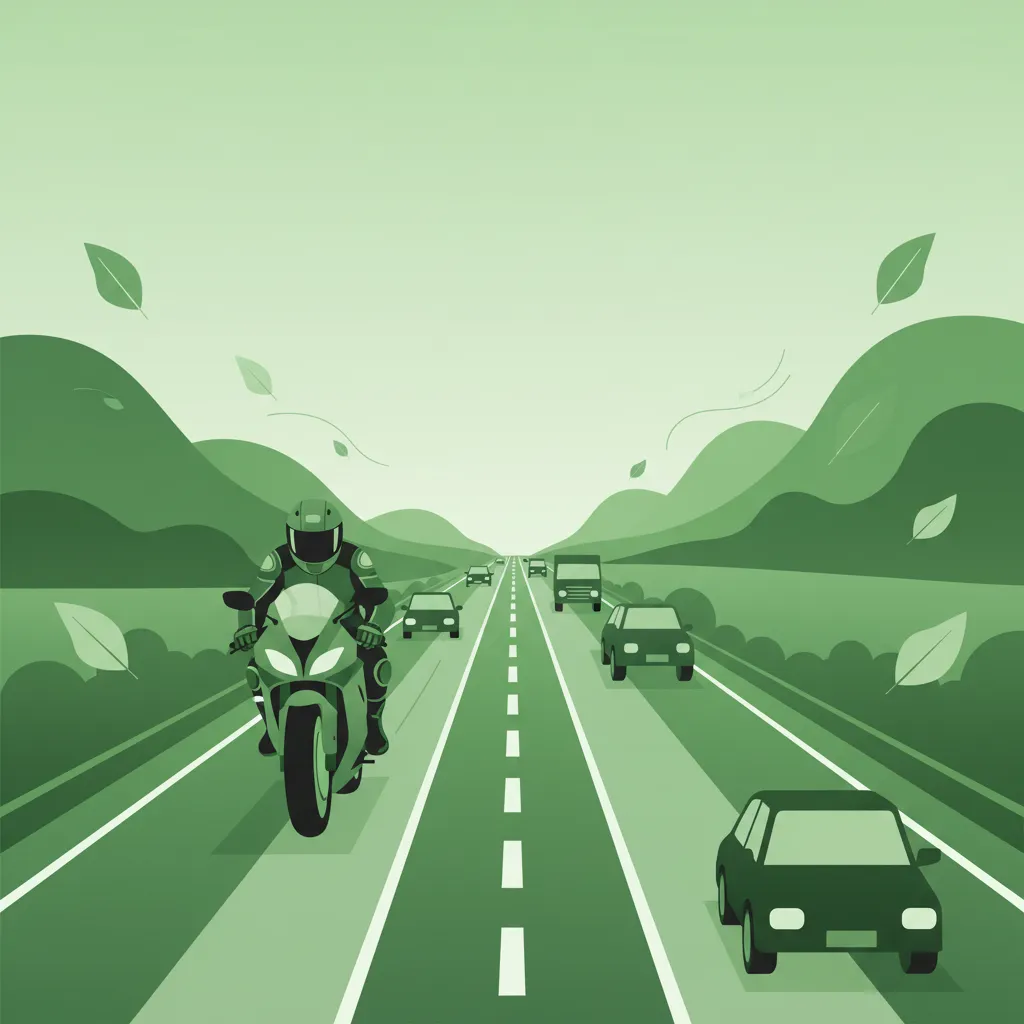
The amount of traffic on the road dictates the space you have to maneuver and react.

  • Heavy Traffic/Congestion: When traffic is dense or in stop-and-go conditions, you must reduce your speed to maintain a safe following distance and be able to react to sudden stops by vehicles ahead. Even if the speed limit is 50 km/h, you might need to travel at 15-20 km/h to stay safe.
  • Visibility of Hazards: Heavy traffic can obscure your view of pedestrians, cyclists, or other hazards, especially at junctions. Adjust your speed to compensate for this limited visibility.
  • Maneuvering Space: Less space means less time to react and correct errors. Slowing down buys you precious seconds.

Visibility and Light Conditions: Day, Night, and Tunnels

How well you can see and be seen is critical for safe riding.

  • Daylight: Generally offers the best visibility, but direct sunlight (sun glare) can temporarily blind you, especially at sunrise or sunset. Reduce speed and use a clean visor or sunglasses.
  • Night: Night riding significantly reduces depth perception and peripheral vision. Your safe speed at night should be dictated by the distance your headlights illuminate. You must be able to stop your moped or scooter within that illuminated distance. On unlit roads, this often means reducing speed well below the posted limit, even with high beams (which must be dimmed for oncoming traffic).
  • Tunnels: Tunnels can have varying lighting conditions. When entering a brightly lit tunnel from daylight, your eyes need time to adjust. Similarly, exiting a tunnel into bright light can cause temporary glare. Always switch on your dipped beams in tunnels, and reduce speed if the tunnel lighting is poor.

Tip

In any low-visibility situation, ensure your lights are on and clean. While lights help you see, they are even more crucial for making sure other road users see you.

Vehicle Load and Mechanical Condition

Your moped or scooter's state directly affects its performance, particularly braking and handling.

  • Vehicle Load: Carrying a passenger or heavy cargo significantly increases the total mass of your vehicle. This added mass increases kinetic energy and thus extends your braking distance. If your scooter is fully loaded with cargo (e.g., 15-20 kg) or carrying a passenger, you should reduce your speed by at least 10-15% to compensate for the reduced braking performance and altered handling.
  • Worn Tyres: Tyres with insufficient tread depth (below the legal minimum) or those that are old and hardened provide less grip, especially on wet or slippery surfaces. This will increase your braking distance and reduce stability.
  • Brake Issues: Faulty or poorly maintained brakes (e.g., worn pads, air in the hydraulic system) will increase the distance required to stop. If you notice any issues with your brakes, have them checked immediately and reduce your speed drastically until repairs are made.
  • Suspension: A poorly functioning suspension system can lead to instability and reduced control, particularly over bumps or during turns.

Interacting with Vulnerable Road Users (VRUs)

Vulnerable Road Users (VRUs) include pedestrians, cyclists, and other two-wheeler riders (like motorcyclists, though you are also a two-wheeler). They are more susceptible to serious injury in a collision.

  • Pedestrian Crossings: At zebra crossings (crosswalks), pedestrians always have priority. You must be prepared to stop well in advance if pedestrians are waiting or crossing. Your speed approaching these areas should allow you to stop safely and comfortably.
  • Shared Paths: On shared cycle-pedestrian paths, your speed must be significantly reduced to ensure the safety of all users. The legal maximum on shared paths for mopeds might be 30 km/h, but if pedestrians are present, 20 km/h or even less is often the only safe speed.
  • Residential Areas: In residential areas, especially those with children playing, speed limits are often 30 km/h (zone 30). You should adapt your speed further if you observe children or pets near the road.
  • Blind Spots and Unpredictability: VRUs can be unpredictable. Anticipate their movements and reduce your speed to give yourself maximum reaction time, especially when passing parked cars or approaching junctions where VRUs might emerge unexpectedly.

The Physics of Stopping: Perception, Reaction, and Braking Distance

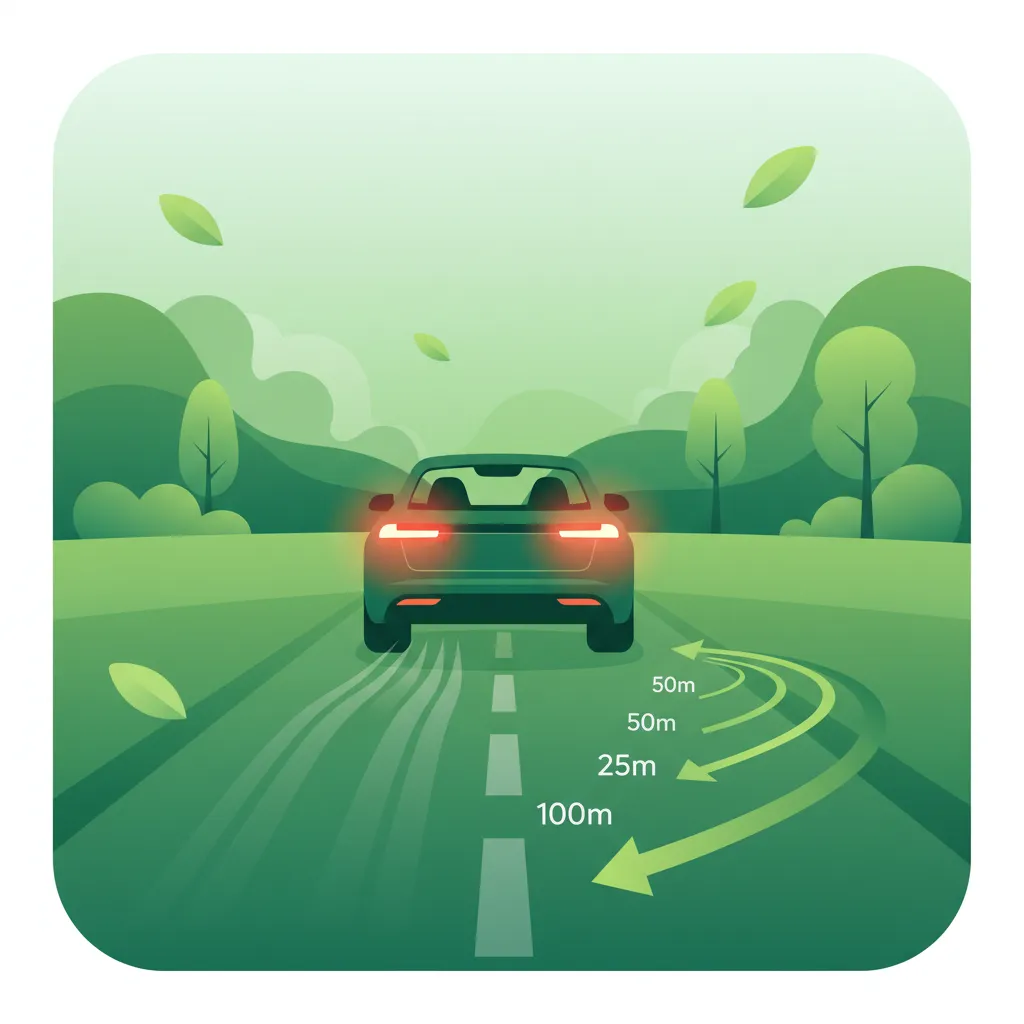
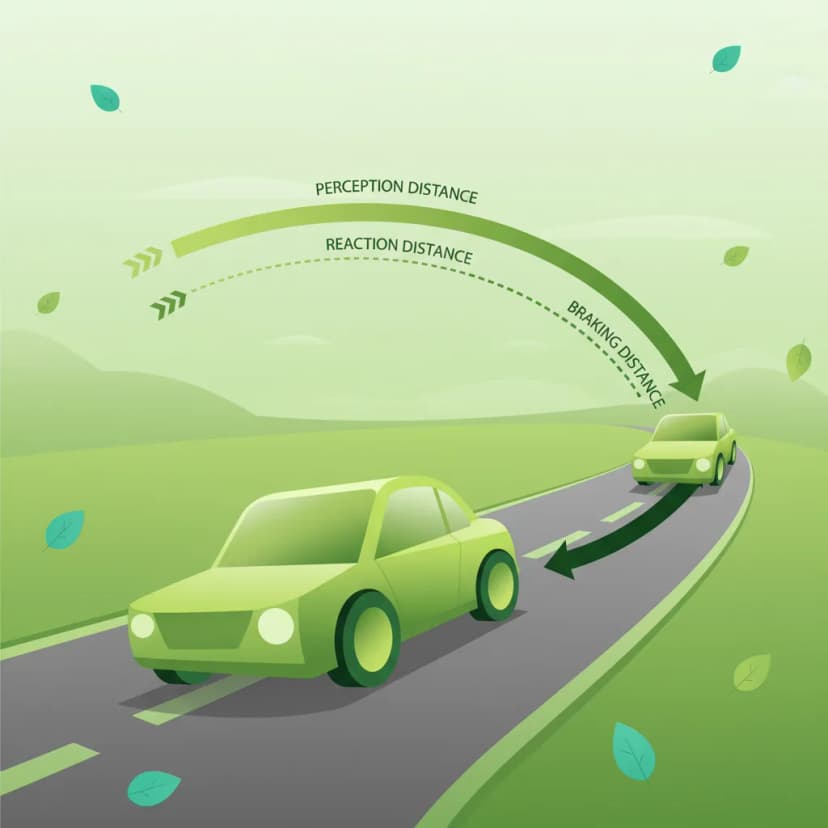
Understanding how your vehicle stops is crucial for appreciating why speed adaptation is so vital. Your total stopping distance is comprised of two main components:

  1. Perception-Reaction Distance: The distance your moped or scooter travels from the moment you perceive a hazard until you react by applying the brakes. For an experienced rider, this perception-reaction time is typically around one second, but it can be longer if you are tired, distracted, or under the influence.
  2. Braking Distance: The distance your moped or scooter travels from the moment you apply the brakes until the vehicle comes to a complete stop. This distance is heavily influenced by your speed, the road surface friction, your tyres' condition, and your brakes' efficiency.

Kinetic Energy and Impact Severity

The physics behind stopping distance dictates that as your speed increases, your stopping distance grows exponentially, not linearly. This is because kinetic energy (the energy of motion) is directly proportional to the square of your speed (Ek=12mv2E_k = \frac{1}{2}mv^2).

  • If you double your speed, your kinetic energy quadruples. This means it takes four times the braking force (and thus roughly four times the braking distance) to stop.
  • This also applies to impact severity: a collision at 60 km/h has four times the destructive energy of a collision at 30 km/h. This drastically increases the risk of severe injury or fatality.

Friction's Role in Braking Performance

The maximum deceleration your moped or scooter can achieve is determined by the friction coefficient (μμ) between your tyres and the road surface.

  • On dry asphalt, the friction coefficient is relatively high (μ ≈ 0.7 to 0.9), allowing for strong braking.
  • On wet asphalt, it can drop significantly (μ ≈ 0.4 to 0.6).
  • On snow or ice, it can be extremely low (μ ≈ 0.1 to 0.2).

When μμ is low, your maximum braking force is reduced, and your braking distance increases proportionally. This is why a smooth, controlled reduction in speed is paramount on slippery surfaces.

Advanced Techniques and Vehicle Features

While no feature can replace the need for careful speed adaptation, some techniques and systems can aid in certain situations.

  • Engine Braking: This involves using the resistance of your moped or scooter's engine to slow down, particularly by easing off the throttle or downshifting (if applicable to your model). Engine braking is gentler than mechanical brakes and can be very useful on slippery surfaces or long descents to provide controlled deceleration without relying solely on tyre-road friction.
  • ABS (Anti-lock Braking System): If your moped or scooter is equipped with ABS, it helps prevent the wheels from locking up during hard braking, allowing you to maintain steering control. However, ABS does not increase the available friction. While it can help you stop in a straight line, it does not shorten your braking distance on a slippery surface. You must still reduce your speed drastically on ice or snow, even with ABS.

Common Mistakes and How to Avoid Them

Many accidents involving mopeds and scooters occur due to inappropriate speed. Recognizing common mistakes can help you avoid them.

SituationWhy It’s WrongCorrect BehaviourConsequence
Maintaining posted speed in heavy rainFriction loss leads to longer braking distance and aquaplaning risk.Reduce speed by at least 20-30% (e.g., 30 km/h on a 50 km/h road).Increased stopping distance, potential loss of control, collision.
Riding at night without adjusting speedReduced depth perception and reaction time in limited visibility.Use dipped beams, keep speed low enough to stop within illuminated distance.Failure to see hazards, leading to a collision.
Ignoring fog-related speed reductionInability to stop within sight distance when visibility is severely limited.Reduce speed to ≤ 20 km/h in dense fog; ensure stop distance ≤ visibility.Collision with unseen obstacles, high liability.
Overtaking on a slippery surface at speedHigh risk of losing traction during the lane change or acceleration.Delay overtaking, reduce speed, ensure sufficient clear road and grip.Skidding, side-collision, loss of control.
Riding fully loaded without speed adjustmentAdded mass increases kinetic energy and extends stopping distance significantly.Reduce speed by 10-15% and be mindful of altered braking performance.Longer braking distance, potential overrun of stop lines, brake fade.
Assuming ABS allows high speed on iceABS prevents lock-up but cannot increase the limited friction on ice.Reduce speed drastically (often ≤ 15 km/h) on icy roads, regardless of ABS.Failure to stop in time, collision.
Proceeding through crosswalk with waiting pedestriansPedestrians have legal priority and may assume you will stop.Decelerate and stop completely before the crossing, allow pedestrians to cross.Legal violation, potential severe incident with a vulnerable road user.
Riding at posted speed on loose gravelLower tyre-road friction, high risk of skidding and loss of control.Reduce speed by 30% or more, maintain smooth throttle and steering inputs.Skidding, loss of control, fall.

Dutch Traffic Laws and Regulations for Speed

Beyond Article 7.2 of the RVV 1990, several other regulations and general duties of care reinforce the need for careful speed management.

  • RVV 1990 Article 6.4 (Priority for VRUs): This article states that drivers must give way to pedestrians at crosswalks and to cyclists on cycle paths, and must adjust their speed accordingly. This implies slowing down significantly to be ready to stop.
  • RVV 1990 Article 1.3 (General Duty of Care): This foundational rule states that "Every road user must behave so that no danger is caused to others." This overarching principle is the basis for all speed adaptation decisions; if your speed could cause danger, it is too high.
  • Motor Vehicle Inspection (WKR) Requirements: Vehicles must be roadworthy, which includes having functional brakes, tyres with adequate tread depth, and proper lighting. These technical requirements directly support the ability to maintain a safe speed and stop effectively.
  • Specific Signage: Occasionally, you might encounter signs that indicate a temporary or conditional speed limit, such as "Maximum Speed 30 km/h – Wet Surface" or electronic signs that flash reduced speeds during fog. These are mandatory and must be obeyed.

Scenario-Based Speed Adaptation Examples

Let's consider practical examples to solidify your understanding.

Scenario 1: Heavy Rain on an Urban Road

  • Situation: You are riding your scooter on a 50 km/h urban street. Suddenly, a heavy downpour begins, reducing visibility to about 30 meters, and the asphalt is soaking wet.
  • Correct Action: You immediately reduce your speed to around 30 km/h (a 40% reduction). You increase your following distance from other vehicles and ensure all inputs (throttle, braking, steering) are smooth and gentle to avoid skidding or aquaplaning. Your dipped beams are on.
  • Why: The combination of reduced friction and limited visibility makes the posted 50 km/h maximum dangerously high. RVV 1990 Article 7.2 mandates this speed reduction for safety.

Scenario 2: Dense Fog on a Rural Highway

  • Situation: You are on a rural highway where mopeds are allowed up to 80 km/h. You encounter dense fog, reducing your clear visibility to only 20 meters. There are no specific fog warning signs.
  • Correct Action: You reduce your speed drastically to no more than 20 km/h. You switch on your dipped beams and ensure you are prepared to stop within the 20-meter visible distance. You avoid riding too close to other vehicles.
  • Why: Your safe speed must always allow you to stop within your visible range. At 80 km/h, your stopping distance would be well over 50 meters, making a collision with an unseen obstacle almost inevitable.

Scenario 3: Night Riding in a Poorly Lit Tunnel

  • Situation: You are approaching a tunnel with a posted limit of 60 km/h. The tunnel appears poorly illuminated. You are currently using your high beams on the unlit approach road.
  • Correct Action: Well before entering the tunnel, you switch from high beams to dipped beams. Upon entering, you reduce your speed to approximately 40 km/h to accommodate the limited illumination from your own lights and the tunnel's potentially dim lighting.
  • Why: High beams blind oncoming traffic (if present) and are often ineffective in tunnels. Reduced speed compensates for limited visibility and ensures you can react to any hazards within the illuminated area. RVV 1990 Article 7.2 and lighting regulations apply.

Scenario 4: Fully Loaded Moped on a Gravel Road

  • Situation: You are riding your moped on a residential gravel road with a 30 km/h limit, carrying a heavy backpack (15 kg cargo) and a passenger. Your tyres have legal but somewhat worn tread (1.2 mm).
  • Correct Action: You reduce your speed to about 20 km/h (a 30% reduction). You use gentle acceleration and braking, and avoid sharp turns. You are aware of the increased stopping distance due to the load and reduced grip from the gravel and worn tyres.
  • Why: Both increased load and reduced tyre-road friction (from gravel and worn tyres) significantly extend stopping distances and reduce stability. Speed adjustment is crucial to maintain control.

Scenario 5: Approaching a Pedestrian Crossing with Waiting Pedestrians

  • Situation: You are on a 30 km/h city street and see several pedestrians waiting at a zebra crossing ahead.
  • Correct Action: You begin to decelerate early, ensuring you can bring your scooter to a complete stop comfortably before the crossing line. You wait patiently for all pedestrians to cross safely before proceeding.
  • Why: RVV 1990 Article 6.4 gives pedestrians priority at zebra crossings. Failing to stop is a legal violation and extremely dangerous. Your speed must always allow for an immediate and safe stop when approaching a pedestrian crossing.

Summary of Safe Speed Principles for AM Riders

Adapting your speed is not merely about obeying rules; it's a fundamental aspect of defensive riding that protects yourself and others.

  • Legal Mandate: Always remember RVV 1990 Article 7.2. You are legally obligated to adjust your speed to prevailing conditions. The posted limit is a maximum, never a default target.
  • Core Principle of Safe Speed: Your speed must always allow you to stop within the distance you can clearly see ahead and maintain full control of your moped or scooter given the current road surface conditions.
  • Key Influencing Factors: Continuously assess weather, road surface, traffic density, visibility, your vehicle's load and condition, and the presence of vulnerable road users.
  • Operational Adjustments: Reduce speed proportionally to the severity of adverse conditions. Increase your following distance. Utilize smooth throttle and braking, and consider engine braking on slippery surfaces. Ensure proper use of lighting.
  • Consequences of Non-Compliance: Failing to adapt your speed leads to extended stopping distances, increased risk of losing control, higher collision severity, and legal penalties.
  • Interconnectedness: Speed adaptation is linked to all aspects of safe riding, including braking techniques, hazard anticipation, vehicle control, and legal responsibilities. It is a skill that improves with conscious practice and vigilance.
Maximum Speed
The highest legal speed permitted on a road segment under ideal conditions, indicated by a traffic sign.
Safe Speed
The dynamic speed at which a rider can maintain full control, stop within the visible distance, and react to hazards given the prevailing conditions.
RVV 1990 Article 7.2
A Dutch traffic law mandating drivers to adjust their speed to prevailing conditions such as weather, road surface, traffic, visibility, and vehicle state.
Stopping Distance
The total distance required to bring a vehicle to a complete stop after perceiving a hazard, comprising perception-reaction distance and braking distance.
Perception-Reaction Time
The time elapsed from when a driver detects a hazard until they initiate an action (e.g., applying brakes), typically around 1 second for experienced riders.
Braking Distance
The distance a vehicle travels from the moment brakes are applied until it comes to a complete stop.
Kinetic Energy
The energy an object possesses due to its motion. It increases with the square of speed, significantly impacting stopping distance and collision severity.
Friction Coefficient (μ)
A numerical value representing the amount of grip or traction between a vehicle's tyres and the road surface, affecting braking and acceleration.
Aquaplaning
A phenomenon where a vehicle's tyres lose contact with the road surface due to a layer of water, leading to a loss of traction and control.
Engine Braking
Using the resistance of the engine to slow down a vehicle, often by easing off the throttle or downshifting, providing controlled deceleration.
ABS (Anti-lock Braking System)
A vehicle safety system that prevents the wheels from locking up during hard braking, allowing the driver to maintain steering control.
Vulnerable Road Users (VRUs)
Road users such as pedestrians, cyclists, and moped/scooter riders who are at a higher risk of injury in a collision compared to occupants of larger vehicles.
Visibility Range
The maximum distance a driver can clearly see and identify objects or hazards ahead on the road.
WKR Requirements
Dutch vehicle inspection requirements that ensure a vehicle is roadworthy, including proper brake function and tyre tread depth.

Learn more with these articles

Check out these practice sets


Search topics related to Speed Adaptation to Conditions

Explore search topics learners often look for when studying Speed Adaptation to Conditions. These topics reflect common questions about road rules, driving situations, safety guidance, and lesson level theory preparation for learners in the Netherlands.

speed adaptation moped theory exam netherlandshow to adjust speed for rain scooterdutch driving theory speed in fogam category theory test speed conditionssafe speed wet road scooterreducing speed for traffic am theorycbr theory exam questions speed adaptationfactors affecting braking distance bromfiets

Related driving theory lessons for Speed Adaptation to Conditions

Browse additional driving theory lessons that cover connected traffic rules, road signs, and common driving situations related to this topic. Improve your understanding of how different rules interact across everyday traffic scenarios.

Factors Affecting Safe Speed Adaptation in Dutch Driving Theory

Understand how weather, road surface, traffic density, and visibility impact safe driving speeds on Dutch roads. Learn why the posted speed limit is not always the safe speed for your moped or scooter.

speed adaptationdriving conditionsweather effectsroad surfacevisibilitytraffic densityDutch driving theory
Wet, Icy, and Slippery Surface Adjustments lesson image

Wet, Icy, and Slippery Surface Adjustments

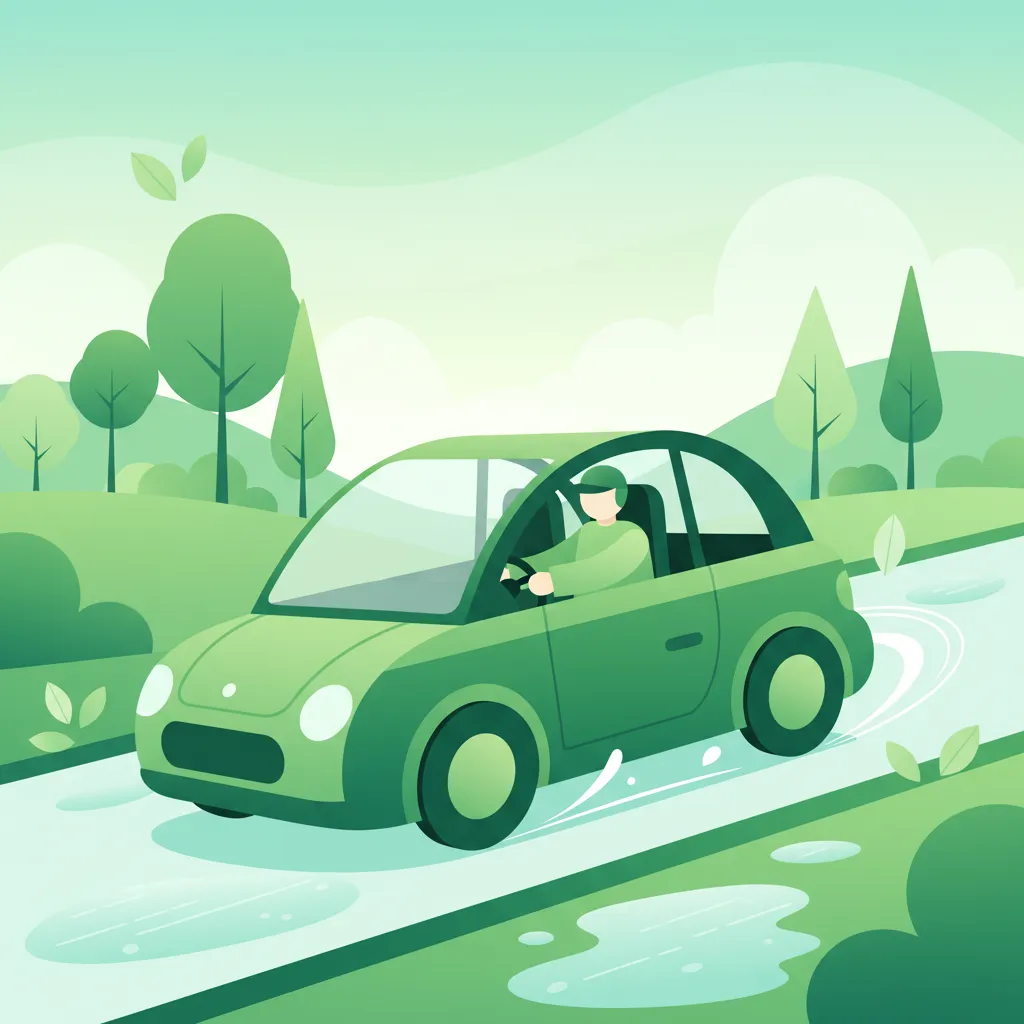
Riding on two wheels requires special care on surfaces with reduced grip. This lesson teaches you how to handle challenging conditions like rain, ice, wet leaves, or tram tracks. Key principles include reducing speed significantly, making all control inputs (braking, accelerating, steering) much more smoothly and gradually, and increasing your following distance to allow for much longer stopping distances. Recognizing potentially slippery areas is a critical part of proactive hazard perception.

Dutch Driving Theory AMSpeed Management & Braking
View lesson
Defensive Riding Strategies for Two‑Wheelers lesson image

Defensive Riding Strategies for Two‑Wheelers

Defensive riding means riding to prevent collisions, despite the actions of others or the conditions around you. This lesson teaches the core principles of this proactive safety strategy. Key techniques include managing the space cushion around your vehicle, positioning yourself in your lane for maximum visibility, constantly planning an escape route, and communicating your intentions clearly to other road users. This mindset acknowledges your vulnerability and empowers you to take control of your own safety.

Dutch Driving Theory AMHuman Factors & Risk Management
View lesson
Starting, Stopping, and Balancing at Low Speeds lesson image

Starting, Stopping, and Balancing at Low Speeds

Controlling a two-wheeled vehicle at very low speeds is a challenging but essential skill. This lesson focuses on the delicate interplay between the clutch, throttle, and rear brake to maintain balance and control without putting your feet down. You will learn the techniques for a smooth take-off from a standstill and how to come to a gentle, controlled stop, which are fundamental skills for navigating city traffic and junctions safely.

Dutch Driving Theory AMVehicle Control & Maneuvers
View lesson
High-Speed Riding on Motorways (snelweg) lesson image

High-Speed Riding on Motorways (snelweg)

This lesson focuses on the unique demands of riding at sustained high speeds on motorways ('snelwegen'). It covers essential topics such as strict lane discipline, safe overtaking procedures, and maintaining a greater following distance to compensate for higher reaction and braking times. The content also addresses the physical and mental challenges, including managing wind blast, increased noise levels, and maintaining heightened situational awareness over long distances to combat fatigue.

Dutch Motorcycle Theory ASpeed Management and Legal Limits
View lesson
Overtaking and Passing Safely lesson image

Overtaking and Passing Safely

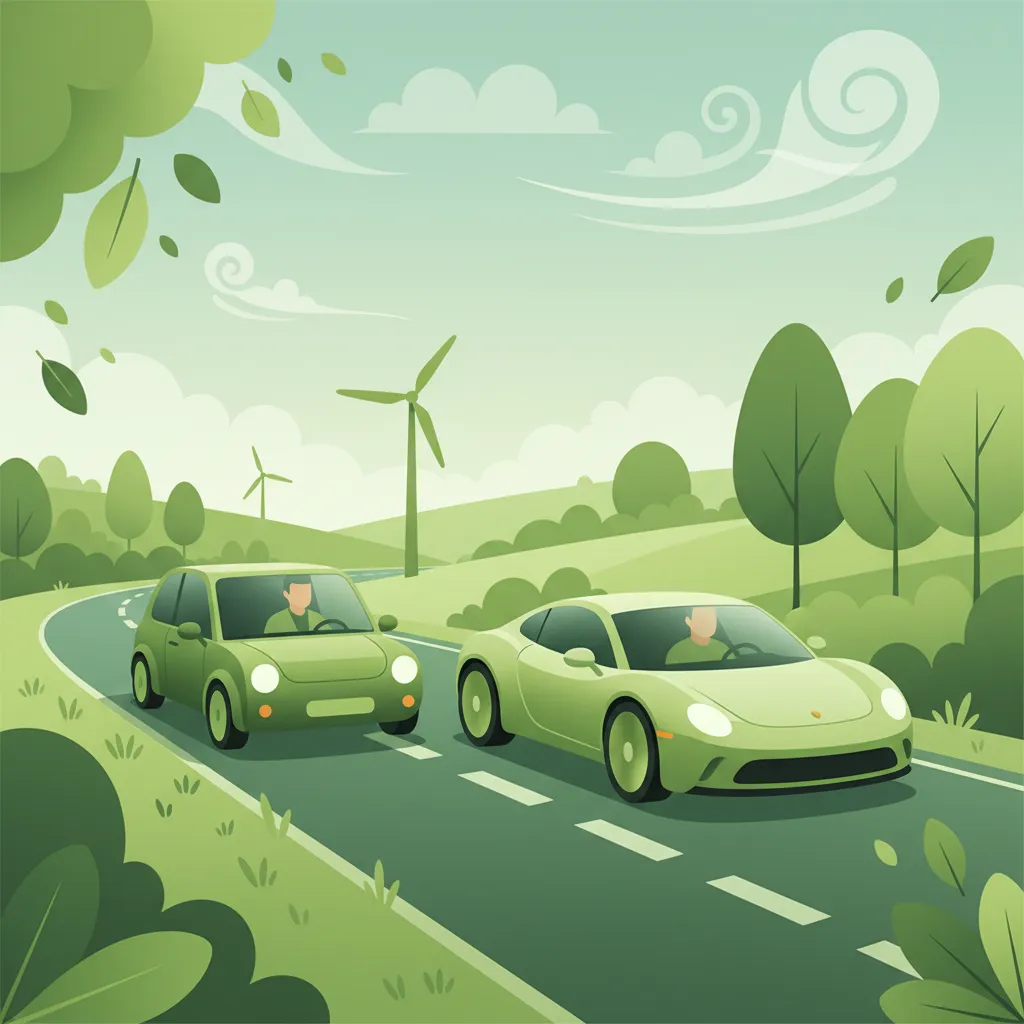
Overtaking is a high-risk maneuver that must be executed correctly. This lesson provides a step-by-step guide: assess if it is safe and legal, check mirrors and blind spots, signal your intention, accelerate smoothly past the other vehicle, and return to your lane leaving adequate space. You will also learn to identify situations where overtaking is prohibited, such as before a pedestrian crossing or when approaching a blind corner.

Dutch Driving Theory AMVehicle Control & Maneuvers
View lesson
Cornering Techniques and Lean Angles lesson image

Cornering Techniques and Lean Angles

Proper cornering technique is vital for safety and stability on a two-wheeler. This lesson explains the physics of turning, including the concepts of lean angle and counter-steering. You will learn the importance of adjusting your speed before the turn, looking where you want to go, and maintaining a smooth throttle through the corner. These techniques help you maximize grip and maintain control, ensuring you can navigate bends safely.

Dutch Driving Theory AMVehicle Control & Maneuvers
View lesson
Seasonal Road Conditions and Maintenance Awareness lesson image

Seasonal Road Conditions and Maintenance Awareness

Each season brings unique challenges for riders. This lesson discusses common seasonal hazards, such as wet autumn leaves that are as slippery as ice, the risk of black ice in winter, and increased agricultural traffic in the summer. It also highlights the importance of seasonal vehicle maintenance. For example, after winter, it is crucial to wash away corrosive road salt, and before winter, to check antifreeze and battery health, ensuring your vehicle is prepared for the conditions ahead.

Dutch Driving Theory AMEnvironmental & Weather Influences
View lesson
Night Riding, Visibility, and Lighting Requirements lesson image

Night Riding, Visibility, and Lighting Requirements

Riding at night presents two main challenges: seeing the road and being seen by others. This lesson covers the legal requirements for your vehicle's lighting system and how to use it effectively, including when to use high beams. It also emphasizes strategies to increase your own conspicuity, such as wearing bright or reflective clothing. You will learn how darkness affects your perception of speed and distance and how to adapt your riding to compensate for these limitations.

Dutch Driving Theory AMEnvironmental & Weather Influences
View lesson
Variable Speed Limits and Dynamic Road Conditions lesson image

Variable Speed Limits and Dynamic Road Conditions

This lesson explains how to respond to variable speed limits shown on overhead electronic signs, which are used to manage traffic flow in real-time. You will learn why these limits are adjusted for factors like congestion, accidents, or bad weather, and the legal requirement to obey them. The content focuses on the importance of anticipatory riding, scanning far ahead for these signs to allow for smooth and safe speed adjustments.

Dutch Motorcycle Theory (A2)Speed Management and Dynamic Limits
View lesson
Speed Adjustments for Weather and Visibility lesson image

Speed Adjustments for Weather and Visibility

This lesson emphasizes the critical importance of adapting your speed to prevailing conditions, which may require driving slower than the legal limit. You will learn how factors like rain, fog, snow, and darkness significantly increase braking distances and reduce visibility. The curriculum explains the dangers of aquaplaning on wet roads and black ice in winter. The core principle taught is that a safe driver always adjusts their speed to ensure they can stop within the distance they can see to be clear.

Dutch Driving Theory BSpeed Management and Limits
View lesson

Understanding Stopping Distance and Braking Physics for Mopeds

Explore the physics behind stopping distance, including perception-reaction time and braking distance. Learn how speed, friction, and vehicle load affect your ability to stop safely on Dutch roads.

braking distancestopping distancekinetic energyfrictionvehicle loadspeed managementAM category theory
Braking Distance Calculations for Light Motor Vehicles lesson image

Braking Distance Calculations for Light Motor Vehicles

This lesson explains the components of the total stopping distance: the reaction distance (distance traveled before you start braking) and the braking distance (distance traveled while braking). You will learn the general formulas and rules of thumb for estimating these distances at different speeds. Understanding that braking distance increases exponentially with speed is a critical piece of knowledge that reinforces the importance of maintaining safe speeds and following distances.

Dutch Driving Theory AMSpeed Management & Braking
View lesson
Calculation of Stopping Distances lesson image

Calculation of Stopping Distances

This lesson provides a theoretical understanding of the components that make up the total stopping distance. It explains how to calculate reaction distance (the distance traveled before applying the brakes) and braking distance (the distance traveled while braking). The content highlights how speed exponentially increases stopping distance and how other variables like rider alertness, road grip, and brake condition play a significant role in the final calculation.

Dutch A1 Motorcycle TheorySpeed, Distance and Stopping
View lesson
Braking Techniques at High Speed (voor- en achterrem) lesson image

Braking Techniques at High Speed (voor- en achterrem)

This lesson provides a detailed breakdown of high-speed braking techniques, emphasizing the correct balance and application of the front ('voorrem') and rear ('achterrem') brakes. It explains the physics of weight transfer under braking and why the front brake provides the majority of stopping power. Techniques for progressive, smooth application to avoid overloading the front tire and losing traction are covered, ensuring riders can slow down quickly and safely from any speed.

Dutch Motorcycle Theory AAdvanced Riding Techniques and High-Speed Control
View lesson
Calculating Total Stopping Distance lesson image

Calculating Total Stopping Distance

This lesson breaks down the concept of total stopping distance into its two key parts: the distance traveled during your reaction time and the distance the motorcycle travels after the brakes are applied. You will learn the formulas and rules of thumb for estimating these distances at various speeds. The content highlights how factors like rider fatigue, road surface conditions, and tyre quality can significantly increase your overall stopping distance.

Dutch Motorcycle Theory (A2)Safe Following Distance and Braking Techniques
View lesson
Principles of Emergency Braking (noodsremmen) lesson image

Principles of Emergency Braking (noodsremmen)

This lesson teaches the principles of performing a controlled emergency stop ('noodsremmen') to achieve the shortest possible stopping distance without losing control. It details the technique of applying both brakes firmly and progressively, managing the forward weight transfer, and maintaining an upright body posture to maximize braking efficiency. The content emphasizes braking in a straight line and looking ahead to where you want to stop, not at the obstacle.

Dutch Motorcycle Theory AEmergency Braking, Crash Avoidance and Accident Handling
View lesson
Two-Second Rule and Stopping Distances lesson image

Two-Second Rule and Stopping Distances

This lesson provides a detailed explanation of the two-second rule as a simple yet effective method for maintaining a safe following distance in good conditions. It breaks down the concept of total stopping distance into its two components: reaction distance (the distance traveled before applying the brakes) and braking distance (the distance traveled while braking). Understanding this calculation is fundamental for appreciating the need for a sufficient space cushion to react to sudden events ahead.

Dutch Motorcycle Theory ASafe Following Distance and Hazard Perception
View lesson
Speed Limits per Vehicle Category lesson image

Speed Limits per Vehicle Category

This lesson details the statutory maximum speeds for each Category AM vehicle: 25 km/h for snorfietsen, and 45 km/h for both bromfietsen and speed pedelecs on the carriageway. It explains how these limits apply within built-up areas, outside built-up areas, and on specific road types like residential zones ('woonerf'). The content covers how to interpret speed limit signs and the legal consequences of exceeding these strict limits, which is a key component of the CBR theory exam.

Dutch Driving Theory AMRoadway Access & Navigation
View lesson
Deceleration Techniques and Controlled Braking lesson image

Deceleration Techniques and Controlled Braking

This lesson provides a comprehensive guide to safe and effective deceleration on a motorcycle. You will learn the principles of controlled braking, including the progressive application of both the front and rear brakes to maximize stopping power while maintaining stability. The content also explains the role of engine braking in managing speed and how the Anti-lock Braking System (ABS) helps prevent wheel lock-up during hard braking.

Dutch Motorcycle Theory (A2)Speed Management and Dynamic Limits
View lesson
Maximum Performance Emergency Braking lesson image

Maximum Performance Emergency Braking

This lesson focuses on the physical skill of an emergency stop, building on previous braking lessons. You will learn to adopt a braced body position, keeping your arms straight and looking ahead, not down. The content details the technique of applying both brakes rapidly but progressively to the point of maximum traction, and how to trust and utilize ABS if your motorcycle is equipped with it.

Dutch Motorcycle Theory (A2)Emergency Evasive Manoeuvres and Hazard Anticipation
View lesson
The Emergency Stop lesson image

The Emergency Stop

This lesson teaches the procedure for executing an emergency stop in response to a sudden, extreme hazard. You will learn how to apply maximum braking pressure quickly and decisively while keeping the steering wheel straight to maintain control. The role of the Anti-lock Braking System (ABS) in preventing wheel lock-up and allowing the driver to continue steering is explained. The lesson also covers the importance of checking mirrors, if time permits, and securing the vehicle safely after the stop.

Dutch Driving Theory BSpecial Maneuvers
View lesson

Frequently asked questions about Speed Adaptation to Conditions

Find clear answers to common questions learners have about Speed Adaptation to Conditions. Learn how the lesson is structured, which driving theory objectives it supports, and how it fits into the overall learning path of units and curriculum progression in the Netherlands. These explanations help you understand key concepts, lesson flow, and exam focused study goals.

What are the main conditions that require me to reduce my speed below the limit for my moped (bromfiets) in the Netherlands?

You must always adapt your speed to the conditions. This includes heavy rain, fog, strong winds, slippery surfaces like ice or wet leaves, poor visibility at night or dusk, and dense traffic. The posted speed limit is the maximum allowed under ideal conditions; in reality, safe speed is often lower.

How does wet weather affect my braking distance on a scooter?

Wet roads significantly increase your braking distance. The tires have less grip, meaning they take longer to slow the vehicle down. You should increase your following distance and reduce your speed considerably in wet conditions to compensate for the longer stopping time.

Are there specific questions about speed adaptation on the Dutch AM theory test?

Yes, the CBR theory exam for category AM frequently includes questions about speed adaptation. These questions often present a scenario with specific conditions (e.g., a sharp bend with poor visibility) and ask you to choose the safest speed or action.

How does traffic density influence the safe speed for my bromfiets?

When traffic is dense or moving slowly, you should match the speed of the surrounding traffic, provided it is safe to do so. Riding too fast in heavy traffic increases the risk of rear-end collisions and makes it difficult to react to sudden stops by other vehicles.

What's the difference between reaction distance and braking distance when adapting speed?

Reaction distance is the distance your vehicle travels from the moment you perceive a hazard until you start braking. Braking distance is the distance your vehicle travels from the moment you apply the brakes until it stops. Both increase with speed and are further affected by conditions like road surface and tire grip.

Continue your Dutch driving theory learning journey

Dutch road signsDutch article topicsSearch Dutch road signsDutch driving theory homeDutch road sign categoriesSearch Dutch theory articlesDutch driving theory coursesDutch Driving Theory B courseDutch driving theory articlesDutch driving theory practiceDutch practice set categoriesDutch Driving Theory AM courseDutch Motorcycle Theory A courseDutch A1 Motorcycle Theory courseDutch Motorcycle Theory (A2) courseSearch Dutch driving theory practiceTowing, Trailers, and Loads unit in Dutch Driving Theory BRoadway Access & Navigation unit in Dutch Driving Theory AMVehicle Positioning and Lane Use unit in Dutch Driving Theory BHuman Factors & Risk Management unit in Dutch Driving Theory AMInfrastructure and Special Roads unit in Dutch Driving Theory BLegal Foundations & Vehicle Types unit in Dutch Driving Theory AMSpeed Adaptation to Conditions lesson in Speed Management & BrakingReaction Time and Hazard Anticipation lesson in Speed Management & BrakingLegal Responsibilities & Incident Procedures unit in Dutch Driving Theory AMWet, Icy, and Slippery Surface Adjustments lesson in Speed Management & BrakingHighway (Autosnelweg) Rules for Motorcycles unit in Dutch Motorcycle Theory (A2)Use of Engine Braking and ABS (if equipped) lesson in Speed Management & BrakingAdvanced Riding Techniques and High-Speed Control unit in Dutch Motorcycle Theory ABraking Distance Calculations for Light Motor Vehicles lesson in Speed Management & BrakingAccident Management, Legal Responsibilities & Substance Use unit in Dutch A1 Motorcycle Theory