
Welcome to the critical skill of emergency braking! In this lesson, we'll focus on mastering the maximum performance emergency stop, a vital technique for A2 motorcycle riders. Building on previous braking knowledge, you'll learn how to react instantly and effectively when faced with sudden hazards on Dutch roads.

As you prepare for your Dutch Category A2 motorcycle license, understanding and mastering maximum performance emergency braking is paramount. This crucial skill is not merely about stopping quickly; it's about doing so safely, maintaining control, and adhering to legal obligations. It is the single most effective manoeuvre for preventing or mitigating collisions, making it a cornerstone of safe motorcycle riding.
This lesson builds upon foundational braking concepts, delving into the physics, rider technique, and legal requirements specific to emergency stops. By the end, you will have a comprehensive understanding of how to achieve the shortest possible stopping distance while preserving your steering control, whether your motorcycle is equipped with an Anti-Lock Braking System (ABS) or not.
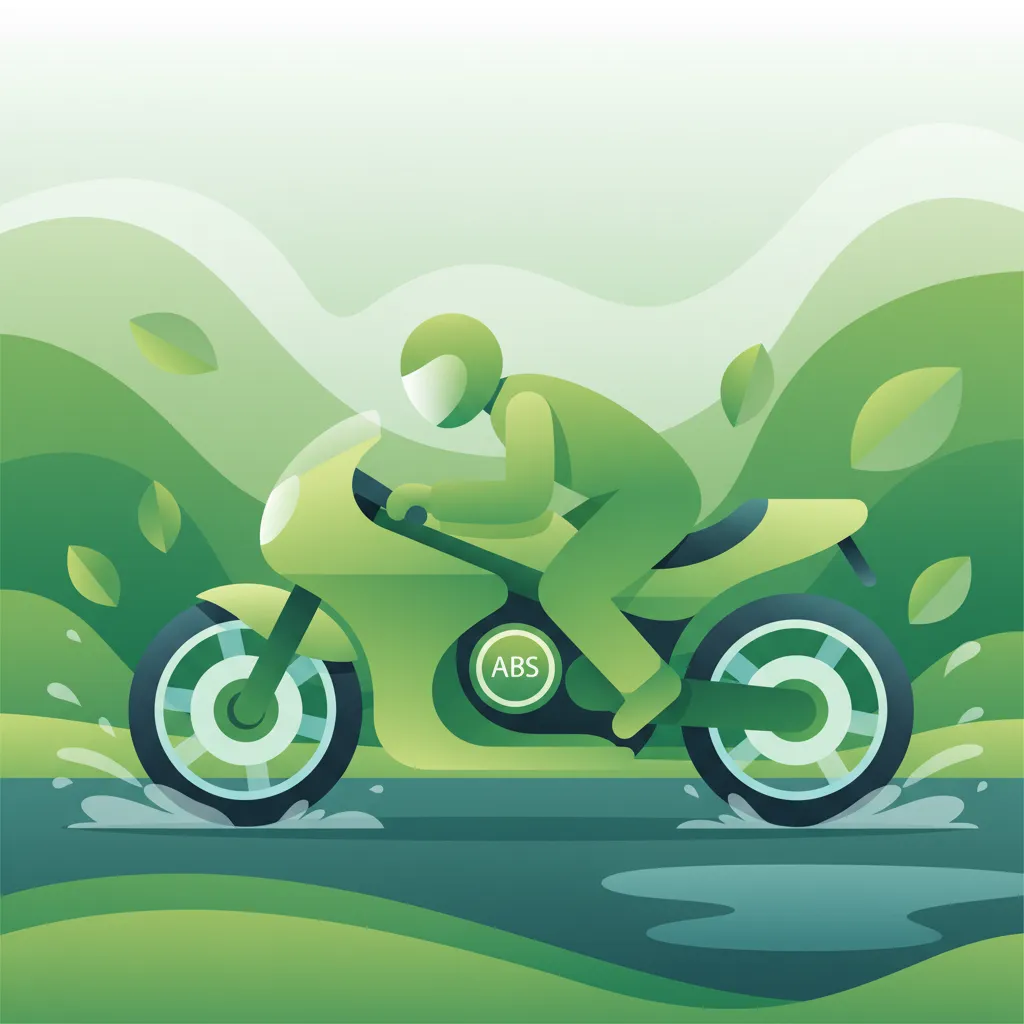
Maximum Performance Emergency Braking (MPEB) is the coordinated use of your motorcycle's front and rear brakes, combined with an optimal rider posture and, if present, electronic aids like ABS, to achieve the absolute shortest safe stopping distance. This technique is designed for sudden, unexpected hazards where every metre of stopping distance counts.
Mastery of MPEB is critical for several reasons. Firstly, it directly translates to enhanced safety on the road, significantly reducing the likelihood of a collision. Secondly, it empowers you to react effectively to unforeseen circumstances, turning potential accidents into avoided incidents. Finally, it demonstrates your compliance with Dutch traffic safety obligations, which mandate all road users to exercise reasonable care and stop safely.
To understand MPEB, it's essential to grasp the fundamental physics that govern a motorcycle's ability to stop. These principles include the limits of tire traction, the phenomenon of dynamic weight transfer, and the relationship between momentum, reaction time, and overall stopping distance.
Every tyre has a finite limit to the amount of grip, or traction, it can generate with the road surface. This traction limit is often conceptualized as a "friction circle" in motorcycle dynamics, representing the maximum combined braking, accelerating, and cornering forces the tyre can handle before it begins to slip. During emergency braking, the goal is to apply brake torque right up to this limit without exceeding it, which would cause the wheel to lock up and lose grip. Maintaining traction is crucial because it allows the rider to continue steering and avoid obstacles, even while decelerating aggressively. The available traction varies significantly with road conditions, being much higher on dry asphalt than on wet, gravelly, or icy surfaces.
When a motorcycle decelerates, its weight dynamically shifts forward. This phenomenon, known as dynamic weight transfer, is a critical factor in emergency braking. As the motorcycle slows down rapidly, its centre of gravity moves towards the front wheel, significantly increasing the downward force (normal load) on the front tyre. Simultaneously, the load on the rear tyre decreases.
This transfer of weight is advantageous because the front wheel, now carrying a greater load, can generate substantially more braking force without locking up. In a maximum performance stop, the front wheel can account for up to 80% of the total braking effort. Understanding and utilizing weight transfer allows you to apply more pressure to the front brake effectively, maximizing deceleration. Conversely, leaning backward or riding too upright during an emergency stop reduces front-wheel load, diminishing its braking potential and increasing the risk of front-wheel lock-up.
The total distance required to stop a motorcycle is a sum of two main components: the perception–reaction distance and the braking distance.
Higher speeds dramatically increase stopping distances because kinetic energy, which must be dissipated by braking, increases with the square of the speed. A small increase in speed can lead to a significant increase in the distance needed to stop. Therefore, minimizing both your perception–reaction time and your braking distance through effective MPEB technique is essential for safety.
While the motorcycle's mechanics are crucial, the rider's input and posture are equally vital for successful emergency braking. Proper technique ensures stability, maximizes the motorcycle's braking potential, and helps maintain control.
The braced position is a specific rider posture adopted during emergency braking that significantly contributes to stability and effective weight transfer. When performing an emergency stop, your arms should be straight but not locked, with elbows slightly bent and relaxed. Your shoulders should remain relaxed, and your head should be upright, with your eyes fixed far forward on the intended path or secondary hazards, not on your front wheel or the ground directly in front of you.
This posture serves multiple purposes. By keeping your arms straight, you effectively brace yourself against the deceleration forces, preventing your body from sliding forward and inadvertently pulling on the handlebars, which could introduce unwanted steering input. This maintains a stable centre of mass and allows the dynamic weight transfer to effectively load the front wheel. Looking forward, rather than down, ensures you maintain situational awareness and can identify potential escape routes or secondary hazards as you decelerate.
Progressive brake application is the technique of smoothly but rapidly increasing pressure on both the front and rear brake controls, rather than grabbing them abruptly. This gradual build-up of pressure allows the weight transfer to occur naturally, loading the front tyre before maximum braking force is applied. An abrupt application, especially of the front brake, can cause the front wheel to lock up instantly before sufficient weight has transferred, leading to a loss of control.
Start by squeezing the front brake lever with increasing force, feeling for the point where the tyre starts to work hard. Simultaneously, apply the rear brake pedal with your foot. While the front brake provides the majority of the stopping power (up to 80% on a dry surface), the rear brake helps settle the chassis and contributes some braking force, especially in the initial phase of the stop. The key is to find the maximum pressure you can apply just before the point of wheel lock-up, adjusting your input based on feedback from the motorcycle.
Many modern motorcycles, including those suitable for a Dutch Category A2 license, are equipped with an Anti-Lock Braking System (ABS). This electronic safety feature is a game-changer for emergency braking.
ABS is designed to prevent the wheels from locking up during hard braking. It uses sensors to monitor the rotational speed of each wheel. If a sensor detects that a wheel is about to lock (i.e., it's decelerating much faster than the motorcycle itself), the ABS controller momentarily reduces the hydraulic pressure to that brake caliper. As the wheel regains traction, the pressure is reapplied. This process happens many times per second, effectively 'pumping' the brakes far faster and more precisely than any human rider could.
The primary benefit of ABS is that it allows you to apply maximum brake pressure without fear of wheel lock-up, thus maintaining steering control. In an emergency situation, this means you can focus on steering around the obstacle while the system manages the braking, rather than worrying about modulating brake pressure to avoid a skid.
When riding an ABS-equipped motorcycle, the best practice for emergency braking is to apply both brakes firmly and steadily. Resist the urge to "pump" the brakes, as this overrides the system's function and reduces its effectiveness. Instead, maintain consistent pressure, allowing the ABS to do its job. You will feel a pulsing sensation in the brake lever and/or pedal, which is the system engaging; this is normal and indicates that ABS is actively working to prevent lock-up.
Some ABS systems may have a "caution mode" or reduced intervention on poor grip surfaces, but the general principle remains: trust the system and apply firm, steady pressure. A defective ABS system is considered a vehicle defect under Dutch law and must be repaired immediately (RVV 1990 Art. 4-6). Furthermore, disabling ABS while the vehicle is in operation is forbidden (RVV 1990 Art. 8-14), as it compromises safety.
Beyond the mechanical aspects of braking, the human element—specifically your Perception–Reaction Time (PRT)—plays a significant role in total stopping distance.
Perception–Reaction Time is the total elapsed time from when you first perceive a hazard to when you physically initiate a response, such as applying the brakes. For an experienced, alert rider, this time typically ranges from 0.7 to 1.0 seconds. However, factors like fatigue, distraction, inexperience, or being under the influence of substances can significantly lengthen PRT, adding crucial metres to your stopping distance before you even begin to slow down.
For example, at 80 km/h, a 1.0-second PRT means you will travel approximately 22.2 metres before you even touch the brakes. Any delay in this initial phase directly translates to a longer overall stopping distance, potentially turning an avoidable situation into a collision.
While there's a physiological limit to how quickly a human can react, you can effectively shorten the distance travelled during your PRT by improving your hazard anticipation and visual scanning skills. This involves continuously scanning the road ahead, to the sides, and in your mirrors, actively looking for potential hazards and developing a mental "what if" scenario for each.
By predicting potential dangers – a car slowing down, a child near the road, or a pedestrian looking distracted – you can be mentally prepared to react. This readiness allows you to initiate brake application sooner when a hazard fully materializes, effectively reducing your effective PRT and, consequently, your total stopping distance. This proactive approach is a cornerstone of advanced hazard perception, a skill reinforced in other lessons.
In the Netherlands, specific articles of the Reglement verkeersregels en verkeerstekens 1990 (RVV 1990 – Regulations for Traffic Rules and Traffic Signs 1990) outline a rider's responsibilities related to safe stopping and vehicle maintenance.
The instant activation of your brake light is more than just a legal formality; it is a critical safety feature. It provides a visual warning to drivers behind you that your motorcycle is decelerating, giving them valuable time to react and reduce their speed. In an emergency stop situation, this immediate warning is vital for preventing a chain-reaction collision, as following drivers might also need to perform an emergency stop.
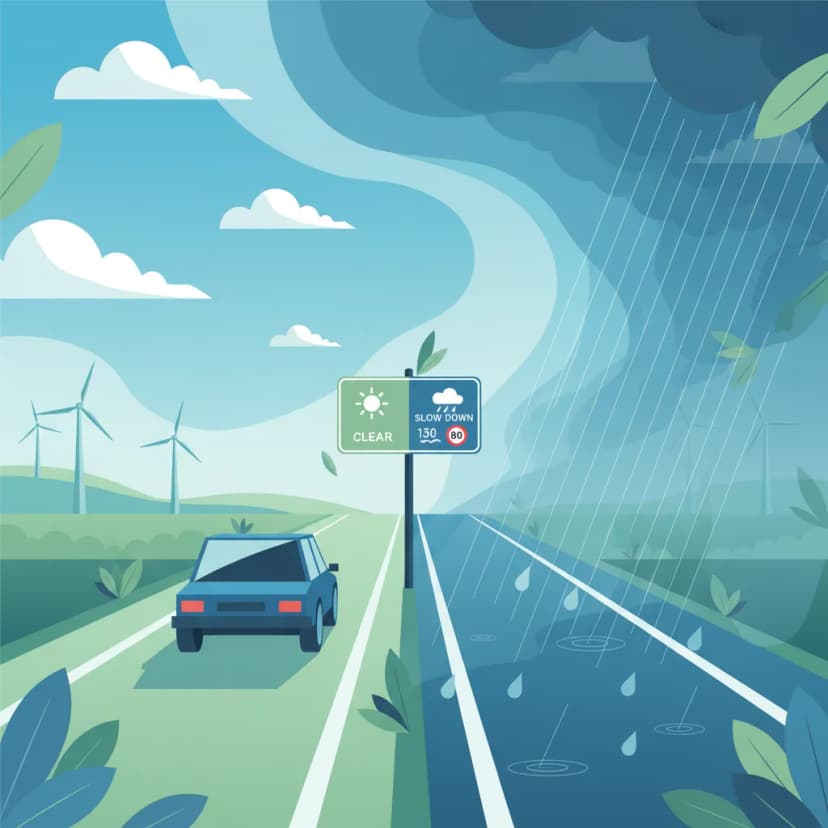
Maximum Performance Emergency Braking is not a one-size-fits-all technique. The maximum achievable deceleration and the precise application of braking force must be adjusted based on prevailing conditions.
Wet road surfaces drastically reduce the available tire-road friction. This means the traction limit is significantly lower, and aggressive braking that might be safe on dry pavement will likely lead to wheel lock-up on a wet road. When braking on wet surfaces:
On motorways (autosnelweg), higher speeds mean significantly greater kinetic energy and, consequently, much longer stopping distances. At 100 km/h, the perception-reaction distance alone can be over 27 metres per second of PRT. For emergency braking at high speeds:
Carrying a passenger or a heavy load significantly alters the motorcycle's weight distribution and dynamics. This typically shifts the centre of gravity rearwards and upwards.
Emergency braking while cornering is one of the most challenging manoeuvres. Braking heavily while leaned over significantly reduces the available traction for cornering, increasing the risk of a low-side crash.
Even experienced riders can make mistakes during emergency braking, especially under pressure. Being aware of these common pitfalls can help you avoid them.
Rear-Brake Dominance:
Ignoring ABS (Pumping Brakes):
Looking Down While Braking:
Late Brake Initiation (High PRT):
Faulty Brake Light:
Braking on a Loose Surface Without Adjusting Technique:
Mastering Maximum Performance Emergency Braking is not an isolated skill; it is deeply interconnected with several other crucial aspects of motorcycle riding within the Complete CBR Theory Course for the Dutch Motorcycle License (Category A2).
This lesson serves as a critical prerequisite for Lesson 9.3 – The Emergency Swerve and Counter-Steering. In many emergency scenarios, braking alone might not be enough to avoid an obstacle, requiring a combination of braking and evasive steering. A solid foundation in MPEB ensures you can reduce speed effectively before or during an evasive manoeuvre.
Maximum Performance Emergency Braking is arguably the most vital skill a motorcycle rider can possess. It demands a blend of theoretical understanding of physics and legal obligations, combined with precise physical execution and mental preparedness.
By understanding dynamic weight transfer, adopting the braced position, applying brakes progressively, and trusting your ABS system, you can significantly shorten your stopping distance and maintain control in critical situations. Remember that practice in a safe, controlled environment is invaluable for developing the muscle memory and confidence required for MPEB. Coupled with advanced hazard perception, this skill empowers you to ride more safely and confidently, meeting the high standards required for your Dutch Category A2 motorcycle license.
Lesson content overview
Explore all units and lessons included in this driving theory course.
Explore search topics learners often look for when studying Maximum Performance Emergency Braking. These topics reflect common questions about road rules, driving situations, safety guidance, and lesson level theory preparation for learners in the Netherlands.
Browse additional driving theory lessons that cover connected traffic rules, road signs, and common driving situations related to this topic. Improve your understanding of how different rules interact across everyday traffic scenarios.
Understand the core principles of maximum performance emergency braking for motorcycles in the Netherlands. Learn about rider posture, weight transfer, and how to apply brakes effectively to achieve the shortest stopping distance safely.

This lesson prepares you for a critical situation: performing a maximum-force emergency stop. You will learn the correct body posture and braking technique to stop in the shortest possible distance without losing control. The content provides a clear explanation of how ABS works by rapidly pulsing the brakes to prevent the wheels from locking, allowing you to maintain steering control even during a panic stop.
This lesson explains the function of an Anti-lock Braking System (ABS) on a motorcycle, detailing how it prevents wheel lock-up during heavy braking, thereby allowing the rider to maintain steering control. It clarifies that while ABS is a powerful safety aid, it does not defy physics and may sometimes increase stopping distances on loose surfaces. The content teaches riders to trust the system and apply the brakes fully and firmly in an emergency, letting the ABS manage traction.

This lesson teaches the principles of performing a controlled emergency stop ('noodsremmen') to achieve the shortest possible stopping distance without losing control. It details the technique of applying both brakes firmly and progressively, managing the forward weight transfer, and maintaining an upright body posture to maximize braking efficiency. The content emphasizes braking in a straight line and looking ahead to where you want to stop, not at the obstacle.

This lesson provides a comprehensive guide to safe and effective deceleration on a motorcycle. You will learn the principles of controlled braking, including the progressive application of both the front and rear brakes to maximize stopping power while maintaining stability. The content also explains the role of engine braking in managing speed and how the Anti-lock Braking System (ABS) helps prevent wheel lock-up during hard braking.

This lesson outlines the step-by-step procedure for executing a controlled emergency stop in a straight line. It emphasizes keeping the motorcycle upright, looking ahead, and applying both brakes firmly and progressively up to the point of maximum traction (or ABS activation). Understanding this technique is critical for minimizing stopping distance in a sudden hazard scenario and is a key skill assessed in practical motorcycle training.
This lesson covers braking techniques beyond simply applying the brake levers. You will learn about the concept of engine braking (decelerating by releasing the throttle or downshifting) for controlled slowing. It also explains the function of an Anti-lock Braking System (ABS), a safety feature on some models that prevents wheels from locking during hard braking, allowing you to maintain steering control and reduce the chance of a skid.

This lesson explains the mechanical and hydraulic principles behind the common types of motorcycle brakes. It compares the operation and performance characteristics of disc brakes and drum brakes. The function of an Anti-lock Braking System (ABS) is also detailed, explaining how it prevents wheel lock-up during hard braking, thereby allowing the rider to maintain steering control and reduce stopping distances in many situations.
This lesson moves beyond basic braking to teach advanced techniques for optimal stopping performance. You will learn that the front brake provides the majority of your stopping power due to forward weight transfer, but that skillful application of the rear brake is crucial for stability. The content covers the concept of progressive braking—squeezing the levers smoothly—to manage traction and prevent wheel lock, especially on motorcycles without ABS.

This lesson teaches the procedure for executing an emergency stop in response to a sudden, extreme hazard. You will learn how to apply maximum braking pressure quickly and decisively while keeping the steering wheel straight to maintain control. The role of the Anti-lock Braking System (ABS) in preventing wheel lock-up and allowing the driver to continue steering is explained. The lesson also covers the importance of checking mirrors, if time permits, and securing the vehicle safely after the stop.

This lesson teaches the technique of progressive braking, which involves applying the brakes smoothly and gradually rather than abruptly. This method allows the motorcycle's weight to transfer forward in a controlled manner, compressing the front suspension and increasing the size of the front tire's contact patch. This, in turn, maximizes available grip and allows for harder, safer braking without unsettling the chassis or locking a wheel.
Learn how factors like wet roads, passengers, or heavy loads affect motorcycle braking. This lesson covers adjusting emergency braking techniques for various real-world scenarios and Dutch traffic laws.

This lesson provides a detailed breakdown of high-speed braking techniques, emphasizing the correct balance and application of the front ('voorrem') and rear ('achterrem') brakes. It explains the physics of weight transfer under braking and why the front brake provides the majority of stopping power. Techniques for progressive, smooth application to avoid overloading the front tire and losing traction are covered, ensuring riders can slow down quickly and safely from any speed.

This lesson reinforces the critical relationship between adverse conditions, reduced traction, and massively increased stopping distances. It provides a clear framework for how much riders need to increase their following distance and reduce their overall speed to maintain a safe margin for error. The curriculum teaches riders to constantly reassess their speed based on visual feedback from the road surface and the level of visibility, ensuring they can always stop within the distance they can clearly see.

Riding on two wheels requires special care on surfaces with reduced grip. This lesson teaches you how to handle challenging conditions like rain, ice, wet leaves, or tram tracks. Key principles include reducing speed significantly, making all control inputs (braking, accelerating, steering) much more smoothly and gradually, and increasing your following distance to allow for much longer stopping distances. Recognizing potentially slippery areas is a critical part of proactive hazard perception.
This lesson provides a comprehensive guide to safe and effective deceleration on a motorcycle. You will learn the principles of controlled braking, including the progressive application of both the front and rear brakes to maximize stopping power while maintaining stability. The content also explains the role of engine braking in managing speed and how the Anti-lock Braking System (ABS) helps prevent wheel lock-up during hard braking.
The posted speed limit is a maximum, not a target. This lesson teaches the crucial skill of adapting your speed to prevailing conditions. You will learn how to assess factors like traffic density, poor weather (rain, fog), limited visibility (at night), and slippery road surfaces. Adjusting your speed downwards in these situations provides you with more time to react to hazards and significantly reduces the risk of losing control or being involved in a collision.
This lesson moves beyond basic braking to teach advanced techniques for optimal stopping performance. You will learn that the front brake provides the majority of your stopping power due to forward weight transfer, but that skillful application of the rear brake is crucial for stability. The content covers the concept of progressive braking—squeezing the levers smoothly—to manage traction and prevent wheel lock, especially on motorcycles without ABS.

This lesson introduces the Dutch concept of 'voorspellend rijgedrag,' or anticipatory riding, a proactive approach to safety. It teaches motorcyclists how to look beyond the immediate vehicle in front and scan for clues that predict the actions of other road users, such as turn signals, wheel direction, and driver head movement. By anticipating potential conflicts before they happen, riders can position themselves to avoid danger and ensure a smoother, safer journey through complex traffic.

This lesson provides survival strategies for riding in the most challenging weather conditions, including heavy rain, snow, and potential ice. It emphasizes the importance of mental preparation, drastically reduced speeds, and hyper-smooth inputs for throttle, brakes, and steering. The content also covers identifying high-risk areas for 'black ice,' such as bridges and shaded spots, and the critical role of appropriate waterproof and insulated gear in preventing hypothermia and maintaining concentration.
This lesson teaches the technique of progressive braking, which involves applying the brakes smoothly and gradually rather than abruptly. This method allows the motorcycle's weight to transfer forward in a controlled manner, compressing the front suspension and increasing the size of the front tire's contact patch. This, in turn, maximizes available grip and allows for harder, safer braking without unsettling the chassis or locking a wheel.

This lesson teaches the crucial skill of assessing road surfaces and adjusting speed accordingly to maintain maximum traction. It covers a variety of hazardous conditions, including wet asphalt, loose gravel, oil patches, metal manhole covers, and painted road markings, all of which can significantly reduce grip. Riders will learn to constantly scan the road ahead, identify potential traction-reducing surfaces, and proactively manage their speed to prevent slides and loss of control.
Find clear answers to common questions learners have about Maximum Performance Emergency Braking. Learn how the lesson is structured, which driving theory objectives it supports, and how it fits into the overall learning path of units and curriculum progression in the Netherlands. These explanations help you understand key concepts, lesson flow, and exam focused study goals.
Normal braking involves gradually applying the brakes to slow down or stop smoothly. Maximum performance emergency braking, however, requires immediate and forceful application of both brakes to stop in the shortest possible distance. It's a reaction to an unexpected hazard, demanding a different level of intensity and rider technique to maintain control.
Body position is crucial. Keeping your arms straight and looking ahead helps keep the motorcycle stable and allows you to use your body weight effectively. A braced posture prevents you from being thrown forward and helps maintain balance, which is essential for controlling the bike during maximum deceleration.
Yes, absolutely. If your motorcycle is equipped with ABS, you should still apply both brakes as hard and as quickly as possible. ABS is designed to prevent the wheels from locking up, allowing you to maintain steering control while achieving maximum braking force. Trust the ABS to do its job; don't ease off the brakes.
Carrying a passenger or luggage increases the total weight of the motorcycle, which will lengthen your stopping distance. This means you need to leave even more space and be even more prepared to brake earlier or more decisively if necessary. It highlights the importance of consistent safe following distances.
Yes, the Dutch CBR theory exam for motorcycles often includes questions related to hazard perception, emergency manoeuvres, and safe braking. Understanding how to perform an emergency stop safely and effectively is a key component of safe motorcycle riding and is therefore likely to be tested.