Logo
Dutch Driving Theory Courses

Lesson 1 of the Braking Systems and Emergency Stops unit

Dutch A1 Motorcycle Theory: Disc, Drum, and ABS Brake Principles

Welcome to the A1 Motorcycle Theory curriculum's section on braking systems. This lesson breaks down the different types of brakes on motorcycles, explaining the mechanics behind disc, drum, and advanced ABS systems. Understanding these principles is vital for safe motorcycle operation and crucial for passing your CBR theory exam.

brake systemsdisc brakesdrum brakesABSmotorcycle technology
Dutch A1 Motorcycle Theory: Disc, Drum, and ABS Brake Principles
Dutch A1 Motorcycle Theory

Disc, Drum, and ABS Brake Principles for Dutch A1 Motorcycle Theory

Welcome to this in-depth lesson on motorcycle braking systems, a crucial topic for your Dutch A1 Motorcycle Theory – Complete Curriculum for CBR Licence Exam. Understanding how your motorcycle's brakes function – from basic mechanical principles to advanced electronic controls – is fundamental for safe riding, maintaining control in emergencies, and complying with Dutch traffic safety standards. This chapter will explain the mechanical, hydraulic, and electronic principles behind disc brakes, drum brakes, and the Anti-lock Braking System (ABS), comparing their operation, performance characteristics, and maintenance requirements.

Understanding Motorcycle Braking Systems: Essential Principles

Braking is the process of converting a motorcycle's kinetic energy (energy of motion) into thermal energy (heat) through friction, thereby decelerating the vehicle. Effective braking is paramount for avoiding collisions, managing speed, and ensuring stability, especially during emergency stops or on challenging road surfaces.

The Physics of Motorcycle Braking: Friction and Energy Conversion

At its core, braking relies on friction conversion. When you apply the brakes, brake pads or shoes press against a rotating surface (a disc or a drum) connected to the wheel. The friction generated at this contact point resists the wheel's rotation, turning the motorcycle's kinetic energy into heat. This controlled energy transformation is what allows your motorcycle to slow down or stop safely. The amount of friction generated is influenced by factors such as the material of the brake pads, the condition of the braking surface, and the temperature of the components.

The hydraulic system then employs hydraulic leverage. This principle uses an incompressible fluid to multiply the rider's input force from the hand lever or foot pedal. By leveraging the difference in surface area between a smaller master cylinder and larger slave cylinders (calipers or wheel cylinders), a small force applied by the rider can generate a much larger clamping force at the wheels, providing sufficient braking torque with minimal effort.

Some brake systems also exhibit a self-assist (self-servo effect). This phenomenon occurs when the rotation of the disc or drum itself helps to augment the normal force pushing the brake pads or shoes against the braking surface. This effectively increases friction without additional rider input, enhancing braking efficiency. While beneficial, this effect must be carefully balanced to prevent excessive pull-in that could lead to wheel lock-up.

Key Elements of Brake System Performance

  • Brake Balance: This refers to the optimal distribution of braking torque between the front and rear wheels. During deceleration, weight naturally shifts forward, meaning the front wheel can typically handle a greater proportion of the total braking force without locking up. An ideal balance, often around 70% front and 30% rear, maximizes overall braking force while maintaining stability.
  • Brake Fade: This is a critical safety concern defined as a reduction in braking performance due to overheating. Excessive heat can cause brake pads or shoes to lose their friction coefficient, brake fluid to boil (leading to a spongy lever), or disc/drum surfaces to glaze over. Understanding and preventing brake fade is vital, especially during prolonged or aggressive braking.
  • Maintenance Integrity: Regular maintenance is non-negotiable for brake systems. Ongoing verification that all components meet manufacturer specifications and legal safety standards guarantees reliability and prevents sudden failure. This includes checking pad/shoe thickness, fluid levels and condition, and the absence of leaks or damage.

How Disc Brakes Work on Motorcycles: Design and Operation

Disc brakes are the most common type of front brake on modern motorcycles, including many A1 models. They offer superior stopping power, better heat dissipation, and more consistent performance compared to drum brakes, particularly in wet conditions.

Definition

Disc Brake

A braking system where calipers clamp friction pads onto a rotating metal disc (rotor) attached to the wheel hub, generating friction to slow the vehicle.

Components of a Disc Brake System

A typical disc brake system consists of several key parts:

  • Brake Disc (Rotor): A flat, circular metal plate attached to the wheel hub that rotates with the wheel.
  • Brake Caliper: A housing that straddles the brake disc, containing one or more pistons and the brake pads.
  • Brake Pads: Friction material mounted on backing plates that are pressed against the disc by the caliper pistons.
  • Master Cylinder: Converts the rider's lever input into hydraulic pressure.
  • Brake Lines: Hoses that transmit hydraulic fluid from the master cylinder to the calipers.

Ventilated vs. Solid Discs: Heat Management

Brake discs can be either solid or ventilated:

  • Solid Discs: These are single, solid pieces of metal. They are simpler and lighter but have less surface area for heat dissipation.
  • Ventilated Discs: These feature a central gap with internal vanes or channels between two disc surfaces. This design significantly increases surface area and promotes airflow through the disc, allowing for much better heat dissipation. Ventilated discs are crucial for high-performance applications and situations requiring prolonged or heavy braking, helping to prevent brake fade. Many modern A1 motorcycles, particularly at the front, use ventilated discs for optimal performance.

Caliper Types: Single-Piston, Multi-Piston, Floating, and Fixed

The brake caliper plays a crucial role in clamping the pads onto the disc. Calipers come in various designs:

  • Single-Piston Calipers: These have one piston on one side of the caliper. When brake pressure is applied, this piston pushes one pad against the disc, and the entire caliper then slides on pins to pull the other pad into contact with the opposite side of the disc.
  • Multi-Piston Calipers (e.g., Twin-Piston, Four-Piston): These calipers feature two, four, or even six pistons, often arranged on both sides of the disc. More pistons generally mean a larger, more evenly distributed clamping force over the brake pads, leading to greater stopping power and better brake feel.
  • Floating Calipers: As described for single-piston types, these calipers are designed to move laterally. They float on guide pins, allowing them to self-centre and compensate for pad wear.
  • Fixed Calipers: These calipers are rigidly mounted and do not move. They always have pistons on both sides of the disc (e.g., four-piston fixed caliper), which push both pads simultaneously and directly against the disc. Fixed calipers often offer more consistent performance and a firmer brake feel, but are more complex and costly.

Most modern A1 motorcycles are equipped with a front disc brake, often utilizing a single- or twin-piston floating caliper, due to its superior heat handling and consistent performance in various conditions.

Advantages and Disadvantages of Disc Brakes

Advantages:

  • Superior Stopping Power: Provide strong, consistent braking force.
  • Excellent Heat Dissipation: Especially with ventilated discs, they resist fade better.
  • Consistent Performance in Wet Conditions: The spinning disc and caliper action tend to shed water, maintaining effectiveness.
  • Easier Maintenance and Inspection: Pads are visible and generally easier to replace.
  • Better Modulation: Offer a more precise feel, allowing the rider to control braking force finely.

Disadvantages:

  • More Complex and Expensive: Generally more intricate and costly to manufacture and maintain than drum brakes.
  • Exposed to Elements: While they perform well in wet conditions, the exposed nature means discs and pads can be more susceptible to dirt and debris.

Drum Brakes in Motorcycle Applications: Mechanics and Use

While disc brakes dominate the front wheels, drum brakes are still common on the rear wheels of many A1 motorcycles, particularly lower-cost or older models. They are enclosed systems, which can offer some protection from dirt and water, but generally have lower performance ceilings than disc brakes.

Definition

Drum Brake

A braking system where internal brake shoes expand outward to press against the inner surface of a rotating drum attached to the wheel, creating friction.

Components of a Drum Brake System

A drum brake consists of:

  • Brake Drum: A cylindrical component attached to the wheel, rotating with it.
  • Brake Shoes: Curved components lined with friction material.
  • Wheel Cylinder (Hydraulic) or Cam (Mechanical): Spreads the brake shoes apart.
  • Return Springs: Pull the brake shoes back to their resting position when the brake is released.
  • Adjuster: Mechanism to compensate for shoe wear.

Leading-Trailing Shoe Arrangements

In most drum brakes, the brake shoes are arranged as leading and trailing shoes relative to the drum's rotation:

  • Leading Shoe: The shoe whose forward edge makes contact with the drum first as it rotates. The drum's rotation tends to "wedge" this shoe more firmly against the drum, creating a powerful self-assist effect.
  • Trailing Shoe: The shoe whose rearward edge makes contact with the drum first. The drum's rotation tends to pull this shoe away from the drum, resulting in less self-assist and generating less braking force.

This leading-trailing design means that one shoe contributes more significantly to braking than the other. Some drum brakes use two leading shoes for greater stopping power, especially older, higher-performance drum systems.

Self-Assist (Self-Servo) Effect in Drum Brakes

The self-assist or self-servo effect is particularly noticeable in drum brakes, especially with leading shoes. As the drum rotates, it drags the leading shoe into tighter contact with itself, multiplying the braking force without extra effort from the rider. While this can enhance efficiency, it also makes drum brakes more prone to sudden lock-up if applied too aggressively, especially on slippery surfaces.

Pros and Cons of Drum Brakes

Advantages:

  • Cost-Effective: Generally cheaper to manufacture and simpler in design than disc brakes.
  • Protected from Elements: Being an enclosed system, the friction components are less exposed to dirt, dust, and minor moisture.
  • Effective Handbrake (Parking Brake): Their design makes them suitable for integrating a parking brake mechanism, though this is less common on motorcycles.

Disadvantages:

  • Inferior Heat Dissipation: The enclosed design traps heat, making drum brakes highly susceptible to brake fade during prolonged or heavy use.
  • Less Stopping Power: Generally provide less raw stopping force than disc brakes.
  • Poor Wet Performance: Water can get trapped inside the drum, significantly reducing friction until it's cleared.
  • More Difficult to Modulate: The "on/off" feel and strong self-assist can make fine control more challenging, increasing the risk of lock-up.
  • More Complex Maintenance: Adjustments and shoe replacement can be more involved, and wear is harder to visually inspect.

Note

While drum brakes can be effective when properly maintained, particularly on the rear wheel, riders must be aware of their limitations regarding heat management and wet weather performance.

The Hydraulic Brake System: Master Cylinder, Fluid, and Lines

Both disc and most modern drum brakes (though some rear drum brakes are cable-operated) rely on a hydraulic system to transmit the rider's input force to the brake components. This closed-loop system ensures consistent brake feel and precise modulation.

Definition

Hydraulic System

A closed network of components (master cylinder, brake lines, slave cylinders) that uses incompressible fluid to transmit force and pressure, allowing the rider to activate the brakes.

Hydraulic Leverage Explained

The principle of hydraulic leverage is key to how your brakes work. When you squeeze the brake lever or press the foot pedal, you push a piston in the master cylinder. This generates pressure in the brake fluid. Because fluids are virtually incompressible, this pressure is transmitted equally throughout the system, through the brake lines, to the slave cylinders (the pistons in the disc brake caliper or the wheel cylinder in a drum brake).

The magic happens due to the difference in the bore sizes (diameters) of the master and slave cylinders. If the slave cylinder has a larger bore than the master cylinder, the force applied to the brake pads/shoes will be multiplied. This allows a small amount of force from the rider to create a significant stopping force at the wheel, without excessive lever or pedal travel.

Importance of Brake Fluid: Types and Maintenance

Brake fluid is the lifeblood of the hydraulic system. It must be able to withstand high temperatures and remain incompressible.

  • DOT 4 and DOT 5.1: These are the most common types of brake fluid used in motorcycles. They are glycol-ether-based and hygroscopic, meaning they absorb moisture from the air over time. Moisture contamination lowers the fluid's boiling point, which can lead to "fluid fade" (where the fluid boils under intense heat, creating compressible gas bubbles and a spongy brake lever).
  • DOT 5 (Silicone-based): This fluid is not hygroscopic and has a very high boiling point. However, it is generally prohibited for use in systems designed for DOT 4/5.1 because it is incompatible with the rubber seals and components in those systems, potentially causing swelling and leaks. Always use the fluid type specified by your motorcycle manufacturer.

Warning

Using the wrong type of brake fluid, especially DOT 5 (silicone) in a system designed for DOT 4 or DOT 5.1, can cause significant damage to seals and lead to brake failure.

Maintenance: Brake fluid must be replaced regularly. The CBR (Centraal Bureau Rijvaardigheidsbewijzen) recommends replacing brake fluid at least every two years, or at the interval specified by the manufacturer, whichever is sooner. This prevents excessive moisture absorption and maintains the fluid's high boiling point, ensuring consistent and safe braking performance.

Brake Lines and Their Role

Brake lines (or hoses) connect the master cylinder to the slave cylinders. They must be strong enough to withstand high hydraulic pressures without expanding.

  • Reinforced Polymer Hoses: Standard hoses are typically made of reinforced rubber or polymer. They are durable but can subtly expand under extreme pressure, leading to a slightly "spongy" brake feel.
  • Steel Braided Hoses: These hoses feature a PTFE (Teflon) inner tube protected by a stainless steel braid. This construction prevents expansion under pressure, providing a firmer, more consistent brake feel and improved modulation. They are often a popular upgrade for enthusiasts.

All brake lines must be free of leaks, cracks, bulges, or chafing. Any damage can compromise the hydraulic system, leading to reduced braking efficiency or even complete brake failure.

Motorcycle Brake Pads and Shoes: Friction Materials and Performance

The actual stopping power of your brakes comes down to the friction materials – the brake pads (for disc brakes) and brake shoes (for drum brakes). These materials are specifically engineered to provide the necessary coefficient of friction (µ) for effective braking across various temperatures and conditions.

Types of Friction Materials

Brake pads and shoes are made from various composite materials, each with different properties:

  • Organic Pads/Shoes: Made from natural fibers (like glass, rubber, or carbon) bound with resin. They are generally quieter, easier on discs/drums, and provide good initial bite for everyday riding. However, they may have lower temperature resistance and wear faster under aggressive use.
  • Semi-Metallic Pads/Shoes: Contain a significant percentage of metal fibers (e.g., copper, iron, steel) mixed with organic materials. They offer a higher coefficient of friction, better heat resistance, and longer life than organic pads, making them a good all-around choice for many A1 motorcycles. They can be noisier and harder on discs/drums.
  • Ceramic Pads/Shoes: Made from ceramic fibers and non-ferrous materials. They offer excellent temperature resistance, long life, low dust, and quiet operation. They typically have a stable friction coefficient across a wide temperature range but can be more expensive.

The choice of friction material influences braking performance in wet/dry conditions, susceptibility to brake fade, and overall wear rate. For A1 motorcycles, semi-metallic pads are a common and effective choice for mixed-use riding.

Wear Indicators and Replacement

Brake pads and shoes have a minimum thickness specified by the manufacturer. Continuing to ride with worn-out friction material is dangerous and illegal.

  • Disc Brake Pads: Often have a wear groove or a metal wear indicator that starts making a squealing noise when the pad material is critically thin. Visual inspection is usually straightforward.
  • Drum Brake Shoes: Wear indicators are less common. Inspection typically involves removing the wheel or drum, making it a more involved process.

It is illegal per RVV 1990 Article 13.5 to operate a vehicle with brakes that are not effective, which includes having pads or shoes below the minimum thickness. Replacement parts must always be E-marked, indicating conformity with EU safety standards.

Anti-Lock Braking System (ABS) for Motorcycles: Safety and Control

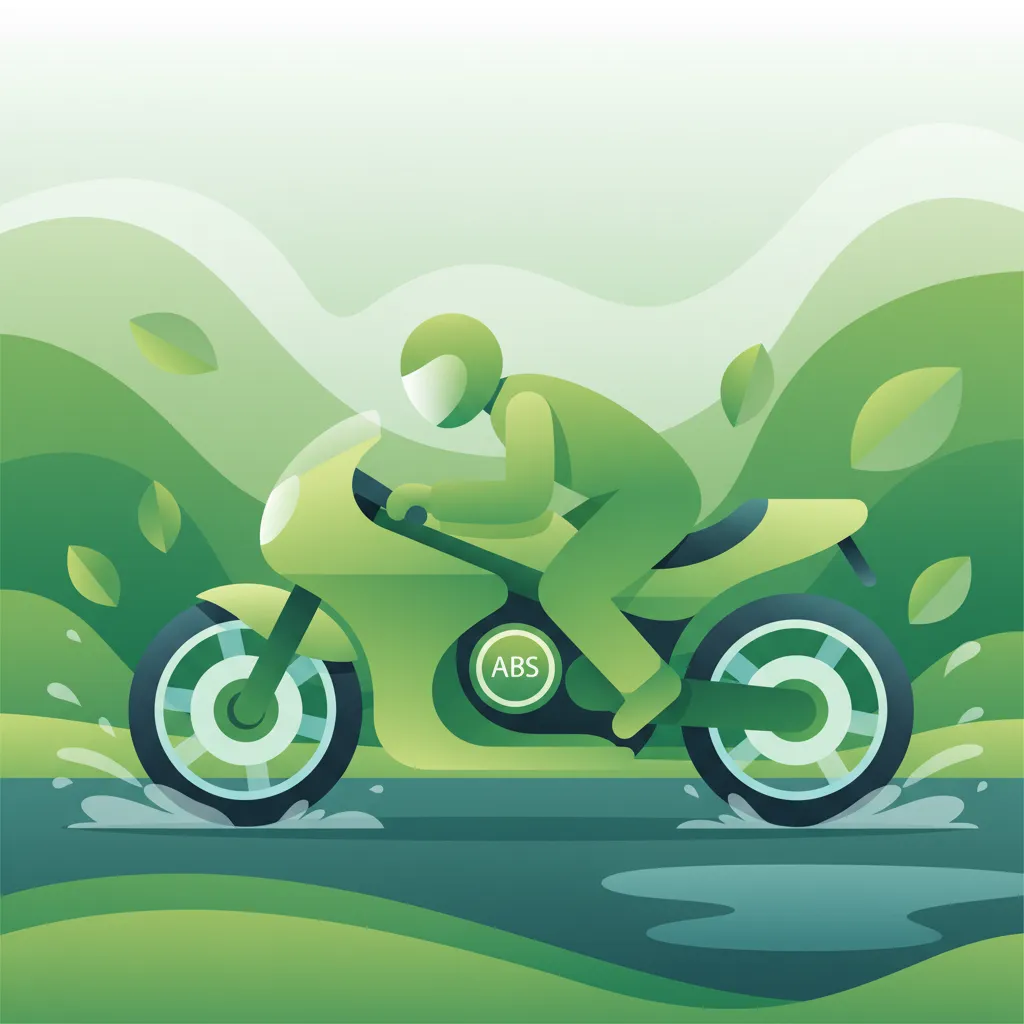
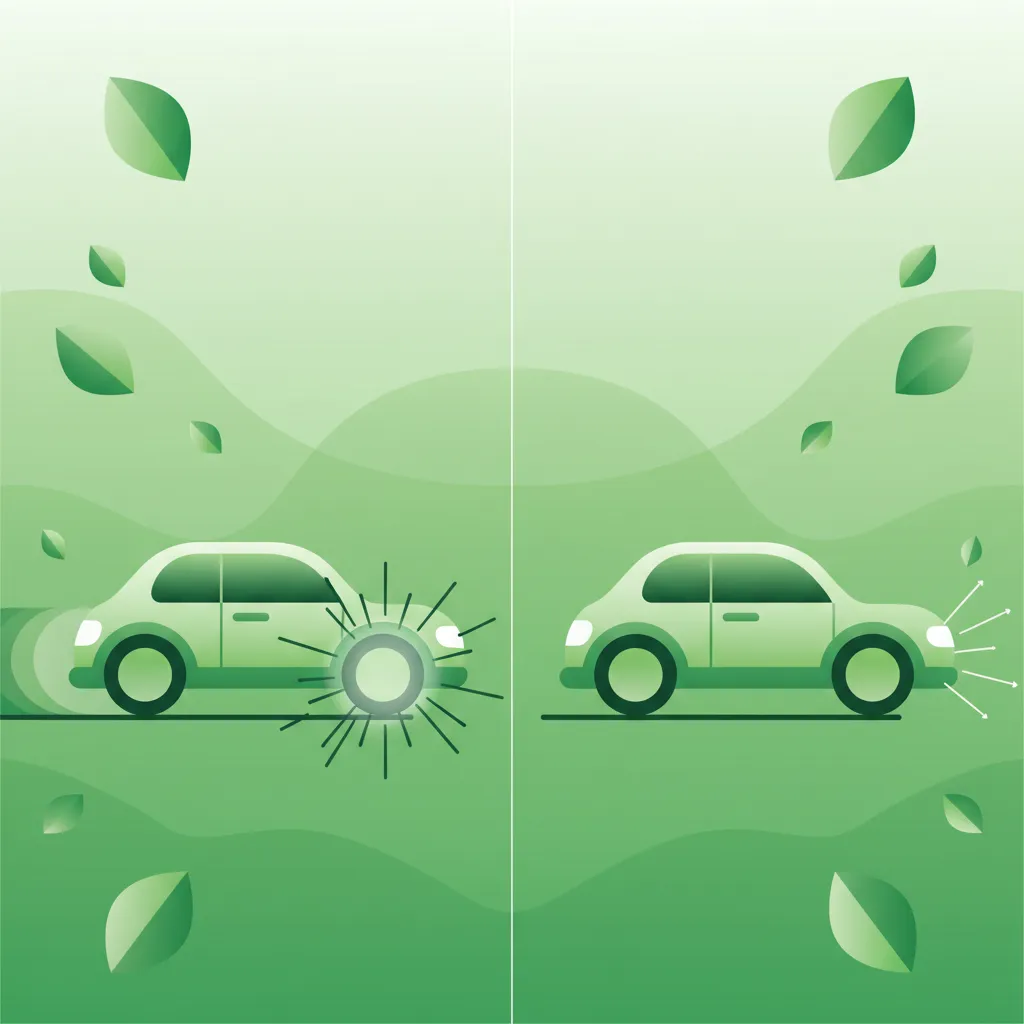
The Anti-lock Braking System (ABS) is a pivotal safety innovation that has become standard on modern motorcycles. It is designed to prevent wheel lock-up during hard or emergency braking, particularly on low-adhesion surfaces, thereby preserving steering control and often reducing stopping distances.

Definition

Anti-lock Braking System (ABS)

An electronic safety system that monitors wheel speed and modulates brake pressure to prevent the wheels from locking up during braking, enhancing control and stability.

Key Components of an ABS System

An ABS system is a sophisticated network of electronic and hydraulic components:

  • Wheel Speed Sensors: Mounted at each wheel, these sensors continuously measure the rotational speed of the wheels, sending pulse signals to the ECU.
  • Electronic Control Unit (ECU): The "brain" of the ABS system. It processes the data from the wheel speed sensors, detecting sudden decelerations that indicate an impending wheel lock-up.
  • Hydraulic Modulator (HCU - Hydraulic Control Unit): When the ECU detects a potential lock-up, it signals the HCU to rapidly modulate the brake pressure. This unit contains solenoid valves that can quickly decrease, hold, or increase pressure to individual brake circuits.
  • Pump (Accumulator): After the modulator releases pressure, a small pump restores the hydraulic pressure, ensuring that full braking force is available again as soon as the wheel regains traction.

How ABS Prevents Wheel Lock-up

The ABS works by continually comparing the rotational speed of the wheels to detect a significant difference, which indicates that a wheel is slowing down much faster than the others – a sign of impending lock-up. When this is detected:

  1. Pressure Release: The ECU signals the hydraulic modulator to momentarily reduce brake pressure to that specific wheel.
  2. Pressure Hold: Once the wheel begins to speed up again (regains traction), the pressure is held constant.
  3. Pressure Reapply: As soon as the wheel's speed matches the other wheels or is just below the slip threshold, full brake pressure is reapplied.

This process happens extremely rapidly, typically cycling 10-15 times per second. The rider will feel a pulsing sensation at the brake lever or pedal as the system activates. This rapid pressure modulation keeps the wheels just at the point of maximum braking friction without skidding, allowing the rider to maintain steering control and stability.

Benefits of ABS in Motorcycle Riding

  • Prevents Wheel Lock-up: The primary benefit, especially crucial on slippery surfaces (wet, gravel, sand) or during panic braking.
  • Maintains Steering Control: By preventing front wheel lock-up, ABS allows the rider to continue steering, which can be vital for avoiding obstacles during an emergency stop.
  • Reduces Stopping Distances: On low-adhesion surfaces, ABS can significantly reduce stopping distances by allowing maximum braking without skidding. On dry, optimal surfaces, a skilled non-ABS rider might achieve a slightly shorter stop, but ABS consistently outperforms average riders.
  • Increased Rider Confidence: Knowing that the system will intervene can reduce anxiety during hard braking situations.
  • Mandatory Safety Feature: Since January 2016, ABS has been mandatory on all new motorcycles sold in the EU, including those for the A1 category, highlighting its proven safety benefits.

Limitations of ABS

While highly effective, ABS is not a magic bullet and has limitations:

  • Does Not Eliminate the Need for Rider Skill: Riders still need to apply brakes progressively and understand weight transfer. ABS only mitigates lock-up; it does not eliminate the need for proper braking technique.
  • Performance on Very Loose Surfaces: On extremely loose gravel or deep sand, ABS might actually slightly increase stopping distances compared to a skilled rider who intentionally locks and slides the rear wheel for maximum deceleration. However, on most public roads, ABS offers a clear advantage.
  • Low-Speed Operation: Some older or simpler ABS systems may not engage at very low speeds (e.g., below 5-10 km/h).
  • System Failure: If an ABS component fails (e.g., a wheel speed sensor), the system will typically deactivate and illuminate a warning light, reverting to conventional non-ABS braking. The rider must then adapt their technique accordingly until the fault is repaired.

Tip

When ABS activates, you will feel a pulsing sensation at the brake lever/pedal. Do not release the brake; continue to apply firm pressure and allow the system to do its job. Maintain a relaxed grip to avoid fighting the pulsing.

Understanding Brake Fade: Causes, Effects, and Prevention

Brake fade is a serious issue that can significantly compromise your motorcycle's ability to stop. It's a reduction in braking efficiency caused by overheating of brake components.

Definition

Brake Fade

A decline in braking performance (reduced stopping power, spongy feel) caused by excessive heat build-up in the brake system.

Thermal Fade vs. Fluid Fade

There are several types of brake fade:

  • Thermal Fade (Pad/Shoe Overheating): This occurs when the friction material itself gets too hot. Beyond a certain temperature, the coefficient of friction of the pads or shoes decreases, leading to reduced grip on the disc or drum. You might notice a burning smell and significantly reduced stopping power.
  • Fluid Fade (Brake Fluid Vaporization): If the brake fluid overheats and reaches its boiling point, it can turn into a gas. Unlike fluid, gas is compressible, meaning that when you squeeze the brake lever, you're mostly compressing gas bubbles rather than transmitting hydraulic pressure. This results in a very spongy or completely unresponsive brake lever/pedal.
  • Pad Glazing: Prolonged mild heating without proper cooling can cause the surface of the brake pads or shoes to harden and become smooth, or "glazed." This reduces their ability to generate friction effectively.

Detecting and Mitigating Brake Fade

Detection:

  • Increased Lever/Pedal Travel: You need to pull the lever or push the pedal further to get any braking effect.
  • Spongy Feel: Particularly indicative of fluid fade, the lever or pedal feels soft and unresponsive.
  • Reduced Stopping Power: The motorcycle takes longer to slow down or stop, even with firm brake application.
  • Burning Smell: Overheated friction material often emits a distinctive smell.
  • Discoloration: Severe overheating can cause brake discs to show blue or purple discoloration.

Mitigation and Prevention:

  • Use Engine Braking: On long descents, downshift and use your engine's compression to help slow the motorcycle. This reduces the reliance on your friction brakes, allowing them to cool.
  • Intermittent Braking: Instead of continuously dragging the brakes on a long descent, apply them firmly for a short period, then release them completely to allow them to cool, repeating as necessary.
  • Proper Maintenance: Regularly replace brake fluid (every two years for DOT 4/5.1) to ensure a high boiling point. Inspect pads/shoes and discs/drums for wear and replace them before they reach minimum thickness.
  • Appropriate Components: Ensure your motorcycle has suitable brake components for its intended use (e.g., ventilated discs if you frequently ride in demanding conditions).
  • Fluid Selection: If operating in extremely hot conditions or with heavy loads, consider using DOT 5.1 fluid, which typically has a higher wet boiling point than DOT 4.

Adhering to legal standards and performing regular maintenance is crucial for your safety and to pass inspections for your A1 licence in the Netherlands.

RVV 1990 Article 13.5: Effective Brakes

Definition

RVV 1990 Art. 13.5 (Effective Brakes)

A Dutch traffic law stating that every motor vehicle must be equipped with brakes that are functional and capable of bringing the vehicle to a stop safely.
This article is a fundamental safety requirement. It means your entire brake system – from the lever to the pads and discs/drums – must be in proper working order. This includes:

  • No leaks in the hydraulic system.
  • Brake pads/shoes with adequate thickness (not worn past minimum).
  • Discs/drums free from excessive wear, cracks, or severe scoring.
  • Proper brake fluid level and condition.
  • A firm, responsive brake lever/pedal.

Correct Example: Before each ride, a responsible rider checks their brake lever and pedal for a firm feel, visually inspects the brake lines for leaks, and quickly glances at the front disc pads to ensure they have sufficient material.

RVV 1990 Article 13.9: ABS Functionality

Definition

RVV 1990 Art. 13.9 (ABS Functionality)

A Dutch traffic law stating that if a vehicle is equipped with ABS, the system must not be disabled or inoperative while the vehicle is used on public roads.
Given that ABS is mandatory on all new motorcycles sold in the EU since 2016, this article is highly relevant for A1 licence holders. If your motorcycle has ABS, it must be functional. An illuminated ABS warning lamp typically indicates a fault, and the system may revert to non-ABS braking. Correct Example: Upon starting their 125cc motorcycle, a rider waits for the ABS warning lamp to go out (indicating a successful self-test) before riding onto public roads. If the lamp stays on, they understand the ABS is not active and will seek repair.

CBR Technical Regulations: Brake Fluid Replacement

The CBR (Centraal Bureau Rijvaardigheidsbewijzen) emphasizes proper maintenance for passing your driving exam and for ongoing road safety.

Definition

CBR Technical Regulations (Brake Fluid)

CBR guidelines recommend replacing brake fluid at least every 2 years, or sooner if specified by the manufacturer, to prevent moisture absorption and maintain safety.
Brake fluid's hygroscopic nature means it degrades over time. Regular replacement ensures the fluid's high boiling point is maintained, preventing fluid fade. Keep records of your brake fluid changes. Correct Example: A motorcycle owner consults their service manual, which recommends DOT 4 fluid replacement every two years. After 23 months, they take their bike to a qualified mechanic for the fluid change and keep the service record.

E-Mark Requirement for Brake Components

Definition

E-Mark Requirement

All replacement brake components (pads, discs, drums, lines, ABS sensors) installed on a road-legal motorcycle in the Netherlands must bear the EU E-mark, signifying conformity with safety standards.
This ensures that any aftermarket or replacement parts meet strict European performance and safety specifications. Using non-E-marked parts is illegal and can compromise your safety and vehicle integrity. Correct Example: When replacing worn front brake pads, a rider ensures the new pads have the 'E-mark' stamped on their backing plates, confirming they are approved for road use in the EU.

APK Brake Inspection Standards

Definition

APK (Algemene Periodieke Keuring)

The Dutch periodic vehicle inspection, mandatory for motorcycles over 4 years old, includes a thorough examination of the brake system for wear, proper operation, and absence of defects.
The APK is a recurring safety inspection. For brakes, inspectors will check:

  • Pad/Shoe Thickness: Must be above the minimum limit (e.g., typically >1mm for shoes, >1.2mm for pads, but refer to manufacturer specific values).
  • Disc/Drum Condition: No deep scoring, cracks, or excessive run-out (wobble).
  • Fluid Leaks: The hydraulic system must be free of any leaks.
  • Brake Lines: Must be in good condition, no cracks or bulges.
  • ABS Functionality: If fitted, the ABS system must be operational and not show fault codes.

Practical Braking Scenarios for Motorcycle Riders

Understanding brake principles becomes tangible when applied to real-world riding situations.

Scenario 1 – Wet Urban Intersection Braking

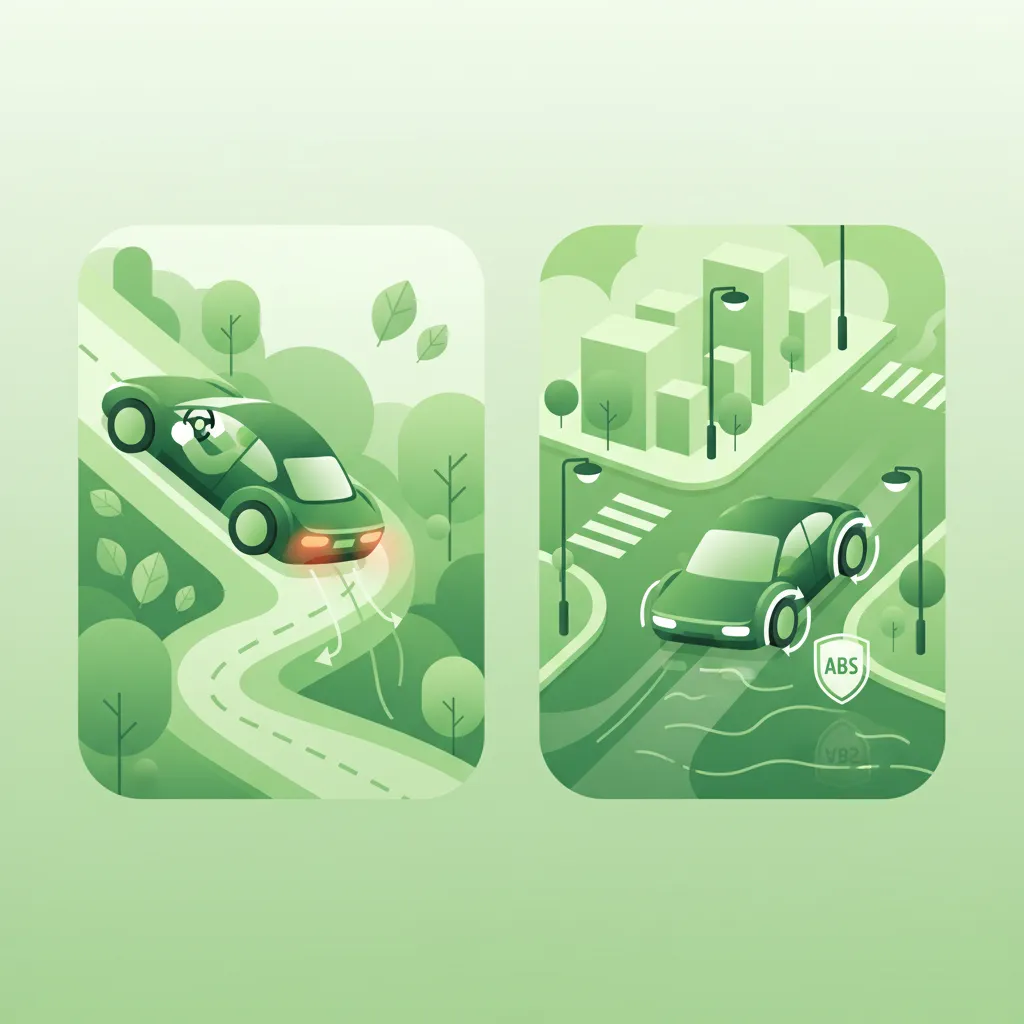
Setting: You are approaching a busy urban intersection. It has just started raining, making the road surface slick. The traffic light ahead turns red, and a pedestrian unexpectedly steps into the crosswalk. Decision Point: You need to stop quickly and safely, without locking your wheels, to avoid hitting the pedestrian. Correct Behavior: You apply the front brake progressively and firmly, simultaneously applying the rear brake with careful, measured pressure. Your front ABS activates, you feel the pulsing, but you maintain firm pressure on the lever. The ABS prevents the front wheel from locking, allowing you to maintain steering control and potentially swerve around the pedestrian if necessary, while the rear brake adds stability without skidding. Why Correct: ABS is critical on wet surfaces to prevent front wheel lock-up, preserving your ability to steer and control the motorcycle. Balanced, progressive braking optimizes stopping distance and stability.

Scenario 2 – Mountain Descent Braking with Heavy Load

Setting: You are riding your 125cc motorcycle, heavily loaded with luggage, descending a long, steep mountain road with a 10% grade on a warm summer day (30°C ambient). Decision Point: The descent requires repeated braking, and you need to prevent brake fade. Correct Behavior: You utilize engine braking by downshifting to a lower gear, which helps slow the motorcycle without solely relying on the friction brakes. You apply the front disc brake intermittently and firmly, then release it completely for a short period to allow for cooling, repeating this process. You avoid continuous, light application of the brakes. You are mindful of your brake fluid level and potential signs of fade. Why Correct: Engine braking reduces the thermal load on your brakes. Intermittent braking allows heat to dissipate, preventing both thermal and fluid fade, especially when carrying a heavy load and in high temperatures. Disc brakes' superior heat dissipation is advantageous here.

Scenario 3 – Emergency Stop on the Motorway

Setting: You are traveling at 80 km/h on a dry motorway. Suddenly, a large box falls off a truck just ahead into your lane, requiring an immediate emergency stop. Decision Point: You need to perform the fastest possible controlled stop to avoid the obstacle. Correct Behavior: You quickly but smoothly apply maximum pressure to both the front brake lever (ABS active) and the rear brake pedal simultaneously. The ABS system on your front wheel modulates pressure, preventing lock-up and allowing you to maintain steering control to potentially veer slightly around the obstacle while decelerating aggressively. Why Correct: In an emergency, both brakes should be used. The front brake provides the majority of stopping power due to weight transfer. ABS is crucial for preventing front wheel lock-up under panic braking, maintaining steerability even at high speeds.

Scenario 4 – Riding with Low Brake Fluid

Setting: You are in urban traffic, riding at 25 km/h, and unaware that your front brake fluid reservoir is critically low due to a minor, slow leak you haven't noticed. Decision Point: You need to make a normal stop at a traffic light. Correct Behavior: As you apply the front brake, you immediately notice the lever feels unusually spongy and travels much further before any significant braking force is felt. Recognizing this symptom, you apply the rear brake more firmly and use engine braking to slow down. You pull over safely immediately after stopping, inspect the reservoir, and discover the low fluid level. You arrange for repair and refilling before continuing your journey. Why Correct: Recognizing early signs of brake system malfunction is critical. A spongy lever indicates air in the system or critically low fluid. Continuing to ride in this condition risks complete brake failure, violating RVV 1990 Article 13.5.

Scenario 5 – Responding to an ABS Fault Light

Setting: You're riding at night on a partially wet road. Suddenly, the ABS warning lamp on your dashboard illuminates and stays on. Decision Point: Do you continue riding as usual, or change your approach? Correct Behavior: You immediately understand that your ABS system is no longer active. You reduce your speed, increase your following distance, and avoid any abrupt or hard braking. You plan to ride cautiously to the nearest service station or safe location to have the fault diagnosed and repaired before resuming normal riding, especially on challenging road conditions. Why Correct: An illuminated ABS warning light means the system is not functional, and you must assume your brakes will behave like non-ABS brakes. Ignoring this warning and relying on a non-existent safety net increases your risk of wheel lock-up and a crash, especially on wet surfaces.

Essential Brake System Vocabulary

Disc Brake
A brake system using calipers to squeeze friction pads against a rotating disc attached to the wheel hub.
Drum Brake
A brake system where internal brake shoes expand outward to press against the interior surface of a rotating drum.
Hydraulic Leverage
The multiplication of rider input force through incompressible brake fluid between master and slave cylinders due to differences in their bore sizes.
Self-Assist (Self-Servo Effect)
A phenomenon where the rotation of the disc or drum augments the normal force on the brake pads/shoes, increasing friction without additional rider input.
Brake Balance
The distribution of braking force between the front and rear wheels, optimized to maximize total stopping power while maintaining stability.
ABS (Anti-Lock Braking System)
An electronic safety system that senses wheel deceleration and modulates brake pressure to prevent wheel lock-up during braking.
Wheel Speed Sensor
A device that measures the rotational speed of each wheel and provides data to the ABS ECU.
Hydraulic Modulator
A component within the ABS system that rapidly adjusts brake fluid pressure to prevent wheel lock-up.
Brake Fade
A reduction in braking performance due to overheating of brake pads/shoes or boiling of brake fluid.
Brake Fluid
An incompressible hydraulic fluid (e.g., DOT 4, DOT 5.1) used to transmit force in the brake system.
Pad/Shoe Wear Indicator
A physical groove or mechanism that signals when brake friction material has worn to its minimum safe thickness.
APK (Algemene Periodieke Keuring)
The mandatory periodic vehicle inspection in the Netherlands, which includes a thorough check of the brake system.
E-Mark
An EU conformity mark required on all replacement brake components, indicating compliance with safety and environmental standards.
RVV 1990
The Dutch Road Traffic Act of 1990, containing regulations concerning vehicle equipment and road usage.

Further Learning and Practice

This lesson has provided a comprehensive overview of motorcycle braking systems. To solidify your understanding and prepare for your Dutch A1 Motorcycle Theory exam, consider exploring related topics and engaging in practice.

Learn more with these articles

Check out these practice sets


Search topics related to Disc, Drum, and ABS Brake Principles

Explore search topics learners often look for when studying Disc, Drum, and ABS Brake Principles. These topics reflect common questions about road rules, driving situations, safety guidance, and lesson level theory preparation for learners in the Netherlands.

motorcycle disc brake explanationhow do drum brakes work on a motorcycleABS motorcycle explaineddifference between disc and drum brakes for A1 licenceCBR theory test motorcycle brakeswhat is motorcycle ABS systempreventing wheel lock with motorcycle brakesDutch A1 motorcycle theory brakes

Related driving theory lessons for Disc, Drum, and ABS Brake Principles

Browse additional driving theory lessons that cover connected traffic rules, road signs, and common driving situations related to this topic. Improve your understanding of how different rules interact across everyday traffic scenarios.

Motorcycle Disc vs. Drum vs. ABS Brake System Comparison

Explore the detailed differences, performance characteristics, and suitability of disc brakes, drum brakes, and ABS for motorcycles in the Netherlands. Understand their mechanics and maintenance for safer riding and theory exams.

brake systemsdisc brakesdrum brakesABSmotorcycle technologycomparisonnlCBR exam
ABS Functionality and Limitations on Motorcycles lesson image

ABS Functionality and Limitations on Motorcycles

This lesson explains the function of an Anti-lock Braking System (ABS) on a motorcycle, detailing how it prevents wheel lock-up during heavy braking, thereby allowing the rider to maintain steering control. It clarifies that while ABS is a powerful safety aid, it does not defy physics and may sometimes increase stopping distances on loose surfaces. The content teaches riders to trust the system and apply the brakes fully and firmly in an emergency, letting the ABS manage traction.

Dutch Motorcycle Theory AEmergency Braking, Crash Avoidance and Accident Handling
View lesson
Deceleration Techniques and Controlled Braking lesson image

Deceleration Techniques and Controlled Braking

This lesson provides a comprehensive guide to safe and effective deceleration on a motorcycle. You will learn the principles of controlled braking, including the progressive application of both the front and rear brakes to maximize stopping power while maintaining stability. The content also explains the role of engine braking in managing speed and how the Anti-lock Braking System (ABS) helps prevent wheel lock-up during hard braking.

Dutch Motorcycle Theory (A2)Speed Management and Dynamic Limits
View lesson
Advanced Braking: Front and Rear Brake Coordination lesson image

Advanced Braking: Front and Rear Brake Coordination

This lesson moves beyond basic braking to teach advanced techniques for optimal stopping performance. You will learn that the front brake provides the majority of your stopping power due to forward weight transfer, but that skillful application of the rear brake is crucial for stability. The content covers the concept of progressive braking—squeezing the levers smoothly—to manage traction and prevent wheel lock, especially on motorcycles without ABS.

Dutch Motorcycle Theory (A2)Safe Following Distance and Braking Techniques
View lesson
Emergency Braking and the Role of ABS lesson image

Emergency Braking and the Role of ABS

This lesson prepares you for a critical situation: performing a maximum-force emergency stop. You will learn the correct body posture and braking technique to stop in the shortest possible distance without losing control. The content provides a clear explanation of how ABS works by rapidly pulsing the brakes to prevent the wheels from locking, allowing you to maintain steering control even during a panic stop.

Dutch Motorcycle Theory (A2)Safe Following Distance and Braking Techniques
View lesson
Brake System Checks and Fluid Maintenance lesson image

Brake System Checks and Fluid Maintenance

This lesson teaches riders how to conduct regular visual inspections of their motorcycle's braking system, a critical safety routine. It covers how to check the thickness of brake pads and look for signs of wear or damage on brake discs. The curriculum also explains the importance of monitoring the brake fluid level and condition, as old fluid can compromise braking performance, ensuring the system is always ready for an emergency.

Dutch Motorcycle Theory AVehicle Inspection, Maintenance, and Documentation
View lesson
Maximum Performance Emergency Braking lesson image

Maximum Performance Emergency Braking

This lesson focuses on the physical skill of an emergency stop, building on previous braking lessons. You will learn to adopt a braced body position, keeping your arms straight and looking ahead, not down. The content details the technique of applying both brakes rapidly but progressively to the point of maximum traction, and how to trust and utilize ABS if your motorcycle is equipped with it.

Dutch Motorcycle Theory (A2)Emergency Evasive Manoeuvres and Hazard Anticipation
View lesson
Use of Engine Braking and ABS (if equipped) lesson image

Use of Engine Braking and ABS (if equipped)

This lesson covers braking techniques beyond simply applying the brake levers. You will learn about the concept of engine braking (decelerating by releasing the throttle or downshifting) for controlled slowing. It also explains the function of an Anti-lock Braking System (ABS), a safety feature on some models that prevents wheels from locking during hard braking, allowing you to maintain steering control and reduce the chance of a skid.

Dutch Driving Theory AMSpeed Management & Braking
View lesson
Front vs. Rear Braking Dynamics lesson image

Front vs. Rear Braking Dynamics

This lesson explores the dynamic differences between using the front and rear brakes on a motorcycle. It explains that due to forward weight transfer under deceleration, the front brake provides the majority (around 70-80%) of the stopping power. The content details how to use both brakes in a coordinated manner for stable, effective braking, and clarifies the specific situations where the rear brake is particularly useful, such as for fine-tuning speed at low RPMs.

Dutch A1 Motorcycle TheoryBraking Systems and Emergency Stops
View lesson
Progressive Braking and Weight Transfer lesson image

Progressive Braking and Weight Transfer

This lesson teaches the technique of progressive braking, which involves applying the brakes smoothly and gradually rather than abruptly. This method allows the motorcycle's weight to transfer forward in a controlled manner, compressing the front suspension and increasing the size of the front tire's contact patch. This, in turn, maximizes available grip and allows for harder, safer braking without unsettling the chassis or locking a wheel.

Dutch A1 Motorcycle TheoryBraking Systems and Emergency Stops
View lesson
Brake Fade, Maintenance, and Inspection lesson image

Brake Fade, Maintenance, and Inspection

This lesson explains the phenomenon of brake fade, a temporary loss of braking performance caused by overheating, and how to avoid it. It also details the essential maintenance and pre-ride inspection points for a motorcycle's braking system. Learners will understand how to check brake fluid levels, inspect brake pads for wear, and assess the overall condition of brake lines and levers to ensure the system is always in safe, working order.

Dutch A1 Motorcycle TheoryBraking Systems and Emergency Stops
View lesson

Motorcycle Braking Scenarios and Safety with ABS

Learn how to handle critical braking situations like emergency stops and wet weather with motorcycle ABS. Understand common errors, legal requirements (RVV 1990), and best practices for safe deceleration in Dutch traffic.

brakingABSemergency brakingwet roadssafetyRVV 1990scenariosnl
ABS Functionality and Limitations on Motorcycles lesson image

ABS Functionality and Limitations on Motorcycles

This lesson explains the function of an Anti-lock Braking System (ABS) on a motorcycle, detailing how it prevents wheel lock-up during heavy braking, thereby allowing the rider to maintain steering control. It clarifies that while ABS is a powerful safety aid, it does not defy physics and may sometimes increase stopping distances on loose surfaces. The content teaches riders to trust the system and apply the brakes fully and firmly in an emergency, letting the ABS manage traction.

Dutch Motorcycle Theory AEmergency Braking, Crash Avoidance and Accident Handling
View lesson
Emergency Braking and the Role of ABS lesson image

Emergency Braking and the Role of ABS

This lesson prepares you for a critical situation: performing a maximum-force emergency stop. You will learn the correct body posture and braking technique to stop in the shortest possible distance without losing control. The content provides a clear explanation of how ABS works by rapidly pulsing the brakes to prevent the wheels from locking, allowing you to maintain steering control even during a panic stop.

Dutch Motorcycle Theory (A2)Safe Following Distance and Braking Techniques
View lesson
Deceleration Techniques and Controlled Braking lesson image

Deceleration Techniques and Controlled Braking

This lesson provides a comprehensive guide to safe and effective deceleration on a motorcycle. You will learn the principles of controlled braking, including the progressive application of both the front and rear brakes to maximize stopping power while maintaining stability. The content also explains the role of engine braking in managing speed and how the Anti-lock Braking System (ABS) helps prevent wheel lock-up during hard braking.

Dutch Motorcycle Theory (A2)Speed Management and Dynamic Limits
View lesson
Emergency Braking Scenarios for Motorcycles lesson image

Emergency Braking Scenarios for Motorcycles

This lesson outlines the step-by-step procedure for executing a controlled emergency stop in a straight line. It emphasizes keeping the motorcycle upright, looking ahead, and applying both brakes firmly and progressively up to the point of maximum traction (or ABS activation). Understanding this technique is critical for minimizing stopping distance in a sudden hazard scenario and is a key skill assessed in practical motorcycle training.

Dutch A1 Motorcycle TheoryBraking Systems and Emergency Stops
View lesson
Use of Engine Braking and ABS (if equipped) lesson image

Use of Engine Braking and ABS (if equipped)

This lesson covers braking techniques beyond simply applying the brake levers. You will learn about the concept of engine braking (decelerating by releasing the throttle or downshifting) for controlled slowing. It also explains the function of an Anti-lock Braking System (ABS), a safety feature on some models that prevents wheels from locking during hard braking, allowing you to maintain steering control and reduce the chance of a skid.

Dutch Driving Theory AMSpeed Management & Braking
View lesson
Maximum Performance Emergency Braking lesson image

Maximum Performance Emergency Braking

This lesson focuses on the physical skill of an emergency stop, building on previous braking lessons. You will learn to adopt a braced body position, keeping your arms straight and looking ahead, not down. The content details the technique of applying both brakes rapidly but progressively to the point of maximum traction, and how to trust and utilize ABS if your motorcycle is equipped with it.

Dutch Motorcycle Theory (A2)Emergency Evasive Manoeuvres and Hazard Anticipation
View lesson
Braking Techniques at High Speed (voor- en achterrem) lesson image

Braking Techniques at High Speed (voor- en achterrem)

This lesson provides a detailed breakdown of high-speed braking techniques, emphasizing the correct balance and application of the front ('voorrem') and rear ('achterrem') brakes. It explains the physics of weight transfer under braking and why the front brake provides the majority of stopping power. Techniques for progressive, smooth application to avoid overloading the front tire and losing traction are covered, ensuring riders can slow down quickly and safely from any speed.

Dutch Motorcycle Theory AAdvanced Riding Techniques and High-Speed Control
View lesson
Principles of Emergency Braking (noodsremmen) lesson image

Principles of Emergency Braking (noodsremmen)

This lesson teaches the principles of performing a controlled emergency stop ('noodsremmen') to achieve the shortest possible stopping distance without losing control. It details the technique of applying both brakes firmly and progressively, managing the forward weight transfer, and maintaining an upright body posture to maximize braking efficiency. The content emphasizes braking in a straight line and looking ahead to where you want to stop, not at the obstacle.

Dutch Motorcycle Theory AEmergency Braking, Crash Avoidance and Accident Handling
View lesson
Advanced Braking: Front and Rear Brake Coordination lesson image

Advanced Braking: Front and Rear Brake Coordination

This lesson moves beyond basic braking to teach advanced techniques for optimal stopping performance. You will learn that the front brake provides the majority of your stopping power due to forward weight transfer, but that skillful application of the rear brake is crucial for stability. The content covers the concept of progressive braking—squeezing the levers smoothly—to manage traction and prevent wheel lock, especially on motorcycles without ABS.

Dutch Motorcycle Theory (A2)Safe Following Distance and Braking Techniques
View lesson
Dutch Motorway Law (snelwegwet) and Lane Discipline lesson image

Dutch Motorway Law (snelwegwet) and Lane Discipline

This lesson covers the specific articles of the Dutch Road Traffic Act that apply to motorways, with a primary focus on the strict rule of keeping to the rightmost available lane unless overtaking. It explains the legal and safety reasons for only passing on the left and discusses the correct positioning within a lane for maximum visibility and safety. The content also addresses the nuances of lane usage during heavy congestion, ensuring riders comply with the law and contribute to smooth traffic flow.

Dutch Motorcycle Theory AHighway and Tunnel Riding Strategies
View lesson

Frequently asked questions about Disc, Drum, and ABS Brake Principles

Find clear answers to common questions learners have about Disc, Drum, and ABS Brake Principles. Learn how the lesson is structured, which driving theory objectives it supports, and how it fits into the overall learning path of units and curriculum progression in the Netherlands. These explanations help you understand key concepts, lesson flow, and exam focused study goals.

What is the main difference between disc and drum brakes on a motorcycle?

Disc brakes use a caliper to squeeze a rotor attached to the wheel, offering better heat dissipation and stopping power. Drum brakes enclose the braking mechanism within a drum attached to the wheel, generally providing less performance but being more protected from the elements.

How does ABS help a motorcycle rider?

ABS prevents the wheels from locking up under heavy braking. By rapidly pulsing the brake pressure, it allows the rider to maintain steering control and often reduces stopping distances, especially on inconsistent surfaces. This is a critical safety feature for A1 riders.

Are disc brakes always better than drum brakes for an A1 motorcycle?

Generally, disc brakes offer superior performance and feel, making them preferred for front brakes and often rear brakes on modern motorcycles, including A1 category bikes. Drum brakes are simpler and cheaper, sometimes found on rear wheels of smaller or older models, but typically provide less effective braking.

Will I be tested on brake types in the Dutch A1 theory exam?

Yes, the CBR theory exam for the A1 licence includes questions about vehicle technology, including the principles of braking systems like disc, drum, and ABS. Understanding these concepts is essential for passing.

Can ABS be fitted to any motorcycle?

Modern A1 motorcycles are increasingly equipped with ABS as standard or as an option. While aftermarket ABS kits exist, they are complex and not commonly fitted. The lesson focuses on understanding systems typically found on standard A1 licence-appropriate motorcycles.

Continue your Dutch driving theory learning journey

Dutch road signsDutch article topicsSearch Dutch road signsDutch driving theory homeDutch road sign categoriesSearch Dutch theory articlesDutch driving theory coursesDutch Driving Theory B courseDutch driving theory articlesDutch driving theory practiceDutch practice set categoriesDutch Driving Theory AM courseDutch Motorcycle Theory A courseDutch A1 Motorcycle Theory courseDutch Motorcycle Theory (A2) courseSearch Dutch driving theory practiceTowing, Trailers, and Loads unit in Dutch Driving Theory BRoadway Access & Navigation unit in Dutch Driving Theory AMVehicle Positioning and Lane Use unit in Dutch Driving Theory BHuman Factors & Risk Management unit in Dutch Driving Theory AMInfrastructure and Special Roads unit in Dutch Driving Theory BLegal Foundations & Vehicle Types unit in Dutch Driving Theory AMLegal Responsibilities & Incident Procedures unit in Dutch Driving Theory AMFront vs. Rear Braking Dynamics lesson in Braking Systems and Emergency StopsHighway (Autosnelweg) Rules for Motorcycles unit in Dutch Motorcycle Theory (A2)Disc, Drum, and ABS Brake Principles lesson in Braking Systems and Emergency StopsAdvanced Riding Techniques and High-Speed Control unit in Dutch Motorcycle Theory AProgressive Braking and Weight Transfer lesson in Braking Systems and Emergency StopsBrake Fade, Maintenance, and Inspection lesson in Braking Systems and Emergency StopsEmergency Braking Scenarios for Motorcycles lesson in Braking Systems and Emergency StopsAccident Management, Legal Responsibilities & Substance Use unit in Dutch A1 Motorcycle Theory