
This lesson focuses on a vital aspect of motorcycle safety: the braking system. You'll learn how to perform essential visual checks on your brake pads and discs, and understand why maintaining your brake fluid is crucial for both safe riding and passing your Category A theory exam. Proper brake maintenance is key to riding confidently in the Netherlands.

For riders undertaking the Dutch Motorcycle Theory – Category A Comprehensive Preparation, understanding and meticulously maintaining your motorcycle's braking system is paramount. The braking system is arguably the most critical safety feature on any motorcycle, directly influencing your ability to control the vehicle, react to hazards, and prevent accidents. A well-maintained braking system ensures optimal stopping power, predictable response, and ultimately, your safety on Dutch roads. Neglecting any part of this system can lead to compromised performance, increased stopping distances, and severe consequences.
This lesson delves into the detailed visual and functional inspection of all major motorcycle brake components, including brake pads, discs, brake fluid, and the essential feel of your levers and pedals. We will also cover the necessary maintenance actions required to keep your braking system in peak condition, ensuring it is always ready to perform under all riding circumstances.
The efficiency of your motorcycle's braking system is the single most critical factor for rider safety. Every time you ride, your motorcycle's kinetic energy (the energy of motion) must be effectively dissipated when you want to slow down or stop. The braking system performs this crucial task by converting kinetic energy into heat through friction. If any component of this system is degraded or faulty, it can dramatically increase your stopping distance, lead to a loss of vehicle control, and potentially result in severe injury or even fatality.
Dutch traffic regulations, particularly the RVV 1990 and Wegenverkeerswet, legally obligate every rider to maintain a road-worthy vehicle. A defective braking system is not only a significant safety hazard but also a legal fault that can lead to administrative penalties, fines, or even the restriction of your motorcycle from road use. Regular visual checks, coupled with timed fluid replacement and adherence to manufacturer guidelines, are essential practices that significantly reduce the probability of sudden component failure, ensuring your motorcycle remains safe and legally compliant.
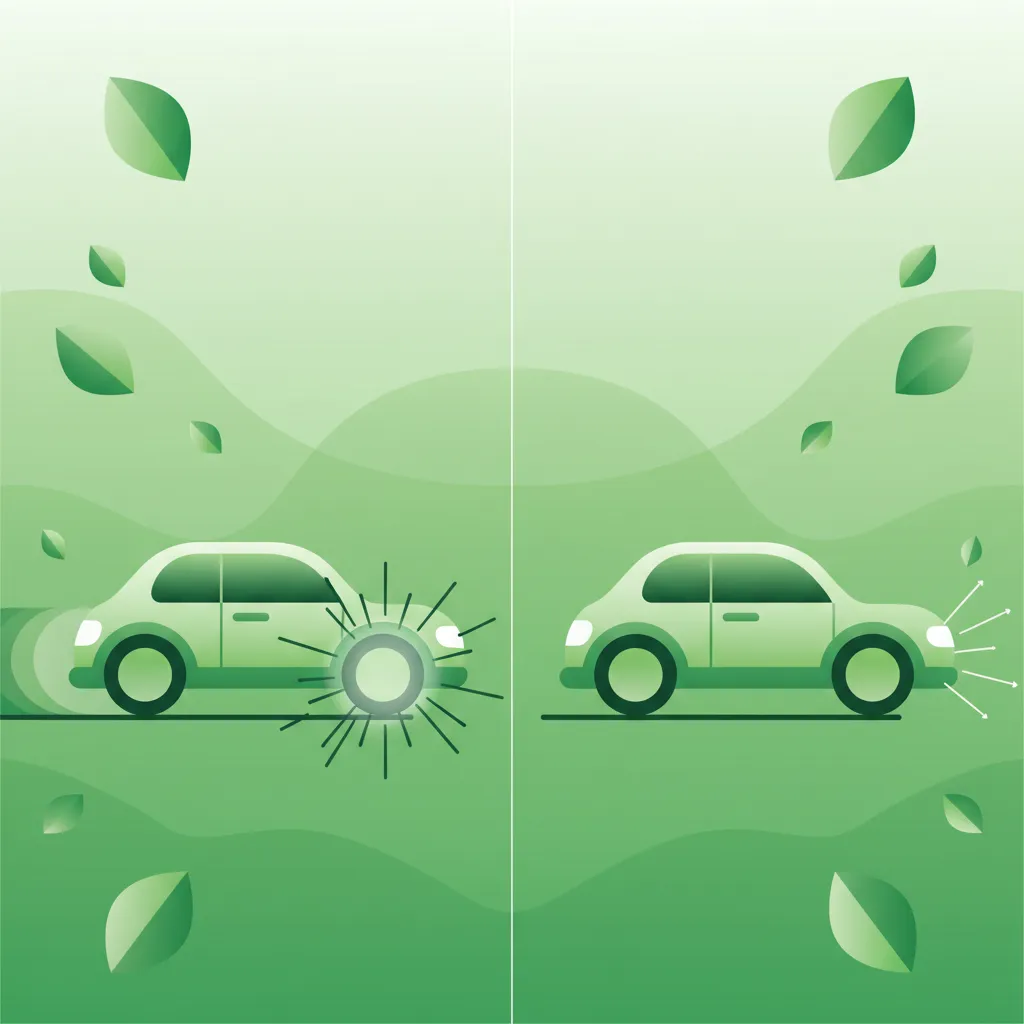
Brake pads are consumable components designed to create friction against the brake disc, converting your motorcycle's kinetic energy into heat and slowing it down. Understanding their wear and condition is crucial for effective braking.
Brake pad wear refers to the progressive thinning of the friction material that is attached to the brake caliper. This material gradually diminishes with every application of the brakes. Different types of pads, such as organic or sintered/metallic, have varying wear characteristics. Organic pads tend to be softer, quieter, and generally wear faster, while sintered or metallic pads offer higher wear resistance but can generate more heat and be noisier.
Regular visual inspection of your brake pads is a fundamental safety routine. You should be able to see the pad surface by looking through the caliper opening. Pay attention to both the front and rear brake pads, as they can wear at different rates depending on your riding style and motorcycle's braking bias.
A critical safety threshold for brake pads is their minimum allowable thickness. For disc brakes on motorcycles, the friction material must be at least 1 millimetre (≥ 1 mm) thick. This minimum thickness guarantees sufficient friction surface to ensure effective and safe braking. Pads that fall below this 1 mm threshold are severely worn and must be replaced immediately before the motorcycle is ridden again. Continuing to ride with pads thinner than 1 mm is not only highly dangerous, significantly increasing your stopping distance, but also illegal under Dutch traffic regulations (RVV 1990 Art. 57).
Pads below the 1 mm thickness threshold must be replaced before the motorcycle is ridden again. Ignoring this can lead to catastrophic brake failure and is a serious legal violation.
A common misconception is that if pads look dark or dirty, they are new or in good condition. The colour of the pads does not indicate their thickness or remaining life. Only a visual check of the friction material's depth, ideally with a calibrated gauge for precision, can accurately determine their wear level. For example, if your front brake pads measure 1.2 mm, they are acceptable. However, if your rear pads are at 0.8 mm, they require immediate replacement.
The brake disc, or rotor, is the rotating component that the brake pads clamp onto. It is typically made of steel, though some high-performance bikes use carbon-ceramic materials. The disc plays a crucial role in converting kinetic energy into heat.
The surface integrity of your brake discs is paramount for consistent and effective braking. You must regularly inspect the discs for any signs of damage:
A common misunderstanding among riders is that "scoring is just cosmetic." However, deep scoring significantly reduces the brake's effectiveness and can lead to dangerous situations.
Brake discs also have a minimum allowable thickness, specified by the motorcycle manufacturer. This limit ensures the disc can safely dissipate heat and withstand braking forces. Exceeding this wear limit means the disc is too thin, making it prone to overheating, warping, and cracking, especially under heavy braking. Always refer to your motorcycle's service manual for the exact minimum thickness, though typical wear limits are around 0.5 mm reduction from the original thickness. If a disc reaches or goes below its minimum thickness, it must be replaced.
Brake fluid is a hydraulic fluid stored in the master cylinder reservoir. It transmits the force from your brake lever or pedal to the calipers, which then apply pressure to the brake pads. Its level and condition are vital for responsive and reliable braking.
Periodically check the brake fluid level in the master cylinder reservoir. Most reservoirs have "MIN" and "MAX" marks. The fluid level should always be between these two indicators. A level consistently below "MIN" could indicate a leak in the system or severely worn pads (as the fluid fills the space left by worn pads).
The colour of the brake fluid is also an important indicator of its condition. Fresh brake fluid is typically clear or amber. Over time, as fluid degrades and absorbs moisture, it can turn dark brown or even black, or become milky in appearance. Dark or milky fluid signals contamination and necessitates a fluid change.
Brake fluid is hygroscopic, meaning it absorbs moisture from the air over time. This absorbed water significantly lowers the fluid's boiling point. Under heavy or prolonged braking, the heat generated can cause the water content in the fluid to boil, creating vapour bubbles within the hydraulic system. This phenomenon, known as vapor lock, is extremely dangerous. Vapour is compressible, unlike fluid, so when you apply the brakes, the lever or pedal will go soft and spongy, or even straight to the handlebar/footrest, resulting in a sudden and complete loss of braking power.
To prevent vapor lock, brake fluid must be replaced at least every two years, or according to the manufacturer's recommendations (whichever comes first), regardless of mileage. Many manufacturers recommend fluid changes every 24,000 km or two years. Ignoring this critical maintenance task is a major contributor to reduced braking performance and potential brake fade.
Brake fluids are classified by DOT ratings (e.g., DOT 3, DOT 4, DOT 5, DOT 5.1), which refer to their boiling point and chemical composition. Most modern motorcycles use DOT 4 brake fluid. High-performance motorcycles may specify DOT 5.1, which has a higher boiling point. It is absolutely crucial to use the correct DOT rating specified for your motorcycle. Using a lower DOT rating fluid than recommended will mean a lower boiling point, which can compromise braking performance under thermal stress. Never mix different DOT fluid types unless explicitly stated by the manufacturer, as some are not compatible (e.g., DOT 5 is silicone-based and should not be mixed with DOT 3, 4, or 5.1).
When topping up or changing brake fluid, always use new, sealed fluid of the correct DOT rating to avoid introducing moisture or contaminants.
The tactile response you experience when you apply the front brake lever or rear brake pedal provides crucial feedback about the health of your motorcycle's hydraulic braking system. This is often referred to as "lever/pedal feel."
A healthy braking system should provide a firm, consistent lever or pedal feel. When you squeeze the lever or press the pedal, you should feel solid resistance, and the brakes should engage progressively. The travel (how far the lever moves before the brakes fully engage) should also be consistent and within a normal range (typically 20-30 mm for the lever).
A "spongy" or "mushy" feel is a red flag. This indicates that there is air or excessive moisture in the hydraulic system, or potentially a fluid leak. Air, being compressible, prevents the hydraulic pressure from being fully transmitted to the calipers, leading to reduced braking power and increased lever/pedal travel. A sudden increase in lever travel from, for example, 30 mm to 45 mm, demands immediate investigation.
Inconsistent lever or pedal feel, such as a lever that feels firm one moment and soft the next, can signal a hidden internal leak, a faulty master cylinder, or air ingress into the system. It is never "just a comfort issue"; it always signals potentially unsafe hydraulic conditions. Any noticeable change in brake feel, especially a sudden softening or excessive travel, must be investigated by a qualified mechanic or addressed by bleeding the system to remove air. Under RVV 1990 Art. 56, no functional impairment of the braking system is permissible.
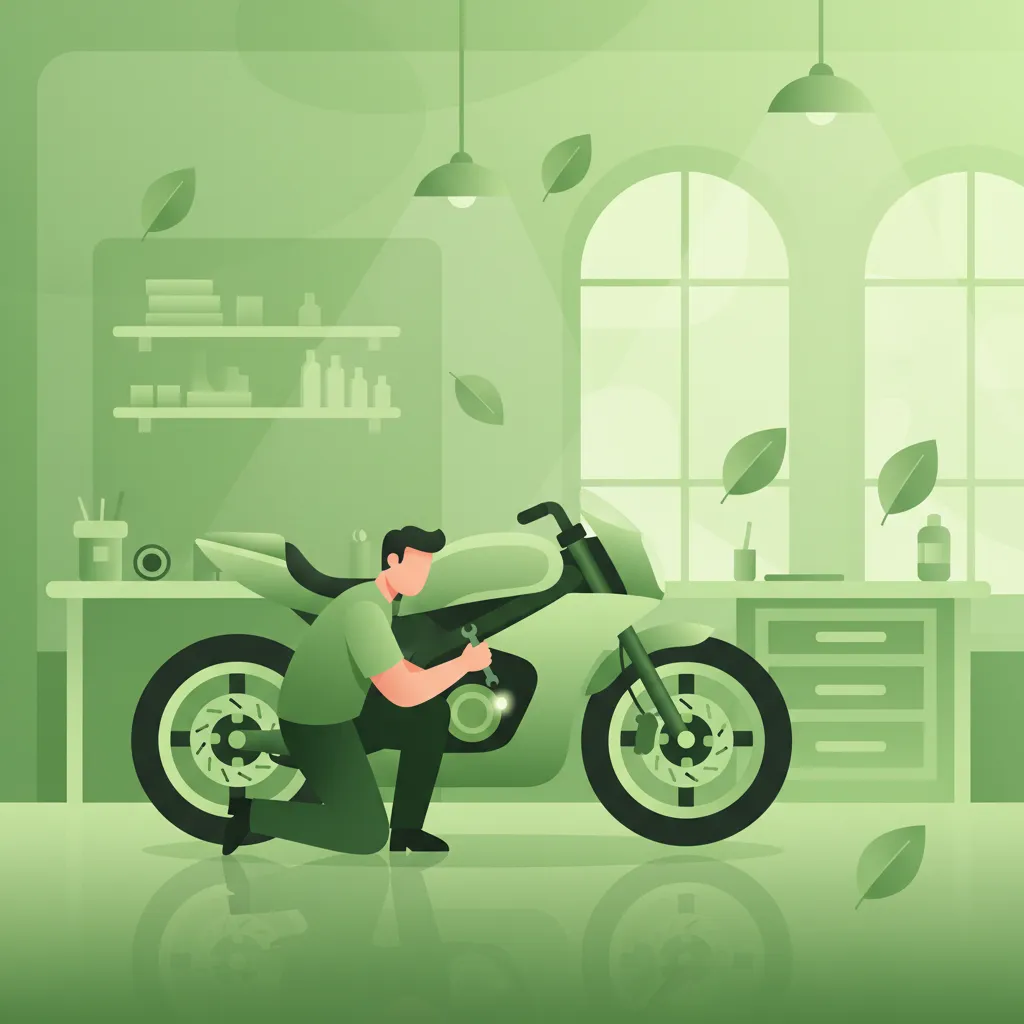
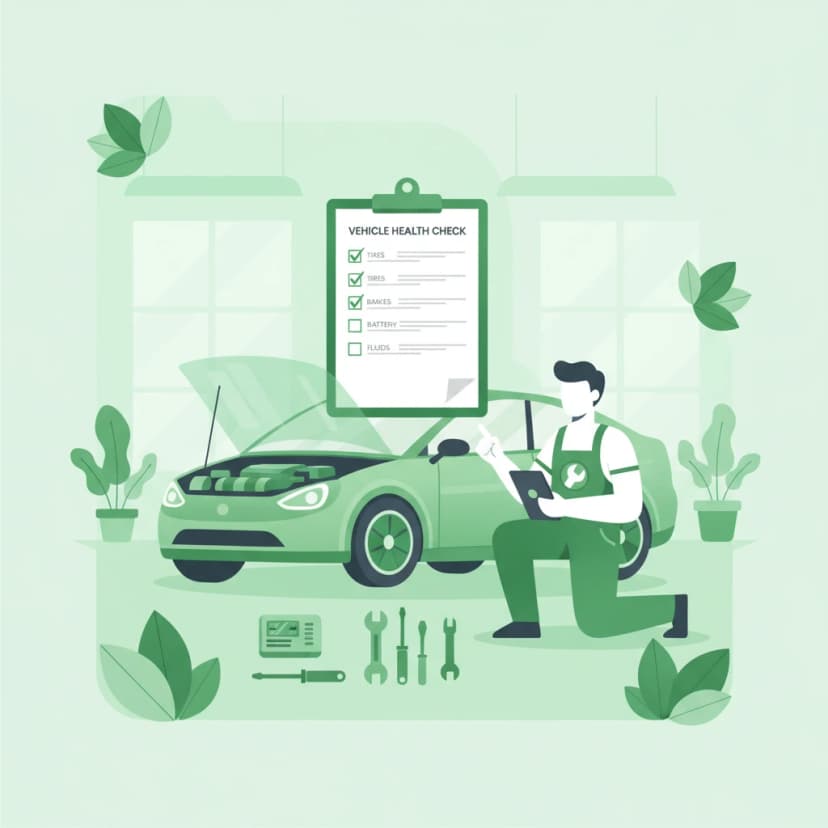
A systematic visual inspection of your motorcycle's braking system is a fundamental safety practice that every rider should perform regularly. This procedure helps you identify potential issues before they become critical safety hazards.
Prepare Your Motorcycle: Park your motorcycle on a level surface. Engage the centre stand or use a paddock stand to lift the wheels off the ground, if possible, allowing for easier rotation and inspection.
Clean the Caliper Area: Before inspection, clean any dirt, grime, or brake dust from around the brake calipers, pads, and discs. This exposes the components for a clear view.
Inspect Brake Pad Thickness: Visually inspect the brake pads on both front and rear wheels. Look for the friction material through the caliper opening. Ensure the thickness of the friction material is at least 1 mm. If you have a calibrated gauge, use it for accuracy.
Examine Brake Disc Surface: Carefully inspect the surface of both brake discs for any signs of cracks, deep grooves, or excessive scoring. Also, check for any discolouration that might indicate overheating. Rotate the wheel slowly to inspect the entire disc surface.
Check Brake Fluid Reservoir: Locate the master cylinder reservoirs (usually one for the front brake on the handlebar, and one for the rear brake near the foot pedal). Verify that the brake fluid level is always between the "MIN" and "MAX" marks. Observe the fluid's colour – it should be clear or amber, not dark or milky.
Look for Hydraulic Leaks: Inspect around the master cylinders, the brake calipers, and along the entire length of the brake hoses and their connections for any visible signs of fluid leaks. Even a small drop of fluid can indicate a serious problem. Check the brake pistons in the calipers for fluid residue.
Test Lever/Pedal Feel: With the engine off, firmly but briefly squeeze the front brake lever and press the rear brake pedal. Pay attention to the tactile response. It should feel firm and consistent, with no sponginess or excessive travel before the brakes engage.
Check Hoses and Lines: Inspect brake hoses for any cracks, fraying, bulges, or signs of deterioration. Ensure they are routed correctly and not rubbing against other components.
This comprehensive visual inspection procedure should be performed at least every two months. Additionally, it is mandatory to perform a thorough check before embarking on any long journey exceeding 100 kilometres. Thoroughness is key; a quick glance is often insufficient to catch subtle but critical issues.
Adhering to manufacturer-defined schedules for brake component maintenance is essential for safety and regulatory compliance. These schedules cover brake pad replacement, disc resurfacing or replacement, brake fluid changes, and system bleeding.
Typical maintenance intervals (always verify with your specific motorcycle's owner's manual):
Failure to adhere to these maintenance intervals can be considered neglect under Dutch traffic regulations, specifically RVV 1990 Art. 57, and can lead to serious safety issues. A common misunderstanding is that "if brakes feel OK, the fluid is fine." However, brake fluid can degrade chemically and absorb moisture without an immediately perceptible change in feel, until a critical braking event causes vapor lock.
In the Netherlands, specific laws and regulations govern the condition and functionality of motorcycle braking systems. Riders are legally responsible for ensuring their vehicle meets these standards.
The Reglement Verkeersregels en Verkeerstekens 1990 (RVV 1990), Article 56, states that:
A vehicle must be kept in a condition that does not endanger road safety.
This is a fundamental safety duty applicable to all motor vehicles on Dutch public roads, including motorcycles. It establishes a general obligation for riders to maintain their motorcycles in a safe operational state. This applies directly to the braking system; if your brakes are faulty and pose a risk, you are in violation of this article. For example, a rider replacing worn pads before a ride is complying, whereas a rider continuing to ride with pads below 1 mm is in violation.
Article 57 of the RVV 1990 specifically addresses the braking system:
The braking system must be functional and free of defects that could impair performance.
This article mandates that your motorcycle's brakes must be fully functional and free from any faults that could compromise their effectiveness. This includes ensuring correct pad thickness, disc integrity, and a leak-free, properly pressurized hydraulic system. For example, changing brake fluid every two years and regularly inspecting discs for cracks demonstrates compliance, while ignoring a visible leak in a caliper constitutes a violation.
The Algemene Periodieke Keuring (APK) is the mandatory periodic technical inspection for vehicles in the Netherlands, including motorcycles.
Passing an APK inspection does not negate the need for regular interim checks. Brake components can deteriorate between inspections, and you are always responsible for your vehicle's roadworthiness.
Understanding common brake system failures and how to avoid them is crucial for every rider.
The performance and wear rate of your braking system can vary significantly depending on various external and operational factors. Being aware of these conditional variations helps you adapt your maintenance routine.
Proper brake maintenance is not just about avoiding fines; it's a direct investment in your safety and the safety of others on the road.
Applying your knowledge in realistic scenarios helps solidify understanding and prepares you for real-world riding decisions.
Setting: A typical city street in the Netherlands, light rain falling, during your 30 km commute with a passenger and a backpack. Relevant Rules: Brake pads must be ≥ 1 mm. Brake fluid must be within MIN-MAX levels and in good condition. Wet conditions reduce friction. Correct Behavior: Before departure, you perform a quick inspection. Both front and rear brake pads are at a healthy 2 mm. The brake fluid level is within limits and shows a clear amber colour. However, you notice a slight sponginess in the front brake lever that wasn't there yesterday. Recognizing this as a potential air bubble or moisture issue, you decide to bleed the front brake system immediately before starting your journey. Incorrect Behavior: You skip the inspection, thinking it's "just a short commute." While approaching a traffic light, a car suddenly stops ahead. You apply the brakes but experience a longer stopping distance than expected due to the spongy front brake, leading to a rear-end collision with the car. Explanation: Wet conditions amplify any existing brake inefficiency. The slight sponginess, if unaddressed, compromises stopping power and dramatically increases accident risk in challenging conditions.
Setting: Planning a 300 km highway trip on a sunny day, with your motorcycle fully loaded with luggage. Relevant Rules: Brake fluid must be replaced every two years. Brake disc thickness must meet the manufacturer's minimum. High thermal loads require optimal brake component integrity. Correct Behavior: A week before the trip, you conduct a thorough inspection. You measure the front disc thickness at 2.0 mm and the rear at 1.6 mm, both well above the manufacturer's minimums. You check your service records and note the brake fluid was last changed 18 months ago, so it's still within the 2-year limit. You top up the fluid to the MAX mark and decide to schedule a brake pad replacement for after the trip, knowing the high mileage will wear them down further. Incorrect Behavior: You give the discs a quick glance, thinking they "look clean" and ignore the actual thickness check. During high-speed braking on an exit ramp, the already thin rear disc, subjected to intense thermal load from the heavy luggage, suddenly cracks. This results in a complete loss of rear braking power, causing an unstable and dangerous emergency situation. Explanation: High thermal loads combined with inadequate disc thickness can lead to catastrophic failure. Regular, precise measurement is crucial, especially before demanding rides.
Maintaining your motorcycle's braking system is a continuous commitment to safety and legal compliance. By adhering to a structured inspection routine and timely maintenance, you ensure optimal braking performance, reduce accident risk, and fulfil your responsibilities as a rider in the Netherlands.
Here is your essential checklist for every motorcycle rider:
This lesson provides the foundational knowledge for maintaining your motorcycle's braking system. Always refer to your motorcycle's specific owner's manual for precise specifications and recommended service procedures. If you are unsure about any aspect of brake maintenance, consult a qualified motorcycle mechanic.
Lesson content overview
Explore all units and lessons included in this driving theory course.
Explore search topics learners often look for when studying Brake System Checks and Fluid Maintenance. These topics reflect common questions about road rules, driving situations, safety guidance, and lesson level theory preparation for learners in the Netherlands.
Browse additional driving theory lessons that cover connected traffic rules, road signs, and common driving situations related to this topic. Improve your understanding of how different rules interact across everyday traffic scenarios.
Understand the legal obligations for maintaining your motorcycle's brakes in the Netherlands, including RVV 1990 articles and APK inspection criteria. Ensure your braking system is road-legal and safe for all Dutch traffic situations.
This lesson explains the legal framework for the mandatory periodic technical inspection (APK) as it applies to motorcycles in the Netherlands, although noting its specific applicability rules. It outlines the key safety and environmental components that are scrutinized during the inspection, such as brakes, tires, lighting, and exhaust emissions. Understanding these criteria helps riders maintain their vehicle in a constant state of roadworthiness and prepare for the formal inspection when required.

Your brakes are your most important safety feature. This lesson explains how to conduct a basic inspection of your braking system. For hydraulic brakes, you will learn how to check the brake fluid level and condition through the reservoir sight glass. The lesson also covers a visual inspection of brake pads for wear and checking brake discs for scoring or damage. Finally, it describes how to test the feel of the brake levers for firmness, ensuring the system is functioning correctly.
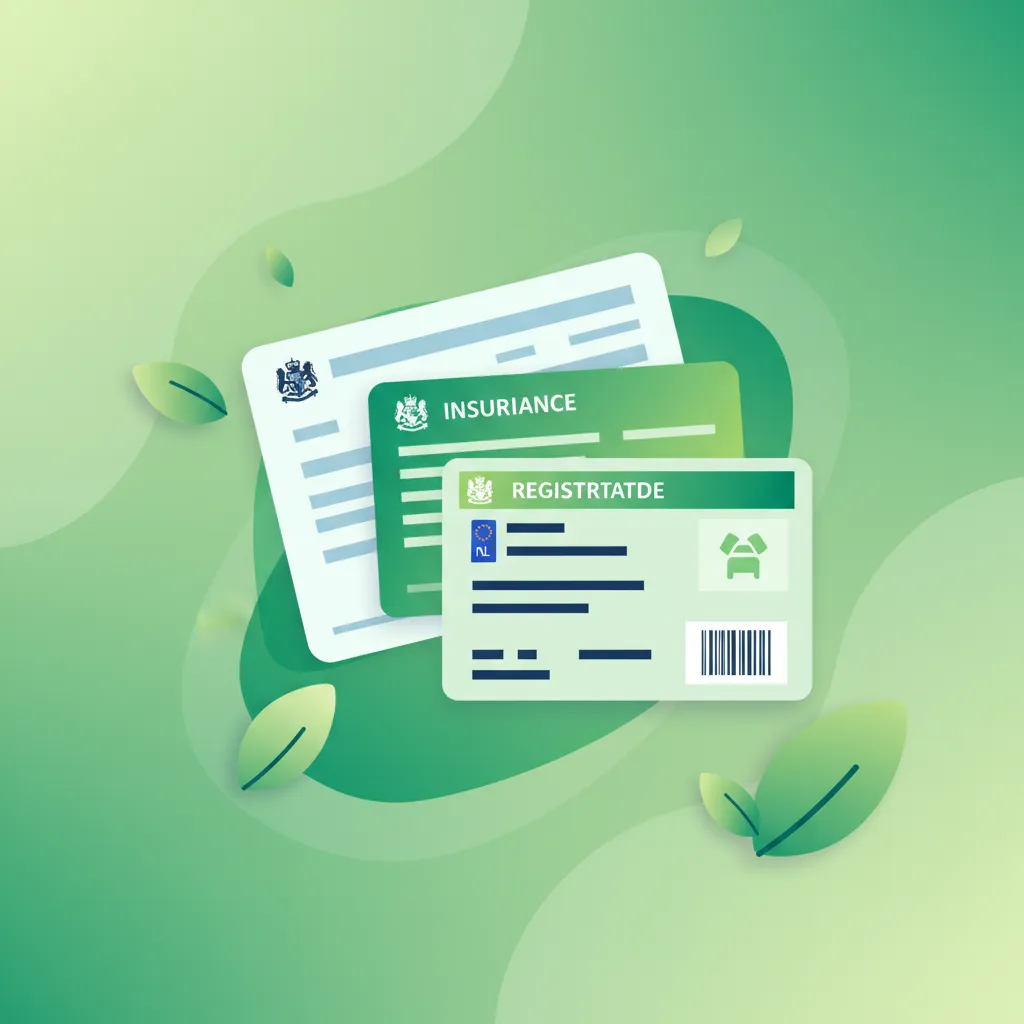
This lesson provides a definitive list of the documents a motorcyclist must carry at all times when riding in the Netherlands. It specifies the requirement for a valid driving license ('rijbewijs') for the correct category, the vehicle registration card ('kentekenbewijs'), and proof of valid third-party liability insurance ('verzekeringsbewijs'). The content clarifies that failure to produce these documents during a police check can result in significant fines and legal complications.
This lesson covers the mandatory lighting and signaling equipment for A2 motorcycles under Dutch law, ensuring you remain visible and communicate your intentions correctly. You will learn the rules for using headlights, taillights, turn signals, and brake lights in various conditions, including daytime and adverse weather. The content also addresses the importance of maintaining this equipment and using hand signals as a valid secondary method of communication in traffic.

This lesson outlines the rider's responsibility for ensuring their motorcycle's engine and exhaust system comply with Dutch legal standards. It covers basic but vital pre-ride checks, such as verifying engine oil and coolant levels. A significant focus is placed on exhaust compliance, explaining the regulations regarding noise levels ('geluidseisen') and the rules surrounding aftermarket exhaust systems, including the requirement for approved markings and the use of 'dB-killers'.
This lesson explains the purpose and frequency of the APK (Algemene Periodieke Keuring), the mandatory periodic safety and emissions inspection for vehicles in the Netherlands. You will understand what aspects of the car are checked, including brakes, steering, lights, and tires. The curriculum also details the essential documents you must have with you when driving, including the vehicle registration certificate (kentekenbewijs) and proof of insurance. Failure to comply with these requirements can result in significant fines.

This lesson provides a comprehensive guide to safe and effective deceleration on a motorcycle. You will learn the principles of controlled braking, including the progressive application of both the front and rear brakes to maximize stopping power while maintaining stability. The content also explains the role of engine braking in managing speed and how the Anti-lock Braking System (ABS) helps prevent wheel lock-up during hard braking.

This lesson teaches the principles of performing a controlled emergency stop ('noodsremmen') to achieve the shortest possible stopping distance without losing control. It details the technique of applying both brakes firmly and progressively, managing the forward weight transfer, and maintaining an upright body posture to maximize braking efficiency. The content emphasizes braking in a straight line and looking ahead to where you want to stop, not at the obstacle.

This lesson explains the precise legal definition of a Category A1 motorcycle, including the maximum 125cc displacement and 11 kW power output. It outlines the entire CBR licensing pathway, from meeting the minimum age requirement to passing both the theory and practical exams. Key administrative obligations such as vehicle registration (kenteken), mandatory insurance, and roadworthiness inspections (APK) are also detailed, ensuring a full understanding of legal compliance.

This lesson provides a detailed breakdown of high-speed braking techniques, emphasizing the correct balance and application of the front ('voorrem') and rear ('achterrem') brakes. It explains the physics of weight transfer under braking and why the front brake provides the majority of stopping power. Techniques for progressive, smooth application to avoid overloading the front tire and losing traction are covered, ensuring riders can slow down quickly and safely from any speed.
Learn to identify and understand common problems affecting motorcycle brake feel and performance. This lesson covers diagnosing issues like spongy levers, inconsistent braking, and hydraulic system faults for safer riding.

This lesson explains the phenomenon of brake fade, a temporary loss of braking performance caused by overheating, and how to avoid it. It also details the essential maintenance and pre-ride inspection points for a motorcycle's braking system. Learners will understand how to check brake fluid levels, inspect brake pads for wear, and assess the overall condition of brake lines and levers to ensure the system is always in safe, working order.
Your brakes are your most important safety feature. This lesson explains how to conduct a basic inspection of your braking system. For hydraulic brakes, you will learn how to check the brake fluid level and condition through the reservoir sight glass. The lesson also covers a visual inspection of brake pads for wear and checking brake discs for scoring or damage. Finally, it describes how to test the feel of the brake levers for firmness, ensuring the system is functioning correctly.

This lesson explains the mechanical and hydraulic principles behind the common types of motorcycle brakes. It compares the operation and performance characteristics of disc brakes and drum brakes. The function of an Anti-lock Braking System (ABS) is also detailed, explaining how it prevents wheel lock-up during hard braking, thereby allowing the rider to maintain steering control and reduce stopping distances in many situations.

This lesson explains the function of an Anti-lock Braking System (ABS) on a motorcycle, detailing how it prevents wheel lock-up during heavy braking, thereby allowing the rider to maintain steering control. It clarifies that while ABS is a powerful safety aid, it does not defy physics and may sometimes increase stopping distances on loose surfaces. The content teaches riders to trust the system and apply the brakes fully and firmly in an emergency, letting the ABS manage traction.

This lesson teaches the technique of progressive braking, which involves applying the brakes smoothly and gradually rather than abruptly. This method allows the motorcycle's weight to transfer forward in a controlled manner, compressing the front suspension and increasing the size of the front tire's contact patch. This, in turn, maximizes available grip and allows for harder, safer braking without unsettling the chassis or locking a wheel.
This lesson explores the dynamic differences between using the front and rear brakes on a motorcycle. It explains that due to forward weight transfer under deceleration, the front brake provides the majority (around 70-80%) of the stopping power. The content details how to use both brakes in a coordinated manner for stable, effective braking, and clarifies the specific situations where the rear brake is particularly useful, such as for fine-tuning speed at low RPMs.

This lesson moves beyond basic braking to teach advanced techniques for optimal stopping performance. You will learn that the front brake provides the majority of your stopping power due to forward weight transfer, but that skillful application of the rear brake is crucial for stability. The content covers the concept of progressive braking—squeezing the levers smoothly—to manage traction and prevent wheel lock, especially on motorcycles without ABS.
Find clear answers to common questions learners have about Brake System Checks and Fluid Maintenance. Learn how the lesson is structured, which driving theory objectives it supports, and how it fits into the overall learning path of units and curriculum progression in the Netherlands. These explanations help you understand key concepts, lesson flow, and exam focused study goals.
It's recommended to visually inspect your brake pads and discs before every ride as part of your pre-ride check. For a more thorough check, consult your motorcycle's manual, but regular visual checks are essential for safety and will help you answer theory questions correctly.
Worn brake pads typically show significantly reduced thickness. You might also hear grinding noises when braking, or feel a spongy sensation in the brake lever. In the theory exam, you'll be asked to identify signs of wear that compromise safety.
Brake fluid is hygroscopic, meaning it absorbs moisture from the atmosphere over time. This contamination lowers its boiling point, which can lead to brake fade under heavy use, and degrades its protective properties, potentially damaging internal brake components. Regular replacement is key.
Your motorcycle will have a small reservoir for brake fluid, usually on the handlebars. There are typically 'min' and 'max' lines on the reservoir. Check the level when the motorcycle is upright and on a level surface. Ensure it is between these lines.
Inspect the brake discs for deep scoring, cracks, or warping. Uneven wear or blue discolouration can indicate overheating. The discs should be smooth and have a consistent surface. Theory questions may test your ability to spot visual damage.
Yes, absolutely. Both the front and rear braking systems are critical for safe motorcycle control. You should perform visual checks on the pads and discs for both the front and rear brakes before every ride.