Logo
Dutch Driving Theory Courses

Lesson 3 of the Safe Following Distance and Braking Techniques unit

Dutch Motorcycle Theory (A2): Advanced Braking: Front and Rear Brake Coordination

Welcome to the advanced braking lesson for your Dutch Category A2 motorcycle license theory. Building on basic stopping principles, this unit teaches you the critical skill of coordinating your front and rear brakes for maximum stopping power and stability. Mastering this is key to passing your CBR theory exam and riding safely on Dutch roads.

advanced brakingmotorcycle brakesfront brakerear brakebrake coordination
Dutch Motorcycle Theory (A2): Advanced Braking: Front and Rear Brake Coordination
Dutch Motorcycle Theory (A2)

Advanced Motorcycle Braking: Mastering Front and Rear Brake Coordination for Your Dutch A2 License

Welcome to an in-depth lesson on advanced braking techniques, a critical skill for every motorcyclist pursuing their Dutch Motorcycle License (Category A2). While basic braking might seem straightforward, mastering the coordinated use of your front and rear brakes is essential for optimal stopping performance, maintaining stability, and ensuring your safety on the road. This chapter delves into the physics and practical application of advanced braking, moving beyond simple lever pulls to a nuanced control that can dramatically reduce stopping distances and prevent accidents.

You will learn that the front brake provides the majority of your stopping power due to forward weight transfer, a fundamental principle we will explore in detail. We will also cover why skillful application of the rear brake is crucial for stability, especially in challenging conditions. The core concept of progressive braking—squeezing the levers smoothly and incrementally—is key to managing tyre traction and preventing wheel lock, a skill particularly vital on motorcycles without an Anti-Lock Braking System (ABS).

Understanding Motorcycle Braking Physics: Weight Transfer and Traction

Effective motorcycle braking is a dance with physics, primarily governed by weight transfer and the limits of tyre traction. Grasping these concepts is fundamental to mastering advanced braking.

Weight Transfer During Deceleration

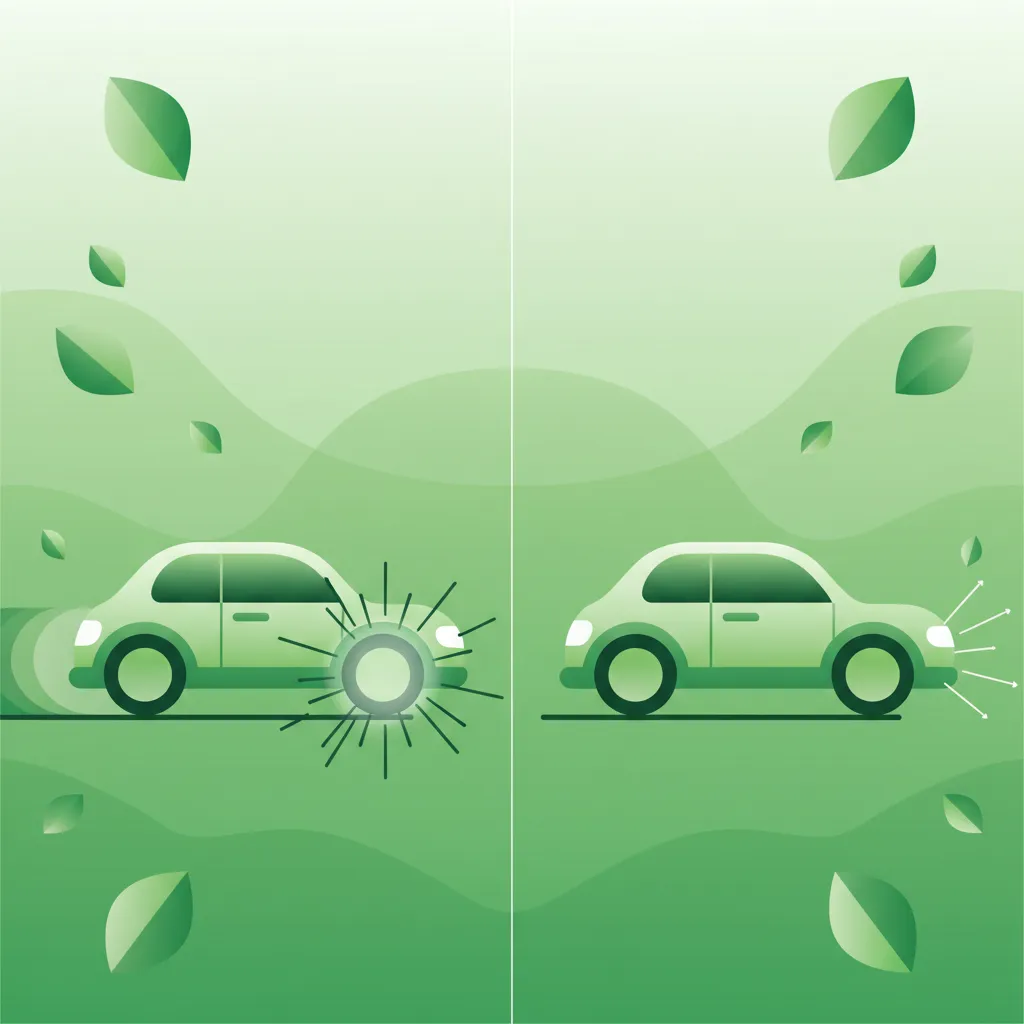
When you apply the brakes on a motorcycle, the vehicle's momentum doesn't just disappear; it shifts. This phenomenon is known as weight transfer. As the motorcycle decelerates, inertia causes its centre of mass to shift forward, effectively increasing the normal load (downward force) on the front tyre and simultaneously decreasing the normal load on the rear tyre.

Definition

Weight Transfer

The forward shift of a motorcycle’s centre of mass during deceleration, which increases the normal load on the front tyre and decreases it on the rear tyre.

This dynamic weight transfer is crucial because the amount of grip or friction a tyre can generate is directly proportional to the load pressing it against the road surface. More load equals more potential friction, up to a certain point. For instance, on a typical 180 kg motorcycle (including the rider), a firm deceleration from 50 km/h can shift approximately 30% of the total weight forward, creating a front-wheel load of around 140 kg and reducing the rear-wheel load to about 90 kg or less.

Practical Implications of Weight Transfer:

  • The front tyre gains significant braking potential due to the increased load.
  • The rear tyre loses load, making it much easier to lock up with less applied force.
  • Understanding this shift guides the proportionate application of front and rear brakes.

A common misunderstanding is believing that brakes share stopping power equally regardless of load. In reality, the dynamic redistribution of weight means the front wheel becomes the primary contributor to stopping force during hard braking. Over-reliance on the rear brake in such situations can easily exceed its reduced friction limit, leading to an unwanted and dangerous rear-wheel lock-up.

Front Brake Dominance: The Primary Stopping Force

Due to the significant forward weight transfer, the front tyre becomes the dominant force in bringing your motorcycle to a stop. It can safely generate the majority of the braking friction available. This principle, known as Front Brake Dominance, dictates that on most motorcycles and in most conditions, the front brake will provide approximately 70% or more of the total stopping power on a dry, high-traction surface.

Definition

Front Brake Dominance

The principle that the front tyre, when loaded during deceleration, can safely deliver the majority of a motorcycle’s total braking torque.

Riders should prioritise the front brake, applying it earlier and more progressively than the rear brake. This maximises overall deceleration while preserving steering control, which is primarily managed through the front wheel. A common fear among new riders is locking the front wheel, leading to an excessive reliance on the rear brake. While front-wheel lock-up is indeed dangerous as it removes steering control, it is largely preventable with proper progressive braking technique. On dry asphalt, the front brake is your most powerful tool for stopping quickly and safely.

Rear Brake Modulation: Enhancing Stability and Control

While the front brake provides the bulk of stopping power, the rear brake plays a vital, albeit secondary, role. Its primary function is Rear Brake Modulation – the fine-tuned application of pressure to provide vehicle stability and prevent rear-wheel lock-up.

Definition

Rear Brake Modulation

The controlled, incremental application of pressure to the rear brake to provide vehicle stability and prevent the rear wheel from locking up.

As weight shifts forward during braking, the rear tyre's normal load decreases, making it prone to locking with relatively light pressure. A locked rear wheel can cause the motorcycle to slide or veer, especially if not perfectly upright. By modulating the rear brake, you keep the wheel rotating just below its traction limit, preserving valuable grip and ensuring a smoother, more controlled deceleration.

Key Aspects of Rear Brake Use:

  • Stability: The rear brake helps keep the motorcycle aligned and stable, particularly under harder braking.
  • Low-Traction Surfaces: On wet roads, gravel, or other slippery conditions, the rear brake can often be applied with more confidence (but still gently) than the front brake to initiate slowing without risking a front-end washout.
  • Slow-Speed Control: At very low speeds, the rear brake can be used in conjunction with the clutch and throttle to maintain balance and precise control, for example, during U-turns or navigating tight spaces.

It is a common error to use the rear brake as the primary stopping force, which is inefficient and highly likely to result in lock-up during an emergency stop. Instead, think of the rear brake as a stabiliser and a supplementary braking force, requiring fine fingertip or foot pressure control to avoid exceeding its reduced friction limit.

Essential Advanced Braking Techniques

Beyond understanding the physics, specific techniques are crucial for effective and safe advanced braking.

Progressive Braking: The Smooth Squeeze

One of the most vital techniques is Progressive Braking, which involves a smooth, continuous increase of brake pressure rather than an abrupt "slam" on the levers. This applies to both the front and rear brakes.

Definition

Progressive Braking

A smooth, continuous, and increasing application of brake pressure to both levers, rather than an abrupt or sudden force.

Why Progressive Braking Matters:

  • Maintains Traction: Abrupt braking can overwhelm the tyre's grip almost instantly, leading to a lock-up. Progressive pressure allows the tyre to "settle" and build friction gradually.
  • Rider Feedback: A smooth application allows you to feel the tyre's grip limit. You can sense if the wheel is about to lock up, giving you time to ease pressure slightly. This tactile feedback is essential, especially on motorcycles without ABS.
  • Predictability: It makes your braking more predictable for following traffic, reducing the risk of rear-end collisions.

Think of it as squeezing a sponge: you apply gradual pressure, increasing it as needed, rather than crushing it suddenly. This technique should be practised until it becomes second nature. An example might be increasing front-brake pressure from 0% to 80% of its maximum usable force over 1.5 seconds, while simultaneously increasing rear-brake pressure from 0% to 20% over the same period.

Brake Balance Adjustment: Adapting to Your Environment

Optimal braking is not a fixed recipe; it's a dynamic process. Brake Balance Adjustment refers to the deliberate variation of the front-to-rear brake force ratio to suit changing conditions.

Definition

Brake Balance Adjustment

The intentional variation in the ratio of front-to-rear brake force applied, adapted to changing conditions such as road surface, load, and road gradient.

The ideal ratio of front to rear brake application will change based on:

  • Load-dependent balance: Riding with a passenger or heavy luggage significantly increases the load on the rear wheel. While this might suggest more rear braking is possible, the overall dynamics change. You'll still rely heavily on the front, but the rear can take a slightly greater share for stability without locking.
  • Surface-dependent balance: On dry, high-grip asphalt, the 70/30 (front/rear) split is often a good starting point. On wet roads, you might reduce aggressive front-brake input and increase the rear brake's contribution slightly, perhaps aiming for a 60/40 or even 55/45 split to avoid front-wheel slide. On gravel or loose surfaces, the front brake must be applied very gently, with a greater emphasis on the rear to maintain steering control.
  • Gradient-dependent balance: When braking downhill, the forward weight transfer is amplified, making the rear wheel even lighter. This demands an increased reliance on the front brake and very light rear-brake application to prevent lock-up. Uphill braking has the opposite effect, making the rear heavier and potentially allowing for a slightly increased rear brake contribution.

Riders must constantly assess conditions and adapt their brake pressure ratio accordingly to optimise stopping distance and preserve stability.

Threshold Braking: The Edge of Traction

For the shortest possible stopping distance on high-grip surfaces, riders employ an advanced technique called Threshold Braking. This involves applying the maximum braking force just before the tyre's friction coefficient begins to drop, which is the point right before the wheel locks up or begins to slip excessively.

Definition

Threshold Braking

An advanced technique involving applying brake pressure to the exact point just before the tyre’s friction coefficient begins to drop, achieving the shortest possible stopping distance without locking the wheel.

Key Characteristics:

  • Peak Friction: You are operating at the absolute peak of the tyre's grip.
  • Sensory Feedback: It requires acute sensory feedback from the brake lever or pedal. Riders often describe feeling a slight vibration or change in the motorcycle's behaviour just before the tyre loses grip.
  • Surface Specific: Threshold braking is primarily feasible and safe on dry, high-grip surfaces. Attempting it on wet or loose surfaces can easily lead to lock-up.

On motorcycles without ABS, mastering threshold braking is a critical skill for emergency stops. With ABS, the system automatically performs this modulation for you, allowing you to apply firm pressure without fear of lock-up.

The Role of ABS (Anti-Lock Braking System) in Modern Braking

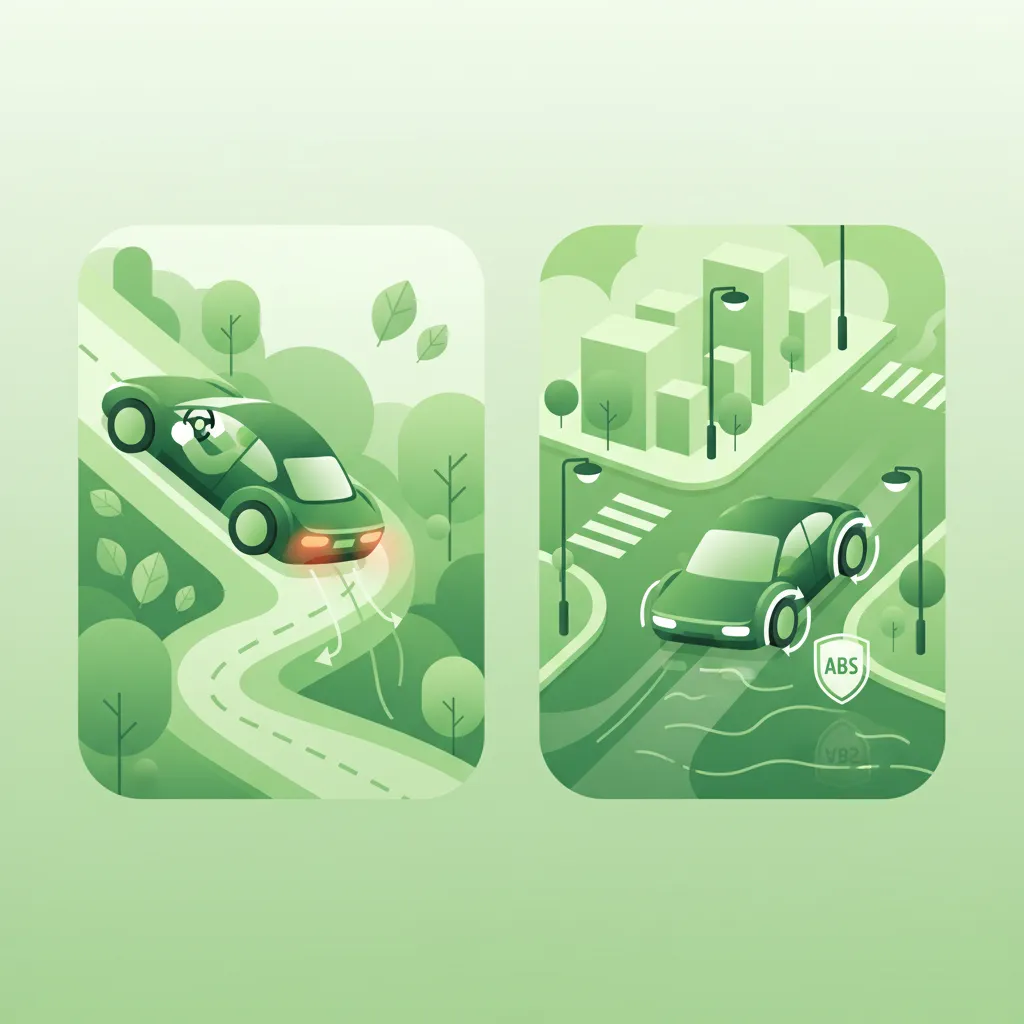
Many modern motorcycles, especially those produced after 2016 and above 125 cc, are equipped with an Anti-Lock Braking System (ABS). While ABS is a significant safety advancement, it's crucial to understand its function and limitations.

Definition

ABS (Anti-Lock Braking System)

An electronic control system that automatically modulates brake pressure to prevent wheel lock-up during braking, maintaining optimal tyre grip.

ABS works by sensing wheel speed. If a wheel begins to lock up, the system rapidly reduces, then reapplies, brake pressure many times per second. This "pulsing" action keeps the wheel rotating just above the point of lock-up, maintaining traction and allowing the rider to steer while braking forcefully.

ABS Types:

  • Single-channel ABS: Only the front wheel is equipped with ABS.
  • Dual-channel ABS: Both front and rear wheels have ABS. This is the mandatory standard for new motorcycles >125 cc in the EU (including the Netherlands) as of 2016.

Important Considerations for ABS-Equipped Motorcycles:

  • Enhanced Safety: ABS dramatically reduces the risk of wheel lock-up, especially in emergency situations or on slippery surfaces. Studies by institutions like the Dutch Road Safety Institute have shown a significant reduction in crashes for ABS-equipped motorcycles.
  • Not a Replacement for Skill: While ABS is an excellent aid, it does not eliminate the need for proper rider technique. Riders should still apply progressive pressure to both brakes. The system can only intervene once wheel slip is detected; a rider who anticipates and applies brakes smoothly will still achieve better and more controlled stops.
  • Sensory Feedback: When ABS activates, you may feel a pulsing sensation in the brake lever or pedal, accompanied by a grinding sound. This is normal and indicates the system is working. Do not release the brakes when you feel this.

For riders of older A2-eligible motorcycles without ABS, developing highly refined progressive and threshold braking skills is paramount, as you are solely responsible for preventing wheel lock-up.

In the Netherlands, specific traffic laws and regulations govern a motorcyclist's responsibilities concerning braking and vehicle control. These rules underpin the importance of skilled braking techniques.

General Duty of Care (RVV 1990 Article 15)

RVV 1990 Article 15 states that "The driver must keep the vehicle under control at all times and must not perform any manoeuvre that endangers traffic." This general duty of care directly applies to braking. Your braking technique must always maintain the stability and control of your motorcycle, ensuring you do not create a hazard for yourself or other road users. Abrupt, uncontrolled braking that leads to a skid or loss of control would be considered a breach of this article.

Functional Braking System (RVV 1990 Article 27.2)

According to RVV 1990 Article 27.2, "Every motor vehicle must be equipped with a functional braking system that allows the driver to bring the vehicle to a stop safely." This mandates that both your front and rear brakes must be in good working order. Riding with a defective brake system is not only dangerous but also illegal. Regular maintenance and checks of your brake pads, discs, and hydraulic fluid are essential for compliance.

Speed Adjustment (RVV 1990 Article 9.1)

RVV 1990 Article 9.1 requires drivers to "not exceed the speed limit and must adjust speed to road, traffic, and weather conditions." This is directly linked to braking, as your speed determines the stopping distance required. Riding at an appropriate speed ensures you have enough time and distance to brake safely and effectively, even with advanced techniques.

Vehicle Condition (RVV 1990 Article 31)

RVV 1990 Article 31 underlines that vehicles must be maintained in a roadworthy condition. This includes all components of the braking system. Worn brake pads, low brake fluid, or faulty hydraulic lines compromise your braking capability and are a violation of this regulation, putting you and others at serious risk.

EU ABS Requirement for New Motorcycles

As per EU Regulation (EU) 2016/162, new motorcycles with a cylinder capacity greater than 125 cc must be equipped with a dual-channel ABS system. This applies to new A2-eligible motorcycles registered after 2016. While older A2 bikes may not have ABS, this regulation highlights the recognition of ABS as a vital safety feature.

Common Braking Mistakes and How to Avoid Them

Understanding what not to do is as important as knowing the correct techniques. Many common braking errors can lead to dangerous situations.

  • Rear-Wheel Lock-up on Dry Roads:
    • Why Wrong: Applying too much rear brake force, exceeding the rear tyre's friction limit (which is reduced due to weight transfer). This causes a skid and loss of stability, potentially leading to a low-side crash.
    • Correct Behaviour: Apply the rear brake lightly and progressively, primarily relying on the front brake for stopping power.
  • Over-reliance on Front Brake on Wet or Loose Surfaces:
    • Why Wrong: On low-grip surfaces like wet roads, gravel, or sand, the front tyre's traction limit is significantly reduced. Applying too much front brake can easily cause a front-wheel lock-up, leading to an immediate loss of steering control and a high likelihood of a crash.
    • Correct Behaviour: Reduce overall brake pressure, especially on the front. Increase the rear brake's (gentle) contribution for stability and apply brakes earlier to allow for longer stopping distances.
  • Abrupt "Slam" Braking in Traffic:
    • Why Wrong: Sudden, forceful braking without progressive pressure can surprise following drivers, increasing the risk of a rear-end collision. It also makes your motorcycle unstable.
    • Correct Behaviour: Anticipate stops early, maintain a safe following distance (as learned in Lesson 4.1), and apply progressive braking.
  • Using Only One Brake (e.g., Front Only):
    • Why Wrong: Neglecting the rear brake sacrifices stability and can overload the front tyre, especially in emergency situations. It also leads to a longer stopping distance.
    • Correct Behaviour: Always use both brakes proportionally to the conditions, employing front-brake dominance but never neglecting the stabilising effect of the rear brake.
  • Ignoring the Effect of a Passenger or Heavy Luggage:
    • Why Wrong: A passenger or heavy load shifts the motorcycle's centre of gravity, significantly increasing the rear-wheel load. Misjudging this can lead to rear-wheel lock-up if the rider doesn't adjust their technique.
    • Correct Behaviour: When carrying a passenger or heavy cargo, adjust your brake balance. You might slightly increase your gentle rear brake contribution (but still with modulation) and be mindful of increased stopping distances.
  • Neglecting Brake Maintenance:
    • Why Wrong: Worn brake pads, contaminated brake fluid, or hydraulic leaks drastically reduce braking efficiency and can lead to sudden brake failure, posing an extreme risk.
    • Correct Behaviour: Perform regular brake checks, replace worn pads or discs, and ensure brake fluid levels and quality are optimal. This is a legal requirement under RVV 1990 Article 31.

Conditional Braking: Adjusting Techniques for Varying Situations

Effective braking is highly contextual. A skilled rider constantly evaluates environmental factors and adjusts their technique accordingly.

Weather and Road Surface Conditions

  • Dry, Clean Asphalt: This offers the highest coefficient of friction (μ). Here, you can aim for near-optimal front-to-rear brake ratios (approximately 70/30) and confidently utilise progressive braking, even pushing towards threshold braking in emergency situations.
  • Wet Roads: Water significantly reduces the available grip (μ is lower). Reduce overall brake pressure, especially on the front brake, to avoid a front-wheel slide. A slightly increased contribution from the rear brake (e.g., 60/40 front/rear) can help with stability, but still with very fine modulation. Your stopping distance will be considerably longer.
  • Gravel, Sand, or Loose Surfaces: These surfaces offer very low and unpredictable grip. Prioritise extremely gentle rear-brake modulation to prevent the rear wheel from locking and sliding. The front brake must be applied with extreme caution and very light pressure to avoid losing steering control. It's often safer to brake earlier and lighter on such surfaces.

Light and Visibility Conditions

  • Daylight / Good Visibility: Full visual assessment of the road ahead allows for earlier anticipation and smooth, controlled braking.
  • Night / Reduced Visibility: Your reaction time is effectively longer due to less visual information. Increase your following distance, anticipate stops much earlier, and use the brake lights of vehicles ahead as primary cues for traffic flow. Progressive braking is essential to prevent sudden, unexpected deceleration.

Road Type

  • Urban Streets: Characterised by lower speeds and frequent stops. Progressive braking with modest pressure is the norm, requiring constant modulation for smooth transitions.
  • Motorway (Autosnelweg): Higher speeds mean significantly longer stopping distances. Initiate braking much earlier than you might in urban areas. The rear brake can be used to help stabilise the motorcycle during higher force decelerations.
  • Residential Zones: Low speeds, but often with unpredictable pedestrians and cyclists. Very gentle, ultra-smooth progressive braking is key, with a strong emphasis on anticipation and preparedness to stop quickly but smoothly.

Vehicle State

  • Passenger Present: As discussed, a passenger increases the load on the rear wheel. While the front brake remains dominant, you might slightly reduce initial rear-brake pressure to avoid premature lock-up, then increase it gently as the weight transfers forward, still applying some rear braking for stability.
  • Heavy Luggage or Cargo: Similar to carrying a passenger, heavy luggage affects weight distribution. Be aware that your motorcycle will handle differently, and stopping distances may increase.
  • Worn Brake Pads / Low Hydraulic Pressure: These conditions compromise brake effectiveness. You will need to apply more force to achieve the same deceleration, increasing the risk of lock-up or brake fade. Schedule maintenance immediately if you notice reduced braking performance.

Interaction with Vulnerable Road Users

  • Motorcyclist Following Car: Always maintain a safe following distance (e.g., the two-second rule, as per Lesson 4.1). This provides adequate reaction time to anticipate the car's braking and allows you to brake progressively without shocking the driver behind you.
  • Pedestrians or Cyclists Crossing: Early, smooth braking signals your intention clearly. Avoid abrupt stops that could cause a car behind you to collide. Your primary goal is to stop safely without startling or endangering the vulnerable road user.

Gradient (Road Slope)

  • Uphill Braking: Gravity assists deceleration, and the rear wheel experiences a slightly higher normal load. This might allow for a fractionally greater, though still modulated, rear-brake contribution for stability.
  • Downhill Braking: Gravity increases the effective forward weight transfer, making the rear wheel very light and prone to lock-up. You must increase front-brake pressure proportionally and keep the rear brake very light and finely modulated.

Real-World Advanced Braking Scenarios

Let's put these concepts into practice with a few illustrative scenarios.

Scenario 1: Emergency Stop on a Straight Dry Road (Without ABS)

  • Setting: You are riding at 70 km/h on a dry, straight asphalt road. Suddenly, an unexpected obstacle appears 25 meters ahead, requiring an immediate full stop. Your motorcycle is not equipped with ABS.
  • Decision Point: Instantaneous recognition of hazard and need for maximum deceleration.
  • Correct Behaviour: Close the throttle instantly. Simultaneously, quickly but smoothly squeeze the front brake lever to near its threshold point (around 85% of its maximum usable travel), feeling for the tyre's grip limit. Lightly apply the rear brake (around 15% pressure) for stability. If the front wheel begins to lock, slightly ease pressure and immediately reapply (a technique known as "threshold modulation"). Maintain a firm grip on the handlebars and keep your eyes focused ahead. You stop within approximately 28 meters.
  • Why Correct: This exemplifies threshold braking, extracting maximum friction from the front tyre without lock-up, while the rear brake maintains stability. Progressive application prevents immediate loss of grip.

Scenario 2: Wet Highway Deceleration to Match Traffic

  • Setting: You are on a motorway (autosnelweg) at 80 km/h in light rain on wet asphalt, approaching a slower vehicle 40 metres ahead. You need to decelerate to match its speed safely.
  • Decision Point: Need for controlled speed reduction on a low-traction surface.
  • Correct Behaviour: Roll off the throttle smoothly. Begin applying both brakes earlier and more gently than you would on a dry road. Use the front brake up to about 55% of its capacity, and the rear brake up to 35% pressure, constantly monitoring for any wheel slip. If the rear wheel starts to slide, ease pressure immediately. Maintain a smooth, controlled deceleration, preserving stability.
  • Why Correct: This demonstrates brake balance adjustment for wet conditions. Lower front pressure respects reduced grip, while a slightly increased, but still modulated, rear brake contribution helps maintain stability without locking.

Scenario 3: Downhill Corner Entry with a Passenger

  • Setting: Riding at 30 km/h down an 8% gradient gravel side-road, with a passenger, approaching a sharp 40-degree bend.
  • Decision Point: Reduce speed and prepare for the corner on a challenging surface with altered load.
  • Correct Behaviour: Initiate braking well before the corner. Gently apply the rear brake first (around 30% pressure) to help settle the motorcycle and distribute some load rearward, counteracting the downhill forward weight transfer. Then, very gradually add light front brake pressure (up to 60% of its reduced capacity for gravel). Focus on progressive application to keep both wheels rotating and look through the corner.
  • Why Correct: This combines brake balance adjustment for gradient, surface, and load. The rear brake helps manage the increased rear load from the passenger and downhill gradient, while the very gentle front input prevents lock-up on the gravel.

Scenario 4: Low-Visibility Night Riding with ABS

  • Setting: You're on a dry road at 60 km/h at night, following a car with a 3-second gap. Your motorcycle is equipped with dual-channel ABS. The car ahead suddenly brakes hard.
  • Decision Point: Emergency stop initiated by preceding traffic in low visibility.
  • Correct Behaviour: Close the throttle quickly. Apply both brake levers firmly and simultaneously. Trust the ABS to modulate brake pressure automatically, preventing wheel lock-up. Maintain a direct gaze ahead, guiding the motorcycle. You feel the pulsing in the levers but continue to apply firm pressure. You stop safely within the following distance.
  • Why Correct: ABS provides maximal deceleration without lock-up, allowing you to react quickly and firmly in an emergency, even in low visibility. However, initiating the brake immediately after closing the throttle is still crucial.

Key Safety and Reasoning Insights

Advanced braking is not just about technique; it's deeply rooted in scientific principles and psychological readiness.

  • Physics of Friction (F=μNF = \mu \cdot N): The core formula for braking force (FF) highlights the critical roles of the coefficient of friction (μ\mu, which varies with road surface and tyre condition) and the normal force (NN, which changes significantly due to weight transfer). Understanding this reinforces why front-brake dominance is key and why surfaces like wet gravel reduce overall braking capability.
  • Human Reaction Time: The average human reaction time for an experienced rider is approximately 0.7 seconds. This doesn't even account for perception time. This delay, however brief, translates to significant distance travelled before braking even begins. Early anticipation and maintaining a safe following distance (as taught in Lesson 4.1) are therefore paramount to reduce the need for sudden emergency stops.
  • Psychology of Anticipation: Riders who actively scan the road ahead and anticipate potential hazards (e.g., traffic lights changing, cars merging, pedestrians) reduce their cognitive load. This proactive approach lessens the likelihood of needing emergency braking and improves the rider's ability to execute controlled, progressive stops.
  • Risk of Over-Braking: Applying excessive front-brake pressure, especially on low-grip surfaces or with abrupt action, is the fastest way to induce a front-wheel lock-up. This is extremely dangerous as it eliminates steering control and almost invariably leads to a crash. It also violates the Dutch legal duty of care.
  • Load Effect on Braking: Even a relatively small additional load, such as a passenger (adding 10-15 kg to the rear wheel), changes the motorcycle's weight distribution and dynamic handling during braking. A skilled rider mentally adjusts their brake balance (e.g., from 70/30 to 65/35 front/rear) to compensate, ensuring optimal stability.

Final Concept Summary: Mastering Your Motorcycle's Stopping Power

Mastering advanced braking is a cornerstone of safe and confident motorcycle riding, particularly for your Dutch Motorcycle License (Category A2). Here’s a concise recap of the crucial concepts:

  • Weight Transfer: Always remember that during braking, weight shifts forward, loading the front tyre and lightening the rear. This fundamental principle dictates how you should apply your brakes.
  • Front-Brake Dominance: The front brake is your primary tool for deceleration, providing the majority of your stopping power. Prioritise its smooth and progressive application.
  • Rear-Brake Modulation: The rear brake's role is to enhance stability and assist in stopping. Use it gently and incrementally to avoid lock-up, especially in challenging conditions.
  • Progressive Braking: Practice the "smooth squeeze" – gradually increasing brake pressure on both levers. This technique maintains traction, provides crucial feedback, and is key to avoiding sudden wheel lock.
  • Dynamic Brake Balance Adjustment: Be adaptable. Your ideal front-to-rear brake ratio will change with road surface, load, road gradient, and weather. Continuously assess and adjust.
  • Threshold Braking: For emergency stops on high-grip surfaces, aim for the maximal braking force just before lock-up. This requires a refined sense of feel and control.
  • ABS as an Aid: While ABS significantly enhances safety by preventing wheel lock-up, it is not a substitute for proper riding technique. Even with ABS, apply both brakes progressively.
  • Legal Obligations: Adhere to Dutch traffic laws (RVV 1990 Article 15, 27.2, 9.1, 31) by maintaining full control, keeping your brakes functional, adjusting speed, and ensuring vehicle roadworthiness.
  • Anticipation and Maintenance: Proactive riding, maintaining safe following distances, and regular brake maintenance are integral to safe braking.

By integrating these advanced techniques and understandings into your riding practice, you will develop the control and confidence needed to handle any braking situation effectively and safely on Dutch roads.

Weight Transfer
The forward shift of a motorcycle’s centre of mass during deceleration, increasing the front tyre’s normal load and decreasing the rear tyre’s.
Front-Brake Dominance
The principle that the front tyre, when loaded during deceleration, can safely deliver the majority of a motorcycle’s total braking torque.
Rear-Brake Modulation
The controlled, incremental application of pressure to the rear brake to provide vehicle stability and prevent the rear wheel from locking up.
Progressive Braking
A smooth, continuous, and increasing application of brake pressure to both levers, rather than an abrupt or sudden force.
Brake Balance Adjustment
The intentional variation in the ratio of front-to-rear brake force applied, adapted to changing conditions such as road surface, load, and road gradient.
Threshold Braking
An advanced technique involving applying brake pressure to the exact point just before the tyre’s friction coefficient begins to drop, achieving the shortest possible stopping distance without locking the wheel.
ABS (Anti-Lock Braking System)
An electronic control system that automatically modulates brake pressure to prevent wheel lock-up during braking, maintaining optimal tyre grip.
Slip Ratio
The difference between wheel speed and vehicle speed, expressed as a percentage, which influences the amount of friction generated by a tyre.
Traction Limit
The maximum frictional force that can be transmitted between a tyre and the road surface before slipping occurs.
Lock-up
The complete cessation of a wheel's rotation due to excessive brake force, resulting in a skid and loss of control.
Road Surface Coefficient (μ)
A numerical value representing the friction available between a tyre and the road surface, varying with conditions like wetness or looseness.
RVV 1990
The Dutch traffic rules and traffic signs regulation, containing key legal obligations for road users.

Learn more with these articles

Check out these practice sets


Search topics related to Advanced Braking: Front and Rear Brake Coordination

Explore search topics learners often look for when studying Advanced Braking: Front and Rear Brake Coordination. These topics reflect common questions about road rules, driving situations, safety guidance, and lesson level theory preparation for learners in the Netherlands.

motorcycle advanced braking techniques nlhow to use front and rear brakes on a motorcycleCBR theory exam braking questionsmotorcycle braking without ABSprogressive braking motorcycleweight transfer motorcycle brakingstopping distance motorcycle coordinationA2 motorcycle license theory braking rules

Related driving theory lessons for Advanced Braking: Front and Rear Brake Coordination

Browse additional driving theory lessons that cover connected traffic rules, road signs, and common driving situations related to this topic. Improve your understanding of how different rules interact across everyday traffic scenarios.

Understanding Motorcycle Braking Physics and Stability

Explore the fundamental physics behind motorcycle braking, focusing on weight transfer and how it impacts stability. Learn to use the front and rear brakes effectively to manage deceleration and maintain control on Dutch roads.

braking physicsweight transfermotorcycle stabilityadvanced brakingnl
Progressive Braking and Weight Transfer lesson image

Progressive Braking and Weight Transfer

This lesson teaches the technique of progressive braking, which involves applying the brakes smoothly and gradually rather than abruptly. This method allows the motorcycle's weight to transfer forward in a controlled manner, compressing the front suspension and increasing the size of the front tire's contact patch. This, in turn, maximizes available grip and allows for harder, safer braking without unsettling the chassis or locking a wheel.

Dutch A1 Motorcycle TheoryBraking Systems and Emergency Stops
View lesson
Front vs. Rear Braking Dynamics lesson image

Front vs. Rear Braking Dynamics

This lesson explores the dynamic differences between using the front and rear brakes on a motorcycle. It explains that due to forward weight transfer under deceleration, the front brake provides the majority (around 70-80%) of the stopping power. The content details how to use both brakes in a coordinated manner for stable, effective braking, and clarifies the specific situations where the rear brake is particularly useful, such as for fine-tuning speed at low RPMs.

Dutch A1 Motorcycle TheoryBraking Systems and Emergency Stops
View lesson
Principles of Load Distribution and Balance lesson image

Principles of Load Distribution and Balance

This lesson explains the physics of how weight distribution affects a motorcycle's stability. You will learn the golden rule of packing: keep the weight as low and as close to the motorcycle's center of gravity as possible. The content provides practical advice on loading panniers evenly, placing heavier items in a tank bag rather than a high top case, and respecting the manufacturer's maximum load capacity.

Dutch Motorcycle Theory (A2)Load Distribution, Passenger Riding, and Vehicle Dynamics
View lesson
Braking Techniques at High Speed (voor- en achterrem) lesson image

Braking Techniques at High Speed (voor- en achterrem)

This lesson provides a detailed breakdown of high-speed braking techniques, emphasizing the correct balance and application of the front ('voorrem') and rear ('achterrem') brakes. It explains the physics of weight transfer under braking and why the front brake provides the majority of stopping power. Techniques for progressive, smooth application to avoid overloading the front tire and losing traction are covered, ensuring riders can slow down quickly and safely from any speed.

Dutch Motorcycle Theory AAdvanced Riding Techniques and High-Speed Control
View lesson
Deceleration Techniques and Controlled Braking lesson image

Deceleration Techniques and Controlled Braking

This lesson provides a comprehensive guide to safe and effective deceleration on a motorcycle. You will learn the principles of controlled braking, including the progressive application of both the front and rear brakes to maximize stopping power while maintaining stability. The content also explains the role of engine braking in managing speed and how the Anti-lock Braking System (ABS) helps prevent wheel lock-up during hard braking.

Dutch Motorcycle Theory (A2)Speed Management and Dynamic Limits
View lesson
Impact of Load and Passengers on Handling and Braking lesson image

Impact of Load and Passengers on Handling and Braking

This lesson focuses on how you must adapt your riding style when the motorcycle is heavily loaded. You will learn that your braking distances will be significantly longer, requiring you to increase your following distance and begin braking earlier. The content also explains that acceleration will be slower, and cornering will require smoother, more deliberate inputs to avoid upsetting the motorcycle's altered balance.

Dutch Motorcycle Theory (A2)Load Distribution, Passenger Riding, and Vehicle Dynamics
View lesson
Body Positioning and Lean Angle Management lesson image

Body Positioning and Lean Angle Management

This lesson explains the critical role of the rider's body in controlling the motorcycle's dynamics, especially during cornering. It details how shifting body weight alters the combined center of gravity, allowing for greater cornering speed at a given lean angle or a safer lean angle for a given speed. Techniques for correct posture, footpeg weighting, and active body positioning are covered to enhance stability, maximize grip, and provide more precise control.

Dutch Motorcycle Theory AAdvanced Riding Techniques and High-Speed Control
View lesson
Principles of Emergency Braking (noodsremmen) lesson image

Principles of Emergency Braking (noodsremmen)

This lesson teaches the principles of performing a controlled emergency stop ('noodsremmen') to achieve the shortest possible stopping distance without losing control. It details the technique of applying both brakes firmly and progressively, managing the forward weight transfer, and maintaining an upright body posture to maximize braking efficiency. The content emphasizes braking in a straight line and looking ahead to where you want to stop, not at the obstacle.

Dutch Motorcycle Theory AEmergency Braking, Crash Avoidance and Accident Handling
View lesson
Emergency Braking Scenarios for Motorcycles lesson image

Emergency Braking Scenarios for Motorcycles

This lesson outlines the step-by-step procedure for executing a controlled emergency stop in a straight line. It emphasizes keeping the motorcycle upright, looking ahead, and applying both brakes firmly and progressively up to the point of maximum traction (or ABS activation). Understanding this technique is critical for minimizing stopping distance in a sudden hazard scenario and is a key skill assessed in practical motorcycle training.

Dutch A1 Motorcycle TheoryBraking Systems and Emergency Stops
View lesson
Physics of Lean Angles and Centrifugal Forces lesson image

Physics of Lean Angles and Centrifugal Forces

This lesson provides a foundational understanding of the physics that govern motorcycle cornering. It explains how leaning the motorcycle shifts its center of gravity, creating a centripetal force that counteracts the outward centrifugal force of the turn. Learners will explore the relationship between speed, turn radius, and the required lean angle, as well as the critical role of tire traction in this dynamic balance.

Dutch A1 Motorcycle TheoryCornering, Leaning and Stability
View lesson

Advanced Braking Techniques and ABS Explained for Dutch Theory

Master advanced braking techniques like progressive and threshold braking, with a focus on ABS functionality and its role in motorcycle safety according to Dutch traffic law (RVV 1990).

advanced brakingABSmotorcycle brakesRVV 1990nl theory
Emergency Braking and the Role of ABS lesson image

Emergency Braking and the Role of ABS

This lesson prepares you for a critical situation: performing a maximum-force emergency stop. You will learn the correct body posture and braking technique to stop in the shortest possible distance without losing control. The content provides a clear explanation of how ABS works by rapidly pulsing the brakes to prevent the wheels from locking, allowing you to maintain steering control even during a panic stop.

Dutch Motorcycle Theory (A2)Safe Following Distance and Braking Techniques
View lesson
ABS Functionality and Limitations on Motorcycles lesson image

ABS Functionality and Limitations on Motorcycles

This lesson explains the function of an Anti-lock Braking System (ABS) on a motorcycle, detailing how it prevents wheel lock-up during heavy braking, thereby allowing the rider to maintain steering control. It clarifies that while ABS is a powerful safety aid, it does not defy physics and may sometimes increase stopping distances on loose surfaces. The content teaches riders to trust the system and apply the brakes fully and firmly in an emergency, letting the ABS manage traction.

Dutch Motorcycle Theory AEmergency Braking, Crash Avoidance and Accident Handling
View lesson
Deceleration Techniques and Controlled Braking lesson image

Deceleration Techniques and Controlled Braking

This lesson provides a comprehensive guide to safe and effective deceleration on a motorcycle. You will learn the principles of controlled braking, including the progressive application of both the front and rear brakes to maximize stopping power while maintaining stability. The content also explains the role of engine braking in managing speed and how the Anti-lock Braking System (ABS) helps prevent wheel lock-up during hard braking.

Dutch Motorcycle Theory (A2)Speed Management and Dynamic Limits
View lesson
Use of Engine Braking and ABS (if equipped) lesson image

Use of Engine Braking and ABS (if equipped)

This lesson covers braking techniques beyond simply applying the brake levers. You will learn about the concept of engine braking (decelerating by releasing the throttle or downshifting) for controlled slowing. It also explains the function of an Anti-lock Braking System (ABS), a safety feature on some models that prevents wheels from locking during hard braking, allowing you to maintain steering control and reduce the chance of a skid.

Dutch Driving Theory AMSpeed Management & Braking
View lesson
Maximum Performance Emergency Braking lesson image

Maximum Performance Emergency Braking

This lesson focuses on the physical skill of an emergency stop, building on previous braking lessons. You will learn to adopt a braced body position, keeping your arms straight and looking ahead, not down. The content details the technique of applying both brakes rapidly but progressively to the point of maximum traction, and how to trust and utilize ABS if your motorcycle is equipped with it.

Dutch Motorcycle Theory (A2)Emergency Evasive Manoeuvres and Hazard Anticipation
View lesson
Disc, Drum, and ABS Brake Principles lesson image

Disc, Drum, and ABS Brake Principles

This lesson explains the mechanical and hydraulic principles behind the common types of motorcycle brakes. It compares the operation and performance characteristics of disc brakes and drum brakes. The function of an Anti-lock Braking System (ABS) is also detailed, explaining how it prevents wheel lock-up during hard braking, thereby allowing the rider to maintain steering control and reduce stopping distances in many situations.

Dutch A1 Motorcycle TheoryBraking Systems and Emergency Stops
View lesson
Principles of Emergency Braking (noodsremmen) lesson image

Principles of Emergency Braking (noodsremmen)

This lesson teaches the principles of performing a controlled emergency stop ('noodsremmen') to achieve the shortest possible stopping distance without losing control. It details the technique of applying both brakes firmly and progressively, managing the forward weight transfer, and maintaining an upright body posture to maximize braking efficiency. The content emphasizes braking in a straight line and looking ahead to where you want to stop, not at the obstacle.

Dutch Motorcycle Theory AEmergency Braking, Crash Avoidance and Accident Handling
View lesson
Emergency Braking Scenarios for Motorcycles lesson image

Emergency Braking Scenarios for Motorcycles

This lesson outlines the step-by-step procedure for executing a controlled emergency stop in a straight line. It emphasizes keeping the motorcycle upright, looking ahead, and applying both brakes firmly and progressively up to the point of maximum traction (or ABS activation). Understanding this technique is critical for minimizing stopping distance in a sudden hazard scenario and is a key skill assessed in practical motorcycle training.

Dutch A1 Motorcycle TheoryBraking Systems and Emergency Stops
View lesson
Progressive Braking and Weight Transfer lesson image

Progressive Braking and Weight Transfer

This lesson teaches the technique of progressive braking, which involves applying the brakes smoothly and gradually rather than abruptly. This method allows the motorcycle's weight to transfer forward in a controlled manner, compressing the front suspension and increasing the size of the front tire's contact patch. This, in turn, maximizes available grip and allows for harder, safer braking without unsettling the chassis or locking a wheel.

Dutch A1 Motorcycle TheoryBraking Systems and Emergency Stops
View lesson
Braking Techniques at High Speed (voor- en achterrem) lesson image

Braking Techniques at High Speed (voor- en achterrem)

This lesson provides a detailed breakdown of high-speed braking techniques, emphasizing the correct balance and application of the front ('voorrem') and rear ('achterrem') brakes. It explains the physics of weight transfer under braking and why the front brake provides the majority of stopping power. Techniques for progressive, smooth application to avoid overloading the front tire and losing traction are covered, ensuring riders can slow down quickly and safely from any speed.

Dutch Motorcycle Theory AAdvanced Riding Techniques and High-Speed Control
View lesson

Frequently asked questions about Advanced Braking: Front and Rear Brake Coordination

Find clear answers to common questions learners have about Advanced Braking: Front and Rear Brake Coordination. Learn how the lesson is structured, which driving theory objectives it supports, and how it fits into the overall learning path of units and curriculum progression in the Netherlands. These explanations help you understand key concepts, lesson flow, and exam focused study goals.

Why is the front brake more important than the rear for stopping a motorcycle?

The front brake provides significantly more stopping power because when you brake, your motorcycle's weight transfers forward. This increased load on the front wheel allows it to generate more friction and thus more braking force. While the rear brake is crucial for stability and fine-tuning, the majority of your stopping power comes from the front.

What is progressive braking, and why is it important for motorcycle riders?

Progressive braking means applying brake pressure smoothly and gradually, rather than abruptly. This is vital because slamming on the brakes, especially the front, can easily overwhelm the front tyre's grip, leading to a lock-up and a fall. Smooth application allows the tyre to maintain traction while maximizing stopping force.

How does ABS affect advanced braking techniques for A2 motorcycle riders?

Anti-lock Braking System (ABS) prevents wheel lock-up by automatically modulating brake pressure. While it significantly increases safety and allows for more forceful braking without fear of skidding, understanding manual braking is still essential. You'll still need to apply brakes progressively to utilize ABS effectively and to understand how to stop if ABS is not functioning or not present.

When should I use the rear brake in combination with the front brake?

The rear brake is used to supplement the front brake, helping to maintain balance and control, especially during hard braking or on slippery surfaces. It can help prevent the rear wheel from lifting and improve overall stability. The key is to apply it gently and progressively alongside the front brake, often slightly after or in unison with front brake application for maximum effect.

What are common mistakes when coordinating front and rear motorcycle brakes?

Common mistakes include relying too heavily on just one brake, applying brakes too abruptly (especially the front), or forgetting to use the rear brake at all. Another error is not understanding how to adjust braking on different surfaces. These errors can lead to loss of control or increased stopping distances, which are critical considerations for your theory exam.

Continue your Dutch driving theory learning journey

Dutch road signsDutch article topicsSearch Dutch road signsDutch driving theory homeDutch road sign categoriesSearch Dutch theory articlesDutch driving theory coursesDutch Driving Theory B courseDutch driving theory articlesDutch driving theory practiceDutch practice set categoriesDutch Driving Theory AM courseDutch Motorcycle Theory A courseDutch A1 Motorcycle Theory courseDutch Motorcycle Theory (A2) courseSearch Dutch driving theory practiceTowing, Trailers, and Loads unit in Dutch Driving Theory BRoadway Access & Navigation unit in Dutch Driving Theory AMVehicle Positioning and Lane Use unit in Dutch Driving Theory BHuman Factors & Risk Management unit in Dutch Driving Theory AMInfrastructure and Special Roads unit in Dutch Driving Theory BLegal Foundations & Vehicle Types unit in Dutch Driving Theory AMLegal Responsibilities & Incident Procedures unit in Dutch Driving Theory AMHighway (Autosnelweg) Rules for Motorcycles unit in Dutch Motorcycle Theory (A2)Advanced Riding Techniques and High-Speed Control unit in Dutch Motorcycle Theory ACalculating Total Stopping Distance lesson in Safe Following Distance and Braking TechniquesAccident Management, Legal Responsibilities & Substance Use unit in Dutch A1 Motorcycle TheoryEmergency Braking and the Role of ABS lesson in Safe Following Distance and Braking TechniquesAdjusting Following Distance in Adverse Conditions lesson in Safe Following Distance and Braking TechniquesAdvanced Braking: Front and Rear Brake Coordination lesson in Safe Following Distance and Braking TechniquesThe Two-Second Rule and Its Application for Motorcycles lesson in Safe Following Distance and Braking Techniques