
This lesson focuses on executing a controlled emergency stop in a straight line, a crucial skill for motorcycle safety and the A1 theory exam. We’ll guide you through the step-by-step procedure, emphasizing how to maintain control and minimize stopping distance when facing sudden hazards on Dutch roads.

Emergency braking is one of the most crucial skills any motorcyclist must master, especially when preparing for the Dutch A1 motorcycle licence theory and practical exams. The ability to stop your motorcycle quickly and safely in an unexpected situation can mean the difference between avoiding a collision and being involved in a serious incident. This comprehensive lesson delves into the step-by-step procedure for executing a controlled emergency stop in a straight line, covering the underlying physics, optimal techniques, and relevant Dutch traffic regulations.
A controlled emergency stop on a motorcycle is a precisely executed manoeuvre designed to bring the vehicle to a halt in the shortest possible distance while maintaining stability and rider control. Unlike routine braking, it involves applying maximum braking force up to the point of a tyre's traction limit, often activating the Anti-Lock Braking System (ABS) if the motorcycle is equipped with it. This skill is not only fundamental for road safety but is also a core competency assessed in the practical A1 motorcycle training in the Netherlands.
For riders in the Dutch A1 Motorcycle Theory curriculum, understanding and practicing emergency braking is paramount. Motorcycles offer less protection than cars, making rider safety heavily dependent on proactive hazard avoidance and effective stopping capabilities. The Dutch traffic regulations (RVV 1990) explicitly require all road users to be able to stop their vehicle safely when required, without endangering themselves or others. Mastering this technique directly influences your stopping distance, which is a critical factor in avoiding collisions and minimizing the severity of potential injuries. It also forms a vital part of your practical examination, demonstrating your readiness to safely operate a motorcycle up to 125cc and 11 kW.
An emergency stop is a rapid deceleration manoeuvre performed to avoid an imminent collision or hazard. It requires a sequence of precise rider actions and the motorcycle's optimal response to achieve maximum deceleration while preserving stability. The goal is to stop as quickly as possible without losing control, such as through wheel lock-up or an uncontrolled skid. This often involves applying both front and rear brakes firmly and progressively, managing weight transfer, and maintaining a clear visual focus on the path ahead.
Executing a safe and effective emergency stop relies on several interconnected principles that leverage the physics of braking and rider control.
The incremental increase of brake pressure, starting gently and building smoothly to the tyre's traction limit, allowing the rider to feel the grip.
Progressive braking is fundamental to controlled stopping. Instead of grabbing the brake levers abruptly, a rider should apply pressure gradually. This initial gentle application allows the motorcycle's suspension to compress and the vehicle's weight to transfer forward smoothly to the front wheel. As more weight shifts to the front, the front tyre gains greater traction, enabling you to apply increasing brake pressure without locking the wheel. This gradual increase in pressure maximizes deceleration while preventing abrupt load transfer, which could cause a loss of traction.
During braking, the motorcycle's momentum causes its weight to dynamically shift forward. This phenomenon, known as weight transfer, significantly increases the load on the front wheel while simultaneously reducing the load on the rear wheel. The amount of weight transfer is proportional to the rate of deceleration and the height of the motorcycle's centre of mass.
This weight transfer is critical because a tyre's maximum braking force is directly related to the load placed upon it. The traction limit, or slip threshold, is the maximum deceleration a tyre can produce before it begins to skid uncontrollably. For road tyres, this typically occurs at about 10-15% slip ratio. Understanding weight transfer explains why the front brake provides the majority of stopping power in an emergency (often 70% or more), but also why an abrupt, excessive front brake application can lead to a dangerous front-wheel lock-up. Conversely, too much rear brake can cause the rear wheel to skid or even lift off the ground, destabilizing the motorcycle.
The proportion of braking force applied to the front wheel relative to the rear wheel, optimized to maximize deceleration without losing traction.
Given the physics of weight transfer, achieving the optimal front-vs-rear brake balance is crucial. For most motorcycles, especially naked bikes on dry surfaces, the ideal distribution for maximum braking is approximately 70% on the front wheel and 30% on the rear. This ratio ensures the front tyre operates within its high-traction envelope, while the rear brake contributes to stability and additional stopping power. Incorrect balance, such as relying too heavily on the rear brake, can lead to excessively long stopping distances or a rear-wheel skid. Conversely, applying too much front brake too quickly can easily lock the front wheel, leading to a loss of steering control and a high likelihood of crashing.
An electronic safety system that monitors wheel speed and modulates brake pressure to prevent the wheels from locking up during braking, thereby maintaining traction and steering control.
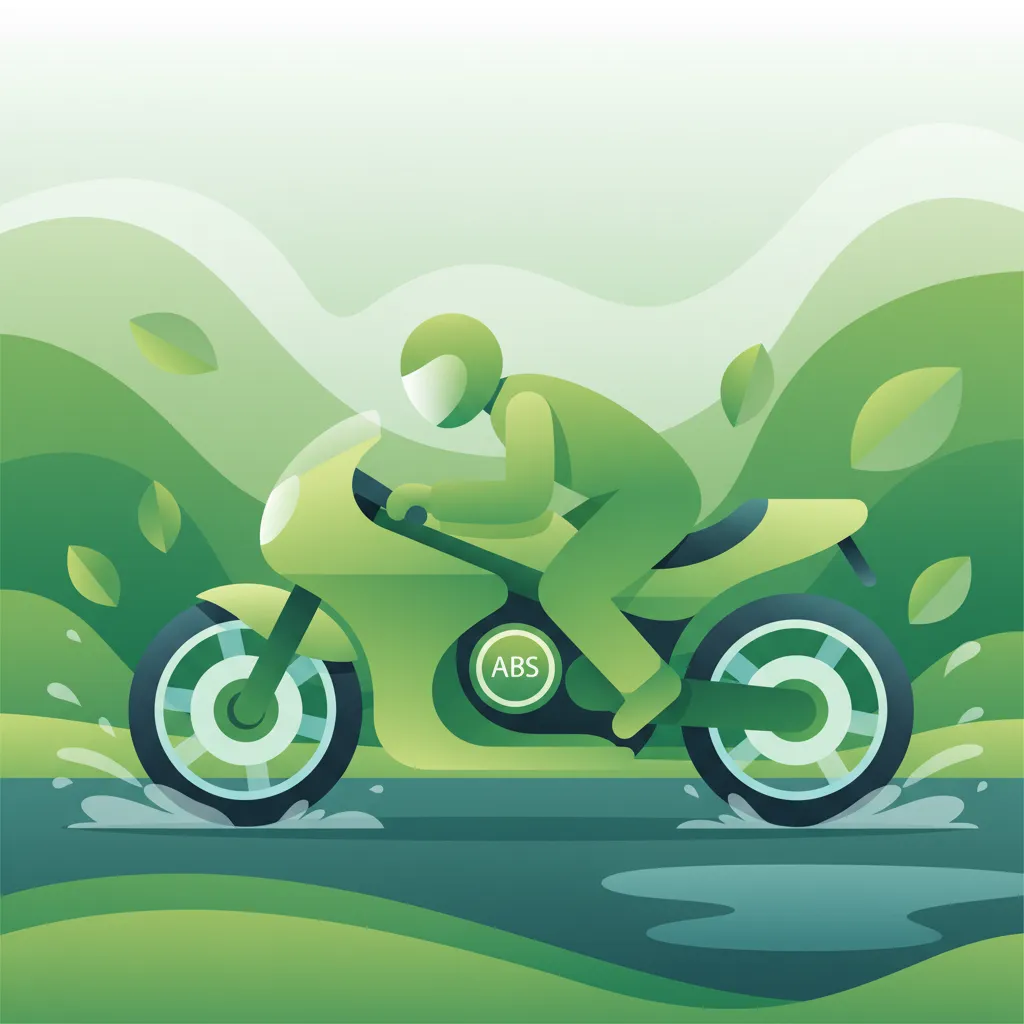
Many modern motorcycles are equipped with an Anti-Lock Braking System (ABS), a significant safety feature. ABS works by detecting when a wheel is about to lock up (i.e., its rotational speed drops too quickly relative to the vehicle's speed, indicating high slip). When this happens, the system rapidly modulates (pulsates) the brake pressure to that wheel, preventing it from locking completely. This allows the tyre to maintain grip with the road surface, ensuring maximal deceleration while preserving steering ability.
The primary benefit of ABS is that it enables riders to apply firm, consistent brake pressure in an emergency without fearing wheel lock-up, especially on slippery or uneven surfaces. While ABS helps achieve maximal deceleration, it does not compensate for poor riding posture or improper visual focus. Riders must still look ahead and maintain an upright body position. Dutch traffic regulations (RVV 1990 § 42) explicitly state that safety-critical vehicle systems, such as ABS, may not be disabled while the vehicle is in motion on public roads.
The practice of keeping one's gaze directed far ahead, past an immediate hazard, onto a stable point on the road.
In an emergency braking situation, a natural human response is to stare directly at the obstacle you are trying to avoid. This "target fixation" can be incredibly dangerous as it often leads to what you look at, causing inadvertent steering inputs towards the hazard. The correct technique, known as visual fixation or the "look-through technique," involves consciously directing your gaze far ahead, beyond the hazard, to a stable point on the road where you want to go or where you intend to stop. This improves steering stability, reduces "tunnel vision" caused by panic, and allows your brain to process the safest path and maintain control.
Your body position plays a crucial role in maintaining stability during an emergency stop. The ideal posture is to keep your torso upright and your elbows slightly bent and relaxed. Your legs should lightly grip the fuel tank to provide stability without tensing up. This upright/neutral body position allows the motorcycle's suspension to absorb braking forces effectively and ensures the tyres maintain consistent contact patches with the road.
Leaning forward aggressively during an emergency stop can be counterproductive. It shifts your centre of mass further forward, potentially overloading the front tyre and increasing the risk of front-wheel lock-up. Maintaining a relaxed, neutral posture ensures the motorcycle's design can function optimally under heavy braking.
Executing a controlled emergency stop is a learned skill that requires practice. Here's the procedure for straight-line emergency braking:
Identify the Hazard: Recognize an imminent threat that requires immediate maximum braking.
Look Ahead (Visual Fixation): Instantly shift your gaze past the hazard to your desired stopping point or clear escape path. Avoid staring at the obstacle.
Throttle Off and Clutch In: Simultaneously and quickly roll off the throttle completely and pull in the clutch lever. This disengages the engine from the rear wheel, preventing engine braking from destabilizing the rear and allowing the engine to idle.
Apply Both Brakes Progressively:
Front Brake: Begin applying the front brake lever smoothly but firmly. Increase pressure rapidly and progressively, squeezing it with increasing force up to the point of maximum traction or ABS activation.
Rear Brake: Apply the rear brake pedal simultaneously but with less initial force than the front. Maintain consistent, firm pressure to contribute to stopping power and stability, being mindful of potential rear-wheel lock-up, especially on non-ABS bikes or low-grip surfaces.
Maintain Upright Body Position: Keep your torso upright, elbows relaxed, and legs lightly gripping the tank. Allow the bike to absorb the forces.
Modulate Brakes to Traction Limit (Non-ABS): If your motorcycle doesn't have ABS, you must manually modulate brake pressure. If a wheel starts to lock up (you'll feel the tyre skid), briefly ease off the pressure slightly and then reapply it just below the lock-up point.
Hold Until Stop: Continue firm, progressive braking until the motorcycle comes to a complete, stable stop.
Look for Escape/Exit: As you come to a stop, maintain awareness of your surroundings and be prepared to move if the hazard shifts or another threat appears.
On a motorcycle without ABS, your feel for the brakes and the road surface is paramount. You must develop the ability to sense the tyre's traction limit. If you feel a wheel begin to lock (a shudder, loss of steering input for the front; a side-to-side wiggle for the rear), you must immediately and briefly release a fraction of the brake pressure before reapplying it. This manual modulation requires significant practice to become intuitive.
With an ABS-equipped motorcycle, the procedure for applying the brakes changes slightly but significantly for rider confidence. In an emergency, your primary task is to apply both the front and rear brake levers firmly and consistently. The ABS system will then automatically detect any impending wheel lock-up and modulate the brake pressure rapidly (you might feel a pulsating sensation through the levers) to maintain maximum traction. This allows you to focus more on steering and looking ahead, rather than precisely modulating brake pressure. While ABS is a powerful tool, it's still crucial to use progressive application to allow the system to engage smoothly and to ensure the bike remains stable.
The fundamental principles of emergency braking remain constant, but their application must be adapted based on various external factors and the state of your motorcycle.
Always adjust your speed to the prevailing road, traffic, and weather conditions (RVV 1990 § 6). This proactive measure is the most effective way to manage stopping distances.
The Dutch traffic regulations (Reglement Verkeersregels en Verkeerstekens 1990 - RVV 1990) include several articles that directly or indirectly govern a rider's responsibility during braking manoeuvres.
This article states, "A road user must be able to bring the vehicle to a stop safely when required." This is a fundamental principle underpinning all braking actions, including emergency stops. It means you must possess the skill and your vehicle must be in a condition that allows you to stop without colliding with other road users or obstacles, and without losing control.
Applying progressive emergency braking and stopping without colliding with a suddenly braking car ahead exemplifies correct application of RVV 1990 §30.
"Speed must be adjusted to road, traffic, and weather conditions." This is crucial for emergency braking because a lower speed directly translates to a shorter required stopping distance. By proactively reducing your speed in adverse conditions (wet roads, poor visibility), you increase your margin for safety and reduce the demand on your braking system in an emergency.
The Kennisbasis Rijvaardigheid (KBR) – the Dutch knowledge base for driving skills – explicitly outlines criteria for the A1 practical motorcycle test. Riders are required to demonstrate a progressive braking technique, often involving specific exercises where a controlled emergency stop from a set speed (e.g., 50 km/h) must be performed within a defined distance while maintaining stability. This reinforces the importance of mastering the concepts discussed in this lesson.
Failing to execute an emergency stop correctly can have severe consequences. Awareness of common pitfalls can help riders avoid them:
Let's illustrate the application of these principles in typical situations for Dutch A1 motorcycle theory students.
Setting: You are riding your 125cc motorcycle at 30 km/h on a straight, dry city road in the Netherlands. Traffic is moderate, and daylight visibility is good. Suddenly, the car directly ahead of you slams on its brakes to avoid a pedestrian who unexpectedly steps onto the road. You have approximately 15 metres to stop.
Correct Behaviour:
Why it's correct: This manoeuvre leverages progressive braking, optimal front-rear brake balance, and visual fixation on a high-traction surface to achieve the shortest possible stopping distance while maintaining stability, complying with RVV 1990 § 30.
Setting: You are riding at 80 km/h on a Dutch motorway during moderate rain. Your A1 motorcycle is equipped with ABS. Suddenly, you spot a large piece of debris (e.g., a shredded tyre) about 50 metres ahead in your lane.
Correct Behaviour:
Why it's correct: By trusting and firmly applying the brakes on an ABS-equipped motorcycle, you allow the system to optimize braking force for the low-traction wet surface, ensuring maximum deceleration without losing control, in compliance with RVV 1990 § 42 and § 6.
Setting: You are riding your motorcycle at 45 km/h in a quiet residential street, carrying a passenger and some luggage (a heavier load than usual). It's evening, and the pavement is damp. A child suddenly darts out from between parked cars.
Correct Behaviour:
Why it's correct: Adjusting the brake distribution to account for the increased rear load (passenger and luggage) prevents the front wheel from being overloaded and ensures both tyres contribute effectively to stopping, even on a damp surface. This demonstrates adaptability and safe use of controls (RVV 1990 § 44).
Mastering emergency braking is a cornerstone of safe motorcycling and a vital skill for your Dutch A1 motorcycle licence. Remember these key principles:
By diligently applying these principles and practicing regularly, you will develop the confidence and skill necessary to execute effective emergency stops, ensuring your safety and success on the road as an A1 motorcycle rider in the Netherlands.
Lesson content overview
Explore all units and lessons included in this driving theory course.
Explore search topics learners often look for when studying Emergency Braking Scenarios for Motorcycles. These topics reflect common questions about road rules, driving situations, safety guidance, and lesson level theory preparation for learners in the Netherlands.
Browse additional driving theory lessons that cover connected traffic rules, road signs, and common driving situations related to this topic. Improve your understanding of how different rules interact across everyday traffic scenarios.
Explore various real-world scenarios for motorcycle emergency braking, including adapting techniques for different road surfaces, weather conditions, and vehicle loads. Learn how Dutch traffic law applies to critical stopping situations.

This lesson focuses on the physical skill of an emergency stop, building on previous braking lessons. You will learn to adopt a braced body position, keeping your arms straight and looking ahead, not down. The content details the technique of applying both brakes rapidly but progressively to the point of maximum traction, and how to trust and utilize ABS if your motorcycle is equipped with it.

This lesson teaches the principles of performing a controlled emergency stop ('noodsremmen') to achieve the shortest possible stopping distance without losing control. It details the technique of applying both brakes firmly and progressively, managing the forward weight transfer, and maintaining an upright body posture to maximize braking efficiency. The content emphasizes braking in a straight line and looking ahead to where you want to stop, not at the obstacle.

This lesson provides a comprehensive guide to safe and effective deceleration on a motorcycle. You will learn the principles of controlled braking, including the progressive application of both the front and rear brakes to maximize stopping power while maintaining stability. The content also explains the role of engine braking in managing speed and how the Anti-lock Braking System (ABS) helps prevent wheel lock-up during hard braking.

This lesson prepares you for a critical situation: performing a maximum-force emergency stop. You will learn the correct body posture and braking technique to stop in the shortest possible distance without losing control. The content provides a clear explanation of how ABS works by rapidly pulsing the brakes to prevent the wheels from locking, allowing you to maintain steering control even during a panic stop.

This lesson teaches the technique of progressive braking, which involves applying the brakes smoothly and gradually rather than abruptly. This method allows the motorcycle's weight to transfer forward in a controlled manner, compressing the front suspension and increasing the size of the front tire's contact patch. This, in turn, maximizes available grip and allows for harder, safer braking without unsettling the chassis or locking a wheel.
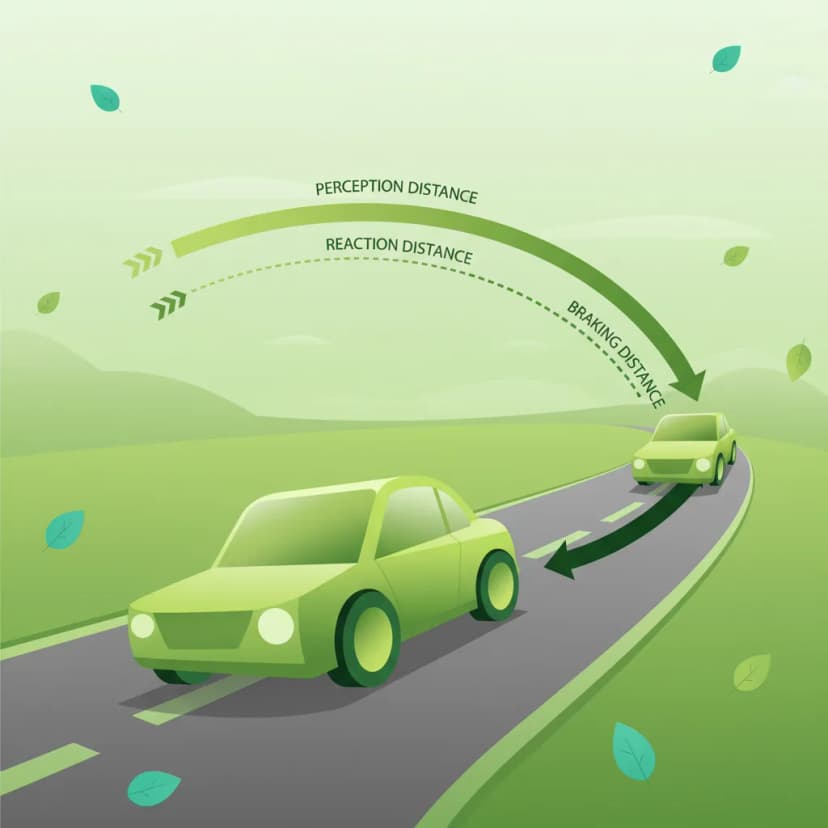
This lesson breaks down the concept of total stopping distance into its two key parts: the distance traveled during your reaction time and the distance the motorcycle travels after the brakes are applied. You will learn the formulas and rules of thumb for estimating these distances at various speeds. The content highlights how factors like rider fatigue, road surface conditions, and tyre quality can significantly increase your overall stopping distance.

This lesson provides a detailed breakdown of high-speed braking techniques, emphasizing the correct balance and application of the front ('voorrem') and rear ('achterrem') brakes. It explains the physics of weight transfer under braking and why the front brake provides the majority of stopping power. Techniques for progressive, smooth application to avoid overloading the front tire and losing traction are covered, ensuring riders can slow down quickly and safely from any speed.

This lesson provides a theoretical understanding of the components that make up the total stopping distance. It explains how to calculate reaction distance (the distance traveled before applying the brakes) and braking distance (the distance traveled while braking). The content highlights how speed exponentially increases stopping distance and how other variables like rider alertness, road grip, and brake condition play a significant role in the final calculation.

This lesson moves beyond basic braking to teach advanced techniques for optimal stopping performance. You will learn that the front brake provides the majority of your stopping power due to forward weight transfer, but that skillful application of the rear brake is crucial for stability. The content covers the concept of progressive braking—squeezing the levers smoothly—to manage traction and prevent wheel lock, especially on motorcycles without ABS.

This lesson provides a detailed explanation of the two-second rule as a simple yet effective method for maintaining a safe following distance in good conditions. It breaks down the concept of total stopping distance into its two components: reaction distance (the distance traveled before applying the brakes) and braking distance (the distance traveled while braking). Understanding this calculation is fundamental for appreciating the need for a sufficient space cushion to react to sudden events ahead.
Delve into the physics behind motorcycle emergency braking, including weight transfer, traction limits, and the role of ABS. Learn essential rider control techniques for safe and effective deceleration in critical situations according to Dutch theory.
This lesson teaches the technique of progressive braking, which involves applying the brakes smoothly and gradually rather than abruptly. This method allows the motorcycle's weight to transfer forward in a controlled manner, compressing the front suspension and increasing the size of the front tire's contact patch. This, in turn, maximizes available grip and allows for harder, safer braking without unsettling the chassis or locking a wheel.
This lesson provides a comprehensive guide to safe and effective deceleration on a motorcycle. You will learn the principles of controlled braking, including the progressive application of both the front and rear brakes to maximize stopping power while maintaining stability. The content also explains the role of engine braking in managing speed and how the Anti-lock Braking System (ABS) helps prevent wheel lock-up during hard braking.
This lesson prepares you for a critical situation: performing a maximum-force emergency stop. You will learn the correct body posture and braking technique to stop in the shortest possible distance without losing control. The content provides a clear explanation of how ABS works by rapidly pulsing the brakes to prevent the wheels from locking, allowing you to maintain steering control even during a panic stop.
This lesson explores the dynamic differences between using the front and rear brakes on a motorcycle. It explains that due to forward weight transfer under deceleration, the front brake provides the majority (around 70-80%) of the stopping power. The content details how to use both brakes in a coordinated manner for stable, effective braking, and clarifies the specific situations where the rear brake is particularly useful, such as for fine-tuning speed at low RPMs.
This lesson explains the function of an Anti-lock Braking System (ABS) on a motorcycle, detailing how it prevents wheel lock-up during heavy braking, thereby allowing the rider to maintain steering control. It clarifies that while ABS is a powerful safety aid, it does not defy physics and may sometimes increase stopping distances on loose surfaces. The content teaches riders to trust the system and apply the brakes fully and firmly in an emergency, letting the ABS manage traction.
This lesson focuses on the physical skill of an emergency stop, building on previous braking lessons. You will learn to adopt a braced body position, keeping your arms straight and looking ahead, not down. The content details the technique of applying both brakes rapidly but progressively to the point of maximum traction, and how to trust and utilize ABS if your motorcycle is equipped with it.
This lesson teaches the principles of performing a controlled emergency stop ('noodsremmen') to achieve the shortest possible stopping distance without losing control. It details the technique of applying both brakes firmly and progressively, managing the forward weight transfer, and maintaining an upright body posture to maximize braking efficiency. The content emphasizes braking in a straight line and looking ahead to where you want to stop, not at the obstacle.
This lesson moves beyond basic braking to teach advanced techniques for optimal stopping performance. You will learn that the front brake provides the majority of your stopping power due to forward weight transfer, but that skillful application of the rear brake is crucial for stability. The content covers the concept of progressive braking—squeezing the levers smoothly—to manage traction and prevent wheel lock, especially on motorcycles without ABS.
This lesson provides a detailed breakdown of high-speed braking techniques, emphasizing the correct balance and application of the front ('voorrem') and rear ('achterrem') brakes. It explains the physics of weight transfer under braking and why the front brake provides the majority of stopping power. Techniques for progressive, smooth application to avoid overloading the front tire and losing traction are covered, ensuring riders can slow down quickly and safely from any speed.

This lesson explains the mechanical and hydraulic principles behind the common types of motorcycle brakes. It compares the operation and performance characteristics of disc brakes and drum brakes. The function of an Anti-lock Braking System (ABS) is also detailed, explaining how it prevents wheel lock-up during hard braking, thereby allowing the rider to maintain steering control and reduce stopping distances in many situations.
Find clear answers to common questions learners have about Emergency Braking Scenarios for Motorcycles. Learn how the lesson is structured, which driving theory objectives it supports, and how it fits into the overall learning path of units and curriculum progression in the Netherlands. These explanations help you understand key concepts, lesson flow, and exam focused study goals.
The most crucial factor is keeping the motorcycle upright. Leaning, even slightly, can cause the tires to lose traction when braking hard, leading to a fall. Focus on maintaining a straight line and keeping the bike vertical.
Apply both brakes firmly and progressively. The front brake provides most of the stopping power (around 70-80%), while the rear brake helps stabilize the motorcycle. Avoid locking either wheel; modulate pressure to maintain grip, especially if you don't have ABS.
Anti-lock Braking System (ABS) prevents the wheels from locking up by rapidly pulsing the brakes. This allows you to maintain steering control even under maximum braking, making it safer and often shorter. With ABS, you can typically 'stomp and steer'.
Absolutely not. You should always look ahead, in the direction you want to go. Looking down can cause you to steer off course or lose balance. Your brain and body will instinctively react to applying the brakes if you've practiced the technique.
The CBR theory exam will present scenarios where you need to identify hazards and choose the safest response. Questions may involve calculating stopping distances, understanding the effect of speed, or selecting the correct action for a sudden obstacle.