
When riding your motorcycle in challenging Dutch weather or low visibility, maintaining a safe speed and adequate stopping distance is paramount. This lesson builds on your understanding of speed and distance by focusing specifically on how adverse conditions drastically affect your ability to stop. You'll learn how to dynamically adjust your speed and following distance to ensure you can always react safely to hazards and pass your CBR Category A theory exam.
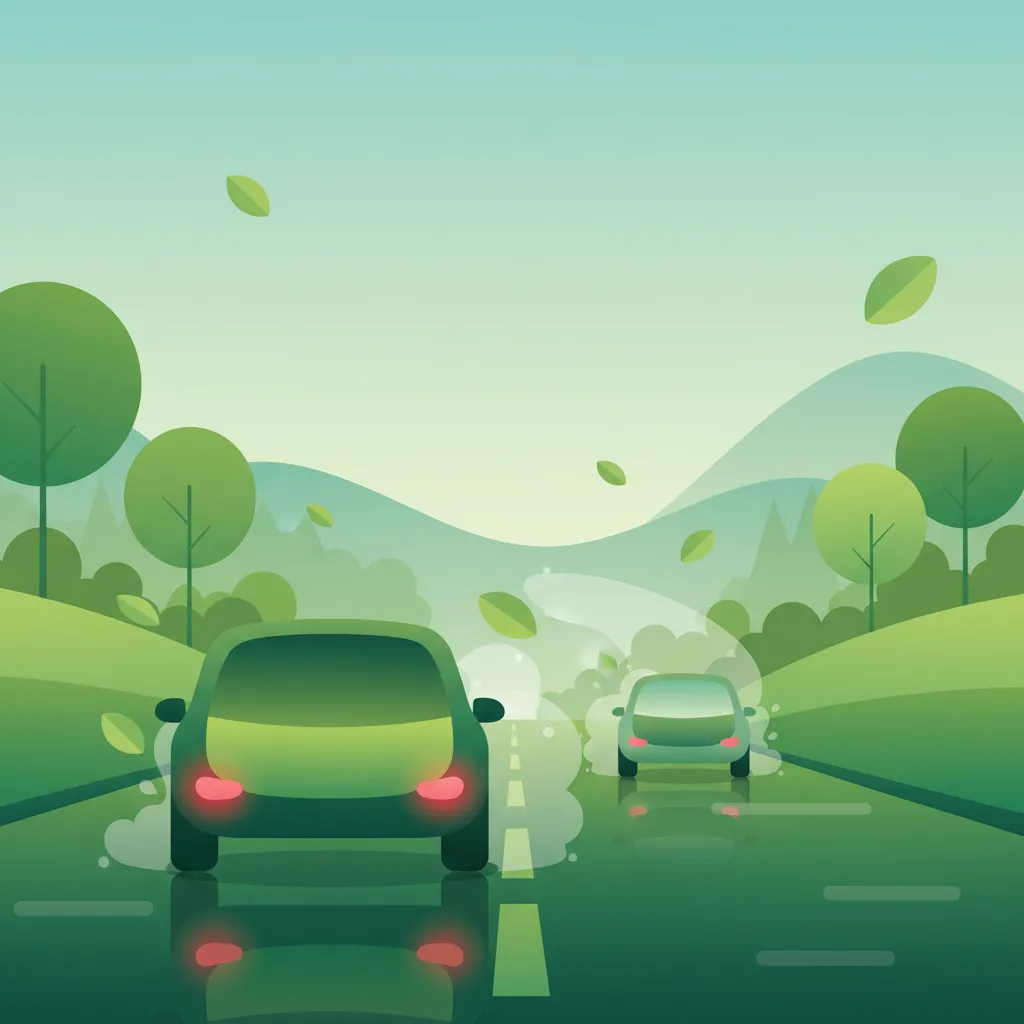
Navigating the roads of the Netherlands safely on a motorcycle requires a profound understanding of how varying conditions impact your ability to stop. This lesson, a vital part of your Dutch Motorcycle Theory – Category A Comprehensive Preparation, delves into the critical relationship between adverse weather, reduced road traction, limited visibility, and the massively increased distances required to bring your motorcycle to a complete halt. By mastering these principles, you will learn to constantly reassess your speed based on visual feedback from the road surface and the level of visibility, ensuring you can always stop within the distance you can clearly see ahead. This proactive approach is not just a safety recommendation; it is a core legal and safety requirement under Dutch traffic law (RVV 1990, Article 5).
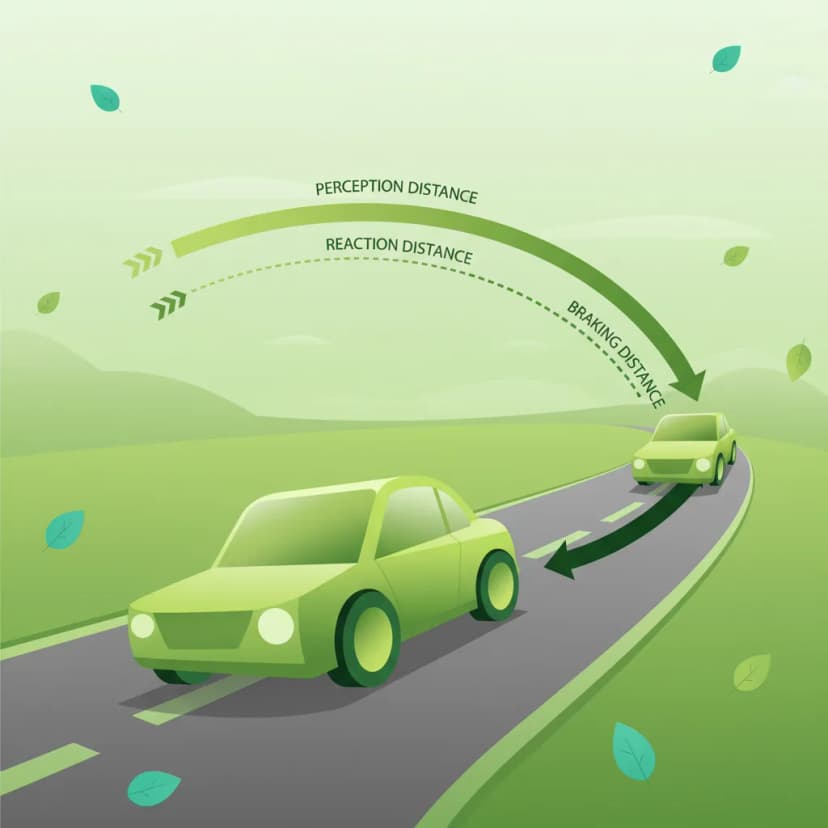
Every time you ride, you need to ensure you can stop your motorcycle before reaching any obstacle in your line of sight. This crucial measurement is known as the Stopping Sight Distance (SSD). It represents the total distance your motorcycle travels from the moment you perceive a hazard until you come to a complete stop.
The SSD is composed of two main parts:
Both components are significantly affected by your speed and the prevailing road and environmental conditions. Understanding this dynamic relationship is essential for safe riding, particularly on high-performance motorcycles that, despite their advanced braking systems, are still subject to the laws of physics and the limitations of road surface friction.
It's a common misconception that doubling your speed merely doubles your stopping distance. In reality, the relationship is non-linear. While perception-reaction distance increases linearly with speed, braking distance increases with the square of your speed. This means that if you double your speed, your braking distance will increase by approximately four times. This exponential increase highlights why adjusting speed in poor conditions is paramount.
Remember: Higher speed means significantly longer braking distances. Always factor this into your judgment, especially when conditions are less than ideal.
The Perception-Reaction Time (PRT) is the interval between recognizing a hazard and physically initiating your braking action. For an alert and experienced rider, the standard PRT is typically around 1.5 seconds. However, this is not a constant value; it can fluctuate significantly based on several factors:
Even a small increase in PRT translates directly into a longer perception-reaction distance, which in turn increases your overall SSD. For example, at 80 km/h (22.2 m/s), an increase in PRT from 1.5 seconds to 2.0 seconds adds an extra 11.1 metres to your perception distance. This additional distance could be the difference between avoiding a collision and being involved in one.
Traction Coefficient (μ), also known as the coefficient of friction, is a numerical value that quantifies the amount of grip your motorcycle's tyres have on the road surface. It represents the ratio of the maximum friction force the tyres can generate to the normal load pressing them against the road. Essentially, a higher μ means more grip and better braking capability, while a lower μ means less grip and longer braking distances.
The traction coefficient is heavily influenced by the road surface material, its condition, and the tyre type. Here are typical values for various conditions encountered in the Netherlands:
When the traction coefficient drops, the maximum deceleration (braking force) your motorcycle can achieve decreases proportionally. This directly leads to a longer braking distance, even if your perception-reaction time remains constant. Modern braking systems like ABS (Anti-lock Braking System) are designed to prevent wheel lock-up and maintain steering control under hard braking, but they cannot create traction that does not exist. If the μ is low, ABS will prevent a skid but will not magically shorten your stopping distance to dry-road levels.
To provide a practical and easy-to-apply guideline for riders, the concept of a Safety Margin Factor (SMF) is used. This is a multiplicative factor applied to your ideal (dry, alert rider) stopping sight distance to conservatively estimate the required SSD under adverse conditions.
While not numerically codified in Dutch law, these factors are widely recommended by traffic safety authorities and police circulars as best practice to meet the general legal requirement for safe driving.
Consider the SMF as a mental multiplier to quickly assess how much more space you need.
Here are typical SMF values recommended for various conditions in the Netherlands:
For instance, if your motorcycle requires 70 metres to stop on a dry road at a certain speed, on a wet road, you might need 1.5 to 2 times that distance, meaning 105 to 140 metres. This significant increase necessitates a corresponding reduction in speed and an increase in following distance.
The ultimate goal of understanding SSD, PRT, μ, and SMF is to determine your Adjusted Speed. This is the maximum speed you can safely and legally travel at any given moment, ensuring that your calculated stopping sight distance (with the appropriate Safety Margin Factor applied) is always less than or equal to the distance you can clearly see ahead (D_vis).
The principle is straightforward: SSD (adjusted for conditions) ≤ Visible Distance (D_vis).
Riders must continuously evaluate and re-evaluate their Adjusted Speed as conditions change. This might involve:
While you won't be performing complex calculations on the road, understanding the underlying formula helps appreciate the interconnectedness:
SSD = (PRT × V) + (V² / (2 ⋅ a_brake))
Where:
To determine Adjusted Speed, you'd effectively work backward: given your D_vis and the conditions (which determine PRT and μ), you find the maximum V that satisfies the SSD ≤ D_vis criterion, then apply the SMF for an extra safety buffer.
Never assume a fixed "rain speed" or "fog speed." Conditions vary, and your adjusted speed must be dynamic and constantly re-evaluated based on the actual visible distance and road surface grip.
Adjusting your speed is one side of the coin; maintaining an adequate following distance is the other. This gap, measured either temporally (in seconds) or spatially (in metres), provides the necessary buffer to react and stop safely if the vehicle ahead brakes suddenly or if an obstacle appears.
The Netherlands uses a temporal following distance as the primary recommendation because it implicitly accounts for your speed: the faster you go, the further you travel in the same number of seconds, naturally increasing your spatial gap.
The time gap, measured in seconds, between your motorcycle and the vehicle directly in front of you. To measure it, pick a stationary object (like a road sign) that the vehicle ahead passes, then count how many seconds it takes for your motorcycle to reach the same object.
This principle is enshrined in Dutch traffic law:
RVV 1990 Article 12: "De weggebruiker houdt voldoende afstand om tijdig te kunnen stoppen bij onverwachte situaties." (The road user shall maintain sufficient distance to be able to stop in time in unexpected situations.) This mandatory rule applies to all drivers on any road.
If you maintain a 2-second gap:
The temporal rule automatically adjusts the spatial gap, simplifying safe distance management.
Dutch traffic legislation places a clear and mandatory obligation on all road users, including motorcyclists, to adapt their speed to the prevailing circumstances. This legal framework is designed to prevent "safety margin erosion," which is a primary cause of collisions.
RVV 1990 Article 5, Sub-article 3: "De weggebruiker past de snelheid aan de heersende omstandigheden aan." (The road user shall adapt the speed to the prevailing circumstances.)
Applicability: This is a mandatory rule that applies to all drivers, on all road types, whenever conditions such as reduced traction, limited visibility, or increased hazard potential are present.
Rationale: This article ensures that your speed is always compatible with your ability to stop safely under current conditions, preventing you from creating a hazardous situation. If your SSD exceeds the distance you can clearly see, you cannot guarantee a safe stop, thus violating this principle.
Correct Example: Riding at 40 km/h on a wet highway where your SSD (calculated with an SMF of 2.0) is less than or equal to your visible distance. Incorrect Example: Maintaining 80 km/h in heavy rain, even though your SSD now exceeds the visible distance due to reduced traction.
Wegenverkeerswet 1994 (WVW 1994) Section 5: This law establishes a general duty of care to drive with "zorgvuldige rijvaardigheid" (careful driving skill). This broad legal foundation implicitly includes the requirement for appropriate speed adaptation and maintaining safe distances.
Rationale: This broad legal principle underpins all specific traffic rules, obliging drivers to prevent danger or hindrance on the road.
Even experienced riders can make critical errors in judgment regarding speed and stopping distances. Being aware of these common pitfalls can significantly enhance your safety.
Why it's wrong: Many riders use their dry-road braking intuition even when the road is wet. However, the traction coefficient (μ) drops significantly on wet asphalt, drastically increasing braking distance. Correct behavior: Always apply a Safety Margin Factor (SMF) of at least 1.5 to 2.0 on wet surfaces. Recalculate your required SSD and increase your temporal following distance to at least 4 seconds. Consequence: A rear-end collision or inability to stop for an obstacle.
Why it's wrong: Low-beam headlights provide a limited visible distance (D_vis), often much shorter than your SSD at higher speeds. You could outrun your lights. Correct behavior: Switch to high-beam headlights whenever permitted and safe (i.e., no oncoming traffic or vehicles ahead). If high-beam isn't possible, reduce your speed until your SSD is well within the range of your low-beam visibility. Consequence: Colliding with unseen hazards such as animals, pedestrians, or unexpected turns.
Why it's wrong: Fog dramatically reduces visible distance, sometimes to less than 30 metres. Maintaining your previous speed means your SSD will far exceed what you can see. Correct behavior: Immediately and smoothly reduce your speed to a level where your SSD is less than or equal to the fog-limited visible distance. This often means reducing speed to 30 km/h or even less. Use your fog lights if equipped and permitted. Consequence: High risk of collision with stationary vehicles or objects barely visible in the fog.
Why it's wrong: Trucks have longer braking distances than motorcycles (especially in low-traction conditions), and in snow, they create significant spray that further reduces your visibility. Your perception-reaction time might also increase due to poor visibility. Correct behavior: Greatly increase your temporal following distance to 6 seconds or more. Account for a significantly reduced μ and a higher SMF (e.g., 3.0) for snowy conditions. Consequence: A high-speed rear-end crash if the truck brakes suddenly.
Why it's wrong: Anti-lock Braking Systems (ABS) prevent your wheels from locking, thus maintaining steering control during hard braking. However, ABS does not magically improve the available traction. If the road is icy, your stopping distance will still be very long, regardless of ABS. Correct behavior: Treat ABS as a control-enhancing system, not a braking-distance reducing one. Always adjust your speed and following distance based on the actual traction coefficient of the road surface. Consequence: Overconfidence leading to insufficient stopping distance and loss of control on extremely low-traction surfaces.
Safe riding demands constant adaptation. Here's how different conditions affect your speed and stopping distances:
| Condition | Variation in Principle | Reasoning |
|---|---|---|
| Heavy Rain | Increase SMF to 1.8-2.0; required temporal following distance to ≥ 4 seconds. | Water significantly reduces the traction coefficient (μ) to around 0.5-0.6, increasing braking distance sharply. Vision may also be impaired. |
| Packed Snow | SMF ≈ 2.5-3.0; following distance ≥ 6 seconds; gentle inputs. | Snow reduces μ to 0.2-0.3. "Snowplow" resistance also plays a role. Sudden movements can cause skidding. |
| Ice (Black Ice) | SMF ≥ 3.5-4.0; following distance ≥ 8 seconds; limit speed to ≤ 30 km/h, or even stop. | μ can be as low as 0.1. Braking distance becomes exceptionally long. Any sudden acceleration, braking, or turning can lead to a fall. |
| Night with Poor Headlamp Alignment | Reduce speed until SSD ≤ D_vis (often 20-30 m). | Misaligned headlights reduce effective visible distance, even if the road surface is dry. You can only react to what you can see. |
| Glare from Oncoming Vehicles | Temporarily increase PRT by 0.3-0.5 seconds; consider increasing SMF. | Intense glare causes temporary loss of visual contrast, increasing the time needed to perceive and react to hazards. |
| Urban Residential Roads (many intersections) | Adopt a lower base speed (≤ 30 km/h) and a slight SMF (e.g., 1.2) even in dry conditions. | Higher incidence of sudden stops, pedestrians, cyclists, and parked vehicles obscuring views. Always be prepared for the unexpected. |
| Motorways (High Speeds) | Maintain a higher baseline speed but always respect the visible distance before overtaking or entering congested flow. | High speeds dramatically magnify SSD. Ensure your SSD is always less than the clear distance in your lane, especially when changing lanes or passing. |
| Heavy Load / Passenger | Reduce effective μ for braking calculations by 5-10%; increase SMF by 0.1-0.2. | Added weight shifts the center of gravity, potentially reducing front-wheel traction during braking and increasing inertia, thus lengthening braking distance. |
| Vulnerable Users (e.g., Cyclists on Wet Road) | Increase minimum following distance to provide an extra buffer for the cyclist, whose braking distance might be even longer than yours on wet surfaces. | Cyclists have smaller contact patches and typically less advanced braking systems. Anticipate their longer stopping times. |
| Vulnerable Users (Pedestrian in Fog) | Reduce speed until you can clearly see any pedestrian at least 2 seconds ahead. Be prepared to stop instantly. | Pedestrians may appear suddenly. Your limited visibility in fog magnifies the risk. Assume they might not see you either. |
Let's look at how these concepts apply to real-world riding situations in the Netherlands.
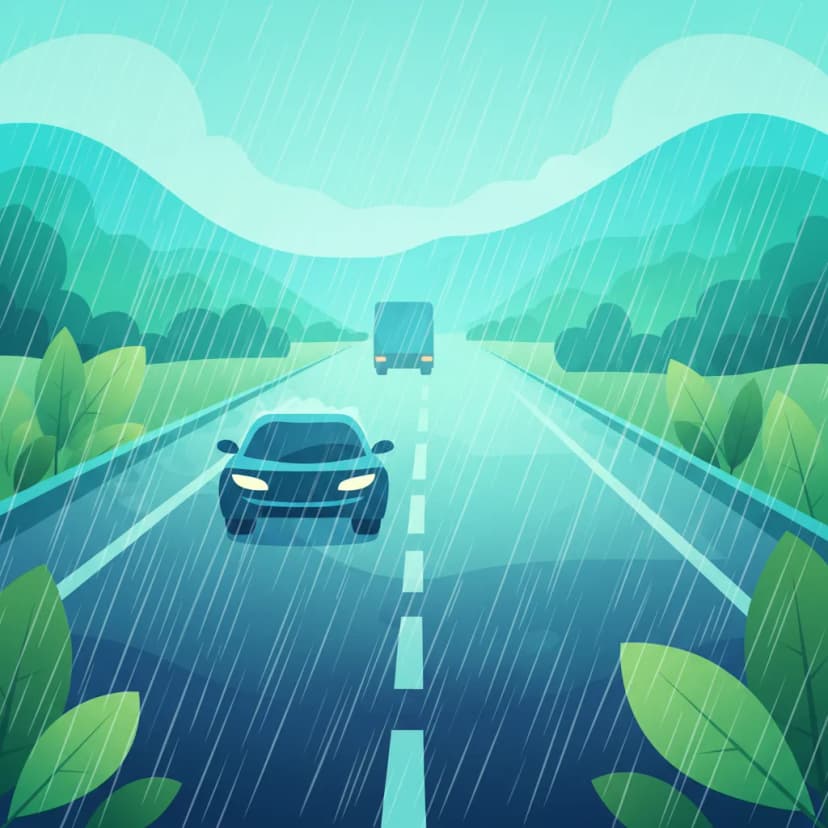
Setting: A dual carriageway in the Netherlands. Rain is moderate, the road surface is visibly wet, and your clear visible distance is approximately 70 metres. The speed limit is 80 km/h.
Decision Point: Determine a safe, adjusted speed and following distance.
Correct Behavior:
Why Correct: This speed reduction aligns your adjusted SSD with your visible distance, satisfying RVV 1990 Article 5 sub-article 3.
Incorrect Behavior: Maintaining 80 km/h. At this speed, your adjusted SSD (with SMF=1.8) would be over 110 m, far exceeding your 70 m visible distance. You would be unable to stop for a sudden hazard.
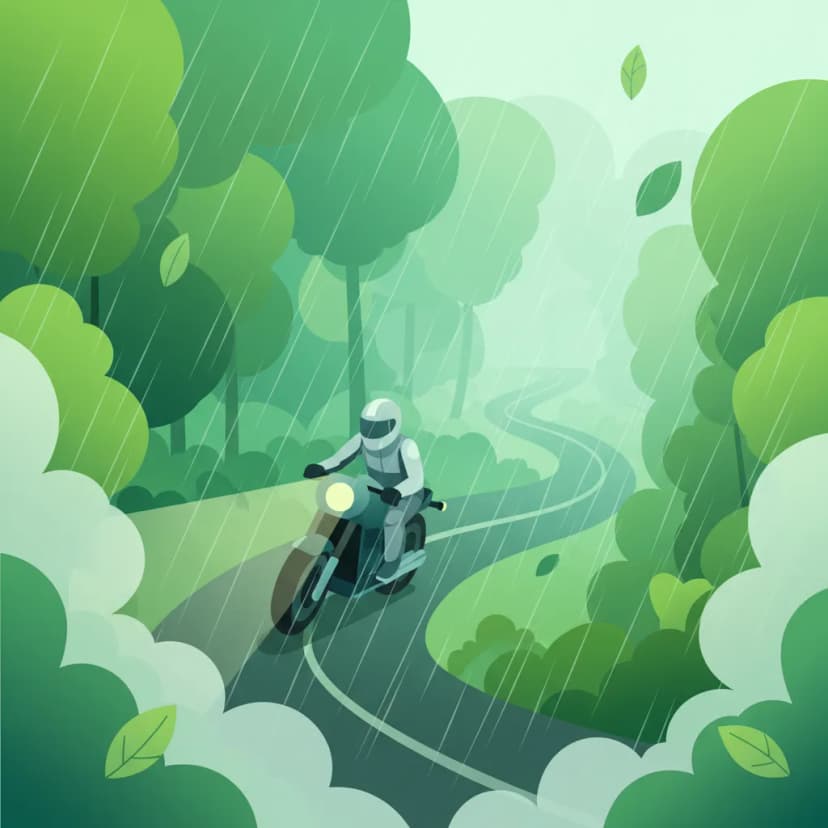
Setting: A two-lane rural road at night. Dense fog limits visibility to a mere 20 metres. Your headlight is on low-beam only. The speed limit is 50 km/h.
Decision Point: Determine the maximum safe speed given the extremely limited D_vis.
Correct Behavior:
Why Correct: You have adjusted your speed so that your SSD is always less than the extremely limited visible distance, prioritizing safety above all else.
Incorrect Behavior: Maintaining 50 km/h. Your SSD would be drastically longer than your visible distance, making a collision with an unseen obstacle almost inevitable.
To ensure you ride safely and comply with Dutch traffic law, remember these essential points:
Lesson content overview
Explore all units and lessons included in this driving theory course.
Explore search topics learners often look for when studying Adjusted Speed and Stopping Distances in Poor Conditions. These topics reflect common questions about road rules, driving situations, safety guidance, and lesson level theory preparation for learners in the Netherlands.
Browse additional driving theory lessons that cover connected traffic rules, road signs, and common driving situations related to this topic. Improve your understanding of how different rules interact across everyday traffic scenarios.
Learn how adverse weather like rain, snow, and fog dramatically impacts motorcycle stopping distances in the Netherlands. Understand the principles of traction, visibility, and speed adaptation for safe riding according to Dutch traffic law (RVV 1990).
This lesson explains why the standard two-second rule is insufficient in adverse conditions and requires extension. It details how factors like rain, fog, and darkness reduce both visibility and tire grip, thereby significantly increasing total stopping distance. The content provides practical guidelines, such as extending the following gap to four seconds or more in the wet, to ensure the rider always has enough time and space to stop safely, regardless of the conditions.

This lesson provides survival strategies for riding in the most challenging weather conditions, including heavy rain, snow, and potential ice. It emphasizes the importance of mental preparation, drastically reduced speeds, and hyper-smooth inputs for throttle, brakes, and steering. The content also covers identifying high-risk areas for 'black ice,' such as bridges and shaded spots, and the critical role of appropriate waterproof and insulated gear in preventing hypothermia and maintaining concentration.

Riding on two wheels requires special care on surfaces with reduced grip. This lesson teaches you how to handle challenging conditions like rain, ice, wet leaves, or tram tracks. Key principles include reducing speed significantly, making all control inputs (braking, accelerating, steering) much more smoothly and gradually, and increasing your following distance to allow for much longer stopping distances. Recognizing potentially slippery areas is a critical part of proactive hazard perception.

Rain significantly reduces tire grip and rider visibility. This lesson covers the essential adjustments needed for wet-weather riding, including reducing speed, increasing following distance, and applying all controls more smoothly. It explains the danger of hydroplaning (aquaplaning) when tires lose contact with the road over standing water and how to avoid it. You will also learn about the importance of good tire tread depth for channeling water away and maintaining traction.
This lesson provides a detailed guide to riding in wet and low-visibility conditions. You will learn to make all your control inputs—braking, accelerating, and steering—exceptionally smooth to avoid breaking traction on slippery surfaces. The content covers the dangers of painted lines and manhole covers when wet, and the importance of increasing your following distance dramatically to account for longer braking distances.
This lesson provides a detailed explanation of the two-second rule as a simple yet effective method for maintaining a safe following distance in good conditions. It breaks down the concept of total stopping distance into its two components: reaction distance (the distance traveled before applying the brakes) and braking distance (the distance traveled while braking). Understanding this calculation is fundamental for appreciating the need for a sufficient space cushion to react to sudden events ahead.

This lesson explains the science behind reduced grip on wet surfaces and the dangerous phenomenon of hydroplaning, where a tire rides on a layer of water instead of the road. It details the critical roles of tire tread depth, tire pressure, and riding speed in maintaining contact with the asphalt. Riders will learn techniques for riding in the rain, including using exceptionally smooth control inputs and proactively reducing speed when approaching standing water.

This lesson provides a theoretical understanding of the components that make up the total stopping distance. It explains how to calculate reaction distance (the distance traveled before applying the brakes) and braking distance (the distance traveled while braking). The content highlights how speed exponentially increases stopping distance and how other variables like rider alertness, road grip, and brake condition play a significant role in the final calculation.
This lesson breaks down the concept of total stopping distance into its two key parts: the distance traveled during your reaction time and the distance the motorcycle travels after the brakes are applied. You will learn the formulas and rules of thumb for estimating these distances at various speeds. The content highlights how factors like rider fatigue, road surface conditions, and tyre quality can significantly increase your overall stopping distance.

This lesson focuses on the crucial safety practice of maintaining an adequate following distance to the vehicle ahead. It explains the 'two-second rule' as a minimum baseline and emphasizes the need to increase this gap to three or four seconds in adverse conditions like rain or poor visibility. For a motorcyclist, this 'space cushion' is a critical buffer that provides the necessary time and space to react to sudden hazards or stop safely.
Explore the core components of motorcycle stopping distance: perception-reaction time and braking distance. Understand how speed, rider state, and road conditions influence these elements according to Dutch motorcycle theory.
This lesson provides a theoretical understanding of the components that make up the total stopping distance. It explains how to calculate reaction distance (the distance traveled before applying the brakes) and braking distance (the distance traveled while braking). The content highlights how speed exponentially increases stopping distance and how other variables like rider alertness, road grip, and brake condition play a significant role in the final calculation.
This lesson breaks down the concept of total stopping distance into its two key parts: the distance traveled during your reaction time and the distance the motorcycle travels after the brakes are applied. You will learn the formulas and rules of thumb for estimating these distances at various speeds. The content highlights how factors like rider fatigue, road surface conditions, and tyre quality can significantly increase your overall stopping distance.
This lesson provides a detailed explanation of the two-second rule as a simple yet effective method for maintaining a safe following distance in good conditions. It breaks down the concept of total stopping distance into its two components: reaction distance (the distance traveled before applying the brakes) and braking distance (the distance traveled while braking). Understanding this calculation is fundamental for appreciating the need for a sufficient space cushion to react to sudden events ahead.
This lesson explains why the standard two-second rule is insufficient in adverse conditions and requires extension. It details how factors like rain, fog, and darkness reduce both visibility and tire grip, thereby significantly increasing total stopping distance. The content provides practical guidelines, such as extending the following gap to four seconds or more in the wet, to ensure the rider always has enough time and space to stop safely, regardless of the conditions.

This lesson teaches the principles of performing a controlled emergency stop ('noodsremmen') to achieve the shortest possible stopping distance without losing control. It details the technique of applying both brakes firmly and progressively, managing the forward weight transfer, and maintaining an upright body posture to maximize braking efficiency. The content emphasizes braking in a straight line and looking ahead to where you want to stop, not at the obstacle.

This lesson provides a comprehensive guide to safe and effective deceleration on a motorcycle. You will learn the principles of controlled braking, including the progressive application of both the front and rear brakes to maximize stopping power while maintaining stability. The content also explains the role of engine braking in managing speed and how the Anti-lock Braking System (ABS) helps prevent wheel lock-up during hard braking.
This lesson explains the components of the total stopping distance: the reaction distance (distance traveled before you start braking) and the braking distance (distance traveled while braking). You will learn the general formulas and rules of thumb for estimating these distances at different speeds. Understanding that braking distance increases exponentially with speed is a critical piece of knowledge that reinforces the importance of maintaining safe speeds and following distances.

This lesson outlines the step-by-step procedure for executing a controlled emergency stop in a straight line. It emphasizes keeping the motorcycle upright, looking ahead, and applying both brakes firmly and progressively up to the point of maximum traction (or ABS activation). Understanding this technique is critical for minimizing stopping distance in a sudden hazard scenario and is a key skill assessed in practical motorcycle training.

This lesson focuses on the physical skill of an emergency stop, building on previous braking lessons. You will learn to adopt a braced body position, keeping your arms straight and looking ahead, not down. The content details the technique of applying both brakes rapidly but progressively to the point of maximum traction, and how to trust and utilize ABS if your motorcycle is equipped with it.

This lesson prepares you for a critical situation: performing a maximum-force emergency stop. You will learn the correct body posture and braking technique to stop in the shortest possible distance without losing control. The content provides a clear explanation of how ABS works by rapidly pulsing the brakes to prevent the wheels from locking, allowing you to maintain steering control even during a panic stop.
Find clear answers to common questions learners have about Adjusted Speed and Stopping Distances in Poor Conditions. Learn how the lesson is structured, which driving theory objectives it supports, and how it fits into the overall learning path of units and curriculum progression in the Netherlands. These explanations help you understand key concepts, lesson flow, and exam focused study goals.
While the general rule is two seconds, in poor conditions like rain or fog, you must significantly increase this. For wet roads, aim for at least four seconds. In heavy rain, fog, or icy conditions, this could extend to six seconds or more. Always prioritise being able to stop safely within the distance you can clearly see.
Yes, stopping distances can be nearly double on wet roads compared to dry ones, and even longer on icy surfaces. This is due to reduced friction between the tires and the road. For Category A motorcycles, with their potential for high speeds and power, this difference is critical to understand for safe riding.
Look for the road surface appearing dark and shiny, especially after light rain has started (this washes oil to the surface). Patches of standing water, oil slicks, or leaves can also indicate reduced grip. On colder days, be extra wary of shaded areas which may hold frost or ice longer.
When visibility is poor due to fog, heavy rain, or snow, you must reduce your speed substantially. You need to be able to stop within the distance you can see. On a motorway (snelweg), this means being prepared to stop quickly for traffic ahead, even if you can only see a short distance.
Yes, heavier motorcycles generally have slightly longer stopping distances than lighter ones due to inertia. However, the primary factor in poor conditions remains the reduced grip. Riders must be aware of their motorcycle's characteristics and adjust speed and distance accordingly, especially when carrying a passenger or luggage.