
Welcome to the lesson on Regulatory Signs, a key component of the 'Road Sign Identification' unit and your preparation for the Dutch Category B driving theory test. These signs are not suggestions; they are legal commands that dictate crucial actions at intersections and on specific routes. Understanding and obeying them is fundamental for safe and lawful driving in the Netherlands.
Navigating the roads of the Netherlands safely and lawfully requires a thorough understanding of its traffic regulations, particularly the mandatory commands issued by regulatory signs. These signs are not merely suggestions; they are explicit legal instructions that every driver must obey to maintain order, prevent accidents, and ensure the smooth flow of traffic. This lesson delves into the specifics of these crucial visual cues, providing a comprehensive guide to identifying them, understanding their legal implications, and responding correctly in various driving scenarios.
This lesson is foundational for your Dutch Category B driving license, building upon basic road sign recognition and introducing the legal framework that governs mandatory actions on the road.
Regulatory signs are the backbone of traffic control, designed to eliminate ambiguity and enforce strict compliance with traffic laws. In the Netherlands, these signs fall primarily under the 'B' (Priority) and 'C' (Closed/Obligatory Directions) categories of the official Road Traffic Regulations (RVV 1990). They dictate who has priority, which actions are forbidden, and which paths are compulsory, making them the most authoritative visual directives on the road.
Traffic signs that convey mandatory instructions, prohibitions, or restrictions that drivers must legally obey. They are typically circular with red borders (for prohibitions), blue (for mandatory directions), or specific shapes like the octagonal stop sign.
The primary purpose of regulatory signs is to ensure safety and order on public roads. They are strategically placed at junctions, intersections, entrances to restricted areas, and specific road sections to guide drivers through potentially hazardous or complex situations. By clearly stating what drivers must do or must not do, these signs play a critical role in preventing collisions and managing traffic flow efficiently. Failure to comply with a regulatory sign is a serious traffic offense and can lead to significant penalties, including fines and points on your license.
In the hierarchy of traffic control devices, regulatory signs hold significant authority. They embody the legal framework of Dutch road law, serving as immediate, visible commands that reinforce rules regarding right-of-way, access, and vehicle movement. While other signs, such as warning signs, advise drivers of potential hazards, regulatory signs impose direct legal obligations. This means that a regulatory sign can supersede general right-of-way rules or even other types of signs if a conflict arises, though careful verification against the official Dutch Road Code (RVV 1990) is always recommended for specific nuances.
One of the most critical regulatory signs in Dutch traffic is the mandatory stop sign, code B6. Understanding and strictly adhering to its command is paramount for road safety.
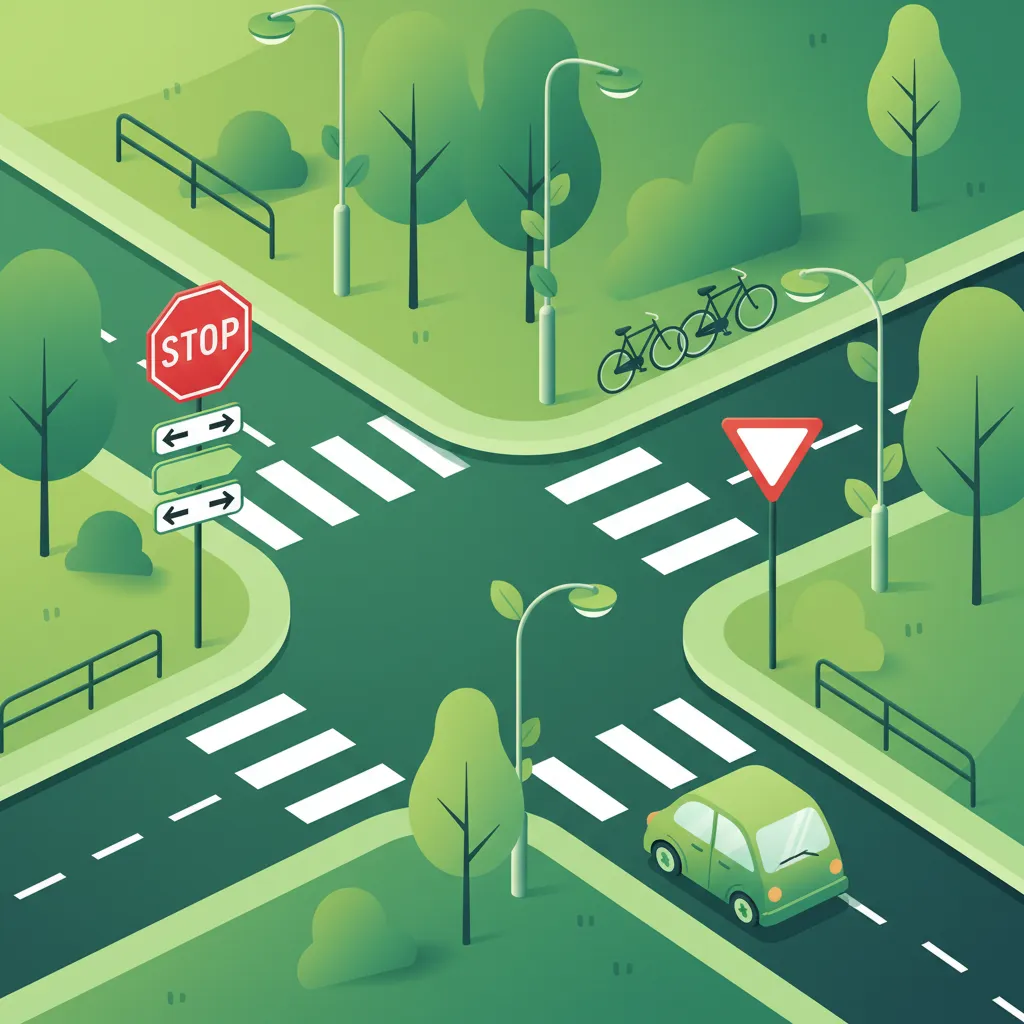
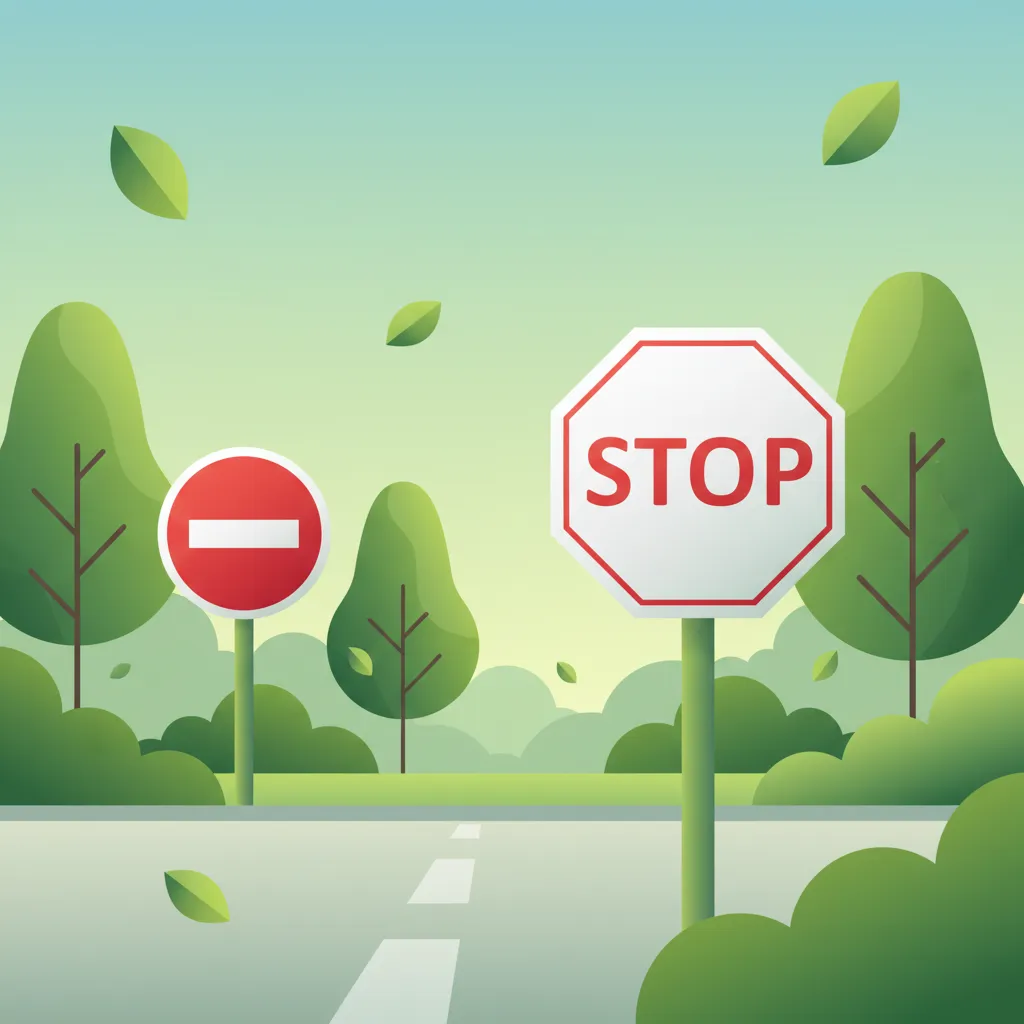
The B6 Stop sign is instantly recognizable by its unique octagonal shape and red color, making it distinct from all other traffic signs. It invariably carries the word "STOP" in white text. This sign is always accompanied by a thick white stop line painted across the road, indicating the precise point where vehicles must come to a halt.
The B6 sign imposes an absolute legal obligation: drivers must bring their vehicle to a complete stop before the stop line. This means all wheels must cease movement. After stopping, the driver must carefully observe traffic from all directions, especially cross-traffic, and yield to any vehicles or vulnerable road users that have priority. Only when the intersection is completely clear, and it is safe to proceed without impeding others, may the driver continue. This applies regardless of whether traffic is visible or not; the stop itself is mandatory.
Many new drivers make critical mistakes at B6 Stop signs. A common misunderstanding is the "rolling stop" or "California stop," where a driver only slows down significantly but does not come to a full stop. This is a direct violation and extremely dangerous. Another error is assuming that a stop is only necessary if traffic is approaching from the left or right; however, the requirement is to stop and then ascertain safety in all directions.
Failing to make a complete stop at a B6 sign is a serious traffic offense in the Netherlands, potentially leading to substantial fines and a significant risk of collision.
Understanding priority rules is central to safe driving in the Netherlands, and the B1 sign is a key indicator of where priority lies.
The B1 sign, or Priority Road sign, is easily identifiable by its unique diamond shape (a square rotated 45 degrees). It has a white border, a yellow (or blue in some older or less common variants) center, and a thick black upward-pointing arrow. This sign indicates that the road you are currently on has priority over traffic entering from side roads or other junctions, unless otherwise specified by different signs or traffic lights.
When driving on a road marked with a B1 sign, you generally have the right-of-way over vehicles approaching from intersecting roads or those merging onto your road. Conversely, if you are approaching a road marked with a B1 sign from a side street, you must yield to traffic already on or entering the priority road. This means you must wait for a safe gap in traffic before proceeding. The B1 sign simplifies priority at numerous intersections and significantly contributes to smoother traffic flow.
Navigating intersections with B1 signs requires drivers to be vigilant. While you have priority on the designated road, always be prepared for others who might not yield. On multi-lane priority roads, vehicles entering from side roads still need to yield to all lanes of traffic. It's also important to note that the B1 sign itself does not automatically grant priority to vehicles exiting the priority road; standard turning rules and other signs would apply in such cases.
Beyond stopping and priority, other regulatory signs explicitly forbid certain actions, ensuring specific areas remain clear or inaccessible for safety and traffic management.
The C2 No Entry sign is a powerful prohibitory signal, typically a red circle with a white horizontal bar in the middle. It signifies that vehicles are forbidden from entering the road or section of road from the direction in which the sign is facing. You will often encounter this sign at the entrance to one-way streets, private roads, or the wrong way into a roundabout. It is an absolute prohibition, meaning no vehicle may pass the sign in that direction.
The F2 No Stopping sign (historically a white sign with a diagonal red line) explicitly prohibits vehicles from stopping in the designated zone for any reason, other than an immediate emergency or breakdown. This means you cannot stop to pick up or drop off passengers, load or unload goods, or even wait momentarily. These zones are crucial for maintaining continuous traffic flow, especially in areas like bus lanes, taxi stands, or critical road junctions where even a brief stop can cause significant congestion or danger.
The B4 No Overtaking sign is a circular sign with a red border, a white background, and two cars depicted, typically a red one on the left and a black one on the right. This sign prohibits all motor vehicles from overtaking other motor vehicles on the road section it covers. Such restrictions are often implemented on narrow roads, near intersections, bends, hills, or in areas where visibility is limited, or vulnerable road users are present (e.g., school zones). Its purpose is to reduce the risk of head-on collisions and promote safer driving behavior in specific areas.
While allowing temporary stops, the F1 No Parking sign (a circular blue sign with a red border and a diagonal red line) prohibits vehicles from being parked in the marked zone. Parking means leaving your vehicle stationary for a period longer than strictly necessary for immediate loading/unloading or passenger pick-up/drop-off. These signs ensure that certain areas remain clear for moving traffic, emergency access, or specific vehicle types (like taxis or buses at their designated stops).
The C series of regulatory signs specifically dictates the mandatory direction of travel, guiding drivers through complex intersections and roundabouts.
Directional arrow signs remove ambiguity regarding which path a driver must take. They are crucial for streamlining traffic flow, preventing wrong-way turns, and ensuring that vehicles move predictably, reducing the chance of collisions, especially at multi-lane intersections or busy junctions. When you encounter a compulsory directional arrow, you must follow the direction indicated; no other movement is permitted, unless explicitly allowed by additional signage.
These signs are typically blue circles with a white arrow indicating the required direction. Here are a few common examples:
These arrows can also appear in combination, such as an arrow pointing straight ahead and right, meaning you may choose either of those directions but no other. They often work in conjunction with lane markings to guide you into the correct position well in advance of the turn.
Compulsory directional arrows often dictate your lane choice before an intersection. If a lane has an arrow indicating "turn left," you must turn left from that lane. You cannot proceed straight or turn right, even if other signs (like a yield sign) are present. These signs ensure that traffic destined for different directions is correctly separated, making maneuvers safer and more predictable for everyone.
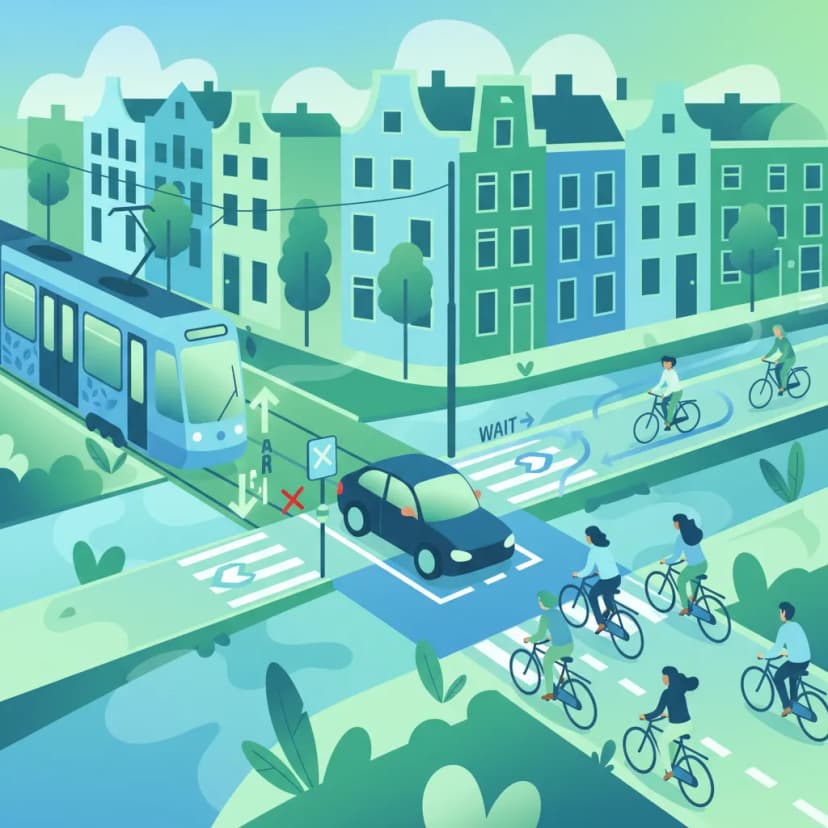
Regulatory signs become particularly critical when navigating complex scenarios like roundabouts or interacting with vulnerable road users.
Roundabouts are prevalent in the Netherlands and are almost always governed by a combination of regulatory signs. You will frequently encounter B1 Priority Road signs either within the roundabout (indicating traffic already in the roundabout has priority) or on the approach roads (indicating you must yield to traffic already in the roundabout). Directional arrows (C series) are also commonly used at roundabout entrances and exits to guide drivers into specific lanes for desired turns.
A common misunderstanding at roundabouts is failing to yield to traffic already circulating inside. Always remember that vehicles already in the roundabout usually have priority. Disobeying directional arrows can lead to confusion, near-misses, or collisions, especially when changing lanes or exiting.
Regulatory signs play a vital role in protecting vulnerable road users such as pedestrians and cyclists. For example:
These signs reinforce the principle of shared road safety, demanding extra vigilance and compliance from drivers in areas where vulnerable users are at higher risk.
Strict adherence to regulatory signs is not just about safety; it's a legal requirement with tangible consequences for non-compliance.
Violating regulatory signs in the Netherlands can lead to significant penalties. These typically include:
| Violation | Why It's Wrong | Correct Behavior | Consequence (General) |
|---|---|---|---|
| Ignoring a B6 Stop Sign | Endangers cross-traffic, high risk of right-angle collisions | Come to a complete stop, check all directions, proceed when safe | Substantial fine, potential accident liability |
| Entering a B1 priority road without yielding | Causes conflict, forces priority traffic to brake/swerve | Yield to all traffic on the priority road | Accident risk, liability |
| Turning onto a C2 No Entry lane | Illegal entry, creates head-on collision risk | Identify alternative legal routes, do not enter | Fine, potential immediate danger |
| Stopping in an F2 No Stopping zone | Blocks traffic, obstructs emergency services, causes congestion | Keep moving until a legal stopping/parking area is found | Fine, possible towing, traffic disruption |
| Overtaking in a B4 No Overtaking zone | Increases risk of head-on collision, especially in restricted view areas | Maintain lane position, wait for the restriction to end | Significant fine, dangerous driving infraction |
| Disobeying a Compulsory Directional Arrow | Causes confusion, forces other drivers to react unexpectedly | Follow the indicated direction precisely | Accident risk, traffic flow disruption |
Regulatory signs demand constant attention, but external factors can influence their visibility and how drivers respond.
Heavy rain, dense fog, snow, or even bright sunlight can significantly reduce the visibility of regulatory signs. While the legal obligation remains, drivers must exercise increased vigilance, reduce speed, and actively scan for signs when conditions are poor. Familiarity with common sign locations through prior knowledge or GPS can be a lifesaver in such situations. At night, signs are reflective, but reduced ambient light still requires drivers to be more attentive.
Regulatory signs are the unequivocal commands of the road, essential for the safety and efficiency of the Dutch traffic network. Mastery of these signs – from the absolute halt demanded by a B6 Stop sign, the right-of-way clarity of a B1 Priority Road sign, the prohibitions of C2 No Entry, F1 No Parking, and F2 No Stopping, to the precise guidance of C series directional arrows – is non-negotiable for any driver. By understanding their definitions, legal implications, and how they interact in various driving scenarios, you equip yourself with the knowledge to drive confidently, lawfully, and safely on all roads in the Netherlands. Always remember that compliance with these signs is not just about avoiding penalties, but about actively contributing to a safer road environment for everyone.
Lesson content overview
Explore all units and lessons included in this driving theory course.
Explore search topics learners often look for when studying Regulatory Sign Recognition. These topics reflect common questions about road rules, driving situations, safety guidance, and lesson level theory preparation for learners in the Netherlands.
Browse additional driving theory lessons that cover connected traffic rules, road signs, and common driving situations related to this topic. Improve your understanding of how different rules interact across everyday traffic scenarios.
Explore deeper insights into Dutch regulatory signs, including their application in complex intersections, special zones like roundabouts, and interactions with vulnerable road users. Understand advanced compliance for your driving theory knowledge.
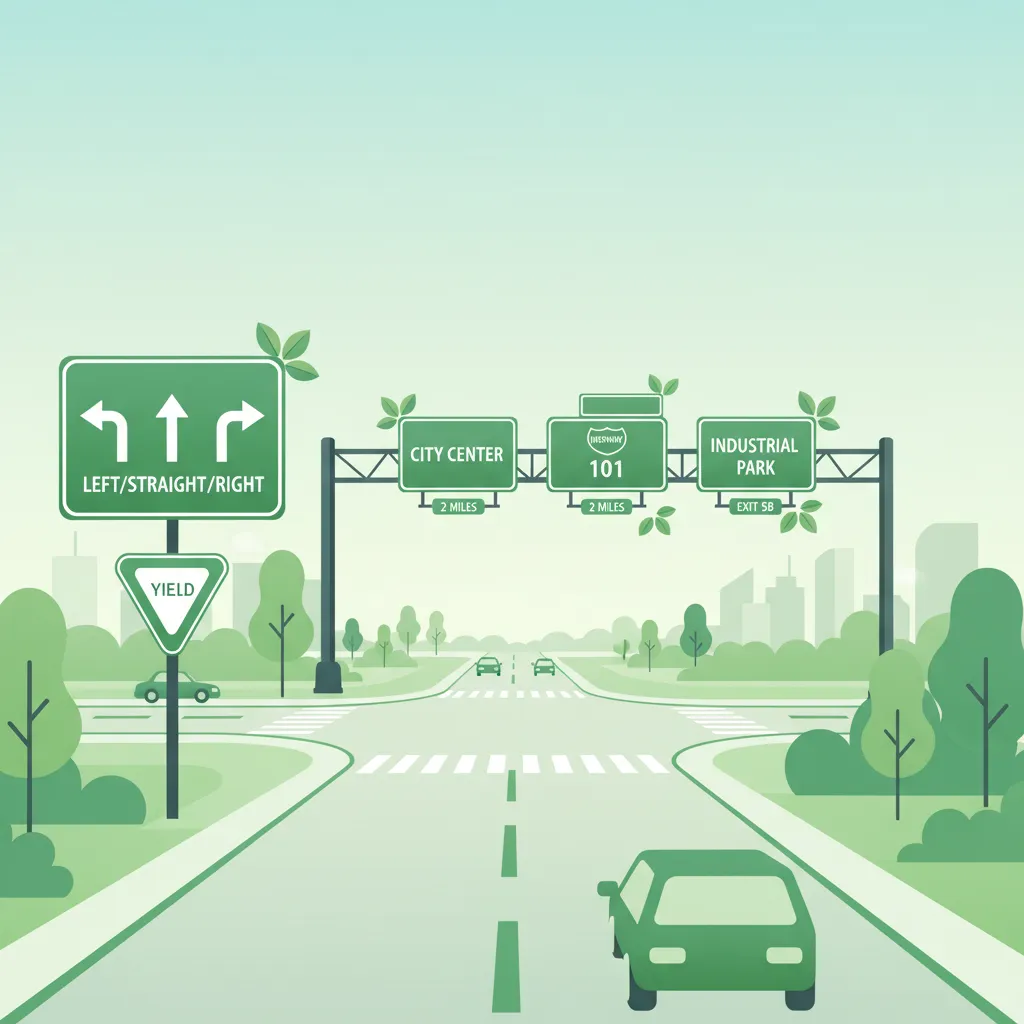
This lesson focuses on the array of signs used to manage traffic at intersections and along multi-lane roads. You will learn to interpret overhead gantry signs, lane designation signs, and markings that guide drivers into the correct lane for their intended direction. The curriculum covers signs indicating priority at upcoming junctions, such as the B3 and B4 signs, which clarify right-of-way rules in complex scenarios. Proper interpretation of these signs is essential for smooth lane changes, efficient navigation, and preventing conflicts at junctions.
This lesson covers the most critical category of traffic signs: regulatory signs, which impose a legal obligation or prohibition. You will learn the precise meaning and required action for essential signs such as the B6 Stop sign, which mandates a full stop, and the C2 No Entry sign, which forbids access. Understanding the shapes, colors, and symbols of these signs is fundamental to safe driving and a major focus of the official CBR theory test.

This lesson offers an in-depth study of Dutch regulatory signs, which impose mandatory actions or prohibitions on road users, with a specific focus on their impact on motorcyclists. It explains the visual language of prohibition symbols ('verbodsborden') and obligation symbols ('verplichtingsborden'), the contexts in which they appear, and the strict statutory consequences of non-compliance. Real-world examples are used to illustrate how these signs directly influence route planning, overtaking decisions, and speed management.
This lesson breaks down the rules of priority at intersections. You will learn to identify an 'equal' intersection where the default rule of giving way to traffic from the right applies. It also explains how priority is regulated by signs (such as the B6 Stop sign and B7 priority road sign) and road markings ('shark's teeth'). Understanding these hierarchies is crucial for making safe and correct decisions when crossing or turning at any junction.
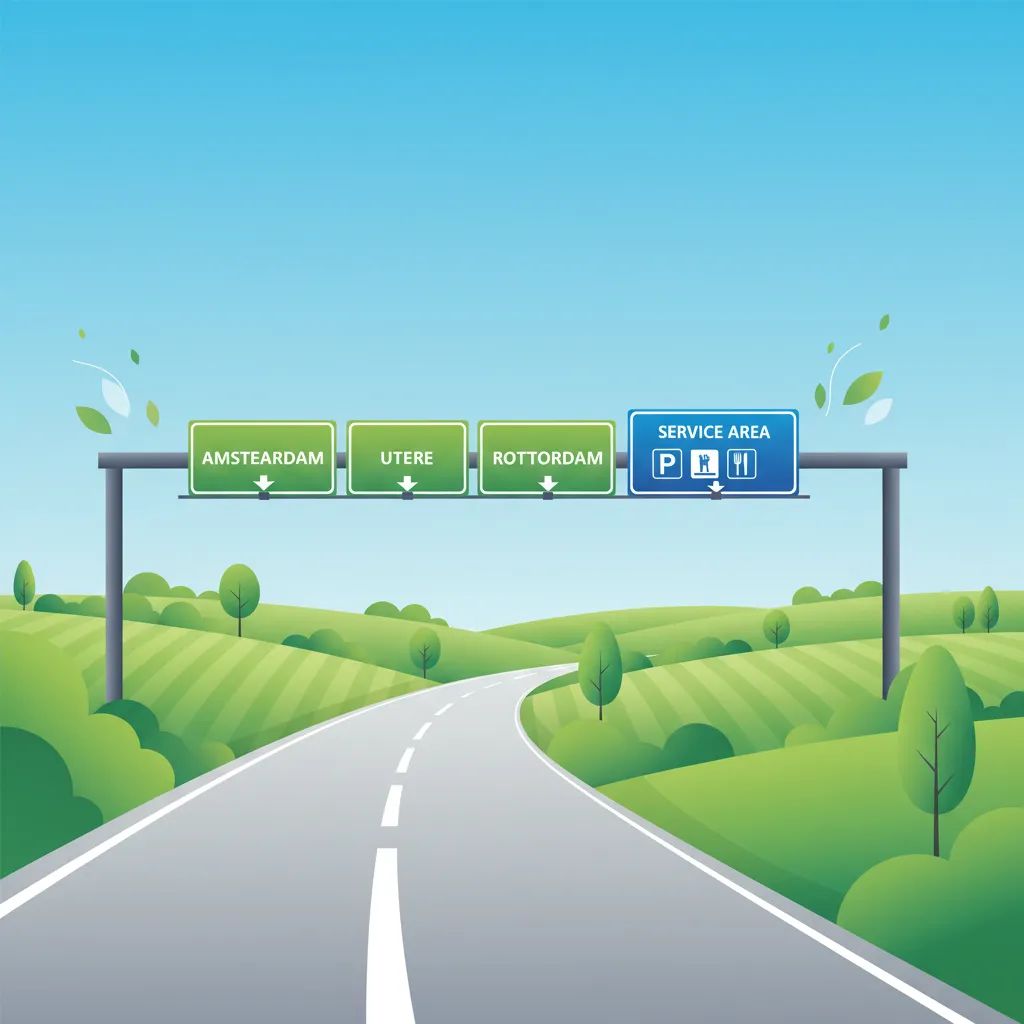
This lesson explains how to interpret informational signs that provide guidance and navigational aid. You will learn to read directional signs indicating cities and locations, understand route numbering on major roads, and recognize signs for services like fuel stations or parking areas. It also covers the signs that mark the beginning and end of a built-up area ('bebouwde kom'), which have important implications for speed limits and traffic rules.
This lesson details the function of signs and markings that explicitly assign priority at intersections. You will learn the difference between the B5 yield sign, which requires giving way to intersecting traffic, and the B6 stop sign, which mandates a complete stop before proceeding. The content also covers the 'haaientanden' (shark teeth) road markings, which function similarly to a yield sign. Understanding how these signs interact with priority road signs (B1) is essential for correctly navigating controlled intersections.

This lesson introduces warning signs, which are designed to alert drivers to potential dangers or changes in road layout ahead. You will learn to interpret the triangular-shaped signs that indicate hazards such as sharp curves, slippery road surfaces (J27), or upcoming road works (J8). The curriculum explains how these signs help in anticipating risks and adjusting driving behavior accordingly, such as reducing speed or increasing alertness. A thorough understanding of warning signs is vital for proactive and defensive driving in various environments.
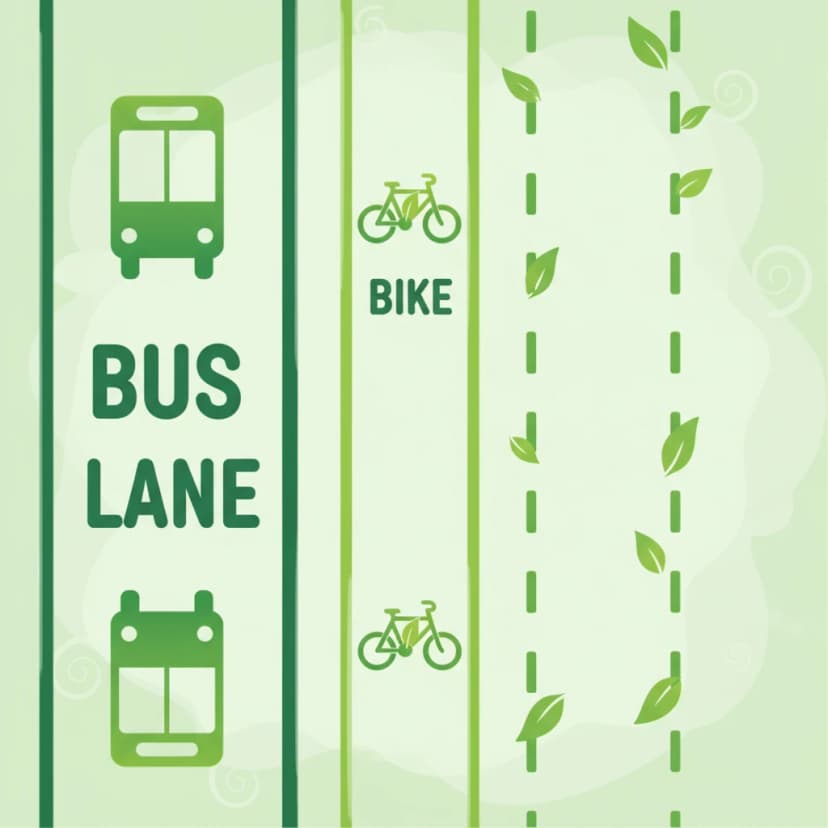
This lesson covers a variety of lanes and markings with specific rules. You will learn to recognize and respect bus lanes, which are reserved for public transport, and rush-hour lanes (spitsstrook), which are only open during busy periods as indicated by electronic signs. The curriculum also explains the meaning of different line types (solid, broken, double lines) that dictate whether lane changes or overtaking are permitted. Understanding these special lanes and markings is key to navigating Dutch infrastructure correctly.

This lesson covers prohibition signs, which are used to forbid specific maneuvers or restrict access for certain vehicles. You will study the characteristics of these signs, typically circular with a red border, such as the C2 'No Entry for any vehicle' or the F1 'No Parking' sign. The content details the legal consequences of ignoring these prohibitions and explains how they contribute to traffic flow and safety in congested or sensitive areas. Recognizing these signs is fundamental to avoiding fines and dangerous situations on the road.
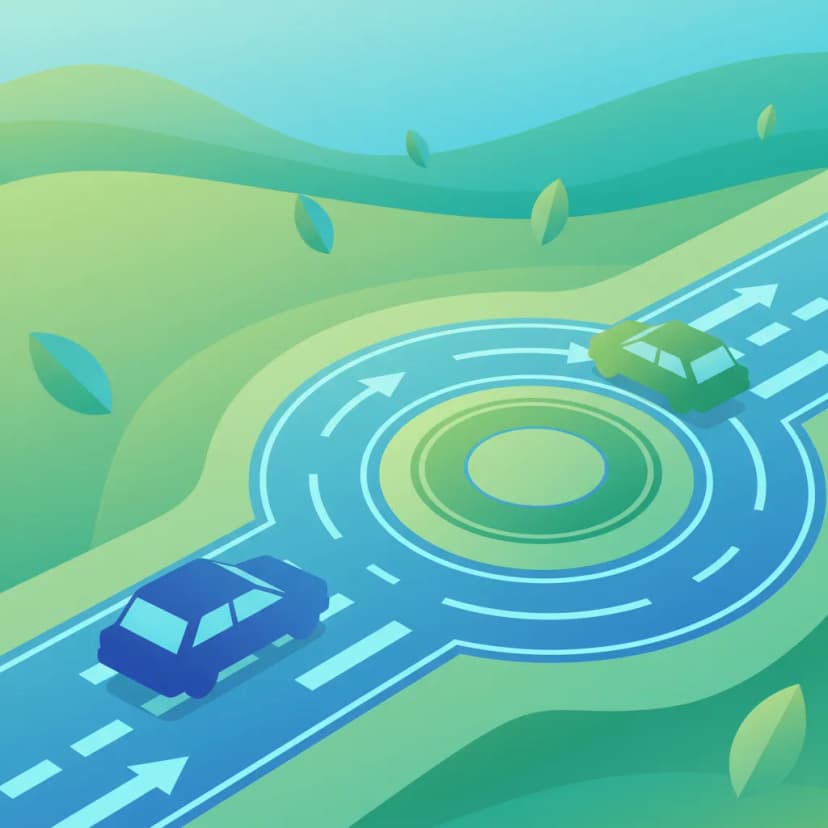
Roundabouts are a common feature of Dutch roads, and they have specific priority rules. This lesson teaches the standard rule of yielding to traffic already circulating on the roundabout before you enter. It also covers correct lane positioning, the importance of signaling your intention to exit, and the specific rules that often apply to cyclists who may have priority when crossing the exits. These skills ensure smooth and safe passage through both large and mini-roundabouts.
Learn about typical errors drivers make when interpreting and obeying Dutch regulatory signs such as Stop (B6) and Priority Road (B1). Understand the theoretical reasons behind these rules to ensure correct application and avoid dangerous situations.
This lesson covers prohibition signs, which are used to forbid specific maneuvers or restrict access for certain vehicles. You will study the characteristics of these signs, typically circular with a red border, such as the C2 'No Entry for any vehicle' or the F1 'No Parking' sign. The content details the legal consequences of ignoring these prohibitions and explains how they contribute to traffic flow and safety in congested or sensitive areas. Recognizing these signs is fundamental to avoiding fines and dangerous situations on the road.
This lesson introduces warning signs, which are designed to alert drivers to potential dangers or changes in road layout ahead. You will learn to interpret the triangular-shaped signs that indicate hazards such as sharp curves, slippery road surfaces (J27), or upcoming road works (J8). The curriculum explains how these signs help in anticipating risks and adjusting driving behavior accordingly, such as reducing speed or increasing alertness. A thorough understanding of warning signs is vital for proactive and defensive driving in various environments.
This lesson details the function of signs and markings that explicitly assign priority at intersections. You will learn the difference between the B5 yield sign, which requires giving way to intersecting traffic, and the B6 stop sign, which mandates a complete stop before proceeding. The content also covers the 'haaientanden' (shark teeth) road markings, which function similarly to a yield sign. Understanding how these signs interact with priority road signs (B1) is essential for correctly navigating controlled intersections.
This lesson covers the most critical category of traffic signs: regulatory signs, which impose a legal obligation or prohibition. You will learn the precise meaning and required action for essential signs such as the B6 Stop sign, which mandates a full stop, and the C2 No Entry sign, which forbids access. Understanding the shapes, colors, and symbols of these signs is fundamental to safe driving and a major focus of the official CBR theory test.
This lesson offers an in-depth study of Dutch regulatory signs, which impose mandatory actions or prohibitions on road users, with a specific focus on their impact on motorcyclists. It explains the visual language of prohibition symbols ('verbodsborden') and obligation symbols ('verplichtingsborden'), the contexts in which they appear, and the strict statutory consequences of non-compliance. Real-world examples are used to illustrate how these signs directly influence route planning, overtaking decisions, and speed management.
This lesson focuses on the array of signs used to manage traffic at intersections and along multi-lane roads. You will learn to interpret overhead gantry signs, lane designation signs, and markings that guide drivers into the correct lane for their intended direction. The curriculum covers signs indicating priority at upcoming junctions, such as the B3 and B4 signs, which clarify right-of-way rules in complex scenarios. Proper interpretation of these signs is essential for smooth lane changes, efficient navigation, and preventing conflicts at junctions.
This lesson clarifies the legal distinction between stopping (briefly, while the driver remains with the vehicle) and parking (leaving the vehicle). You will learn to recognize signs and road markings, such as yellow lines, that indicate where stopping or parking is prohibited. The curriculum covers rules for parking in designated zones, such as blue zones requiring a parking disc, and provides a list of locations where parking is always forbidden, for example, on a cycle path or too close to an intersection.
This lesson breaks down the rules of priority at intersections. You will learn to identify an 'equal' intersection where the default rule of giving way to traffic from the right applies. It also explains how priority is regulated by signs (such as the B6 Stop sign and B7 priority road sign) and road markings ('shark's teeth'). Understanding these hierarchies is crucial for making safe and correct decisions when crossing or turning at any junction.

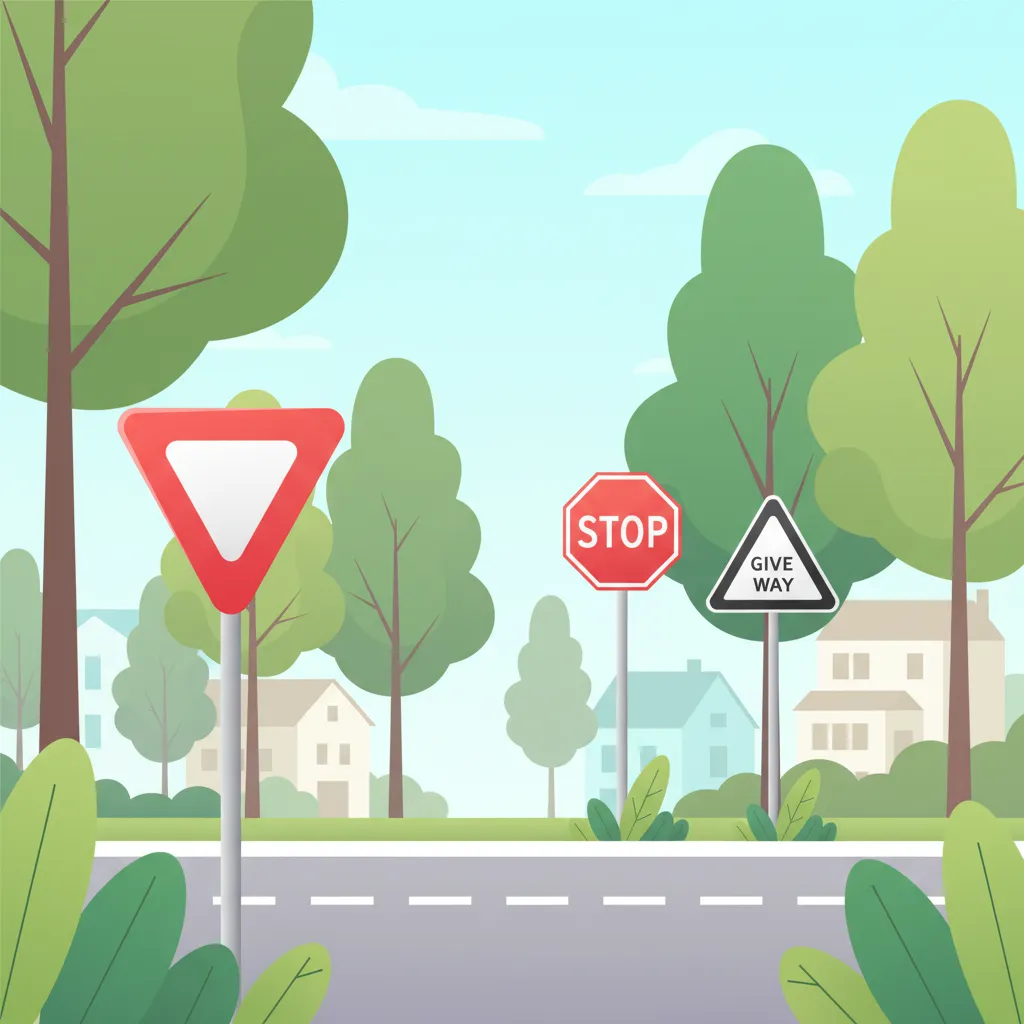
This lesson details the specific actions required at intersections controlled by 'Stop' and 'Give Way' signs. You will learn the legal requirement to come to a complete stop at a stop line (BORD 44) and the obligation to yield to all crossing traffic when encountering give-way markings ('haaientanden'). The content covers safe approach speeds and effective scanning techniques for motorcyclists to accurately assess gaps in traffic before proceeding.

This lesson prepares you for encountering road works, a common feature on any road network. You will learn that signs and markings related to road works are often yellow and that they temporarily override permanent white markings and signs. The curriculum stresses the importance of adhering to temporary speed limits, being alert for workers and machinery, and navigating narrowed lanes. It also covers how to follow diversion routes ('omleiding') and obey instructions given by traffic controllers.
Find clear answers to common questions learners have about Regulatory Sign Recognition. Learn how the lesson is structured, which driving theory objectives it supports, and how it fits into the overall learning path of units and curriculum progression in the Netherlands. These explanations help you understand key concepts, lesson flow, and exam focused study goals.
The B6 Stop sign requires you to come to a complete stop before proceeding, regardless of other traffic. The B3 Give Way sign (often with 'shark teeth' road markings) means you must yield to traffic that has priority, but you don't necessarily need to stop if the way is clear.
This is the B1 Priority Road sign. It indicates that you are on a road where you have priority over traffic coming from side roads, unless otherwise indicated by another sign or traffic controller. You must still be aware of other traffic.
No, regulatory signs like compulsory direction arrows are legal requirements. If an arrow indicates you must turn left, you must turn left at that junction. Ignoring it is a traffic violation and can lead to dangerous situations.
The only exception to the Stop sign rule is if a police officer or traffic controller directs you to proceed differently. Otherwise, you must always come to a complete stop.
Regulatory signs are a very common topic on the Dutch driving theory exam. Questions often test your understanding of their meaning and the legal obligations they impose in various intersection and road scenarios.