
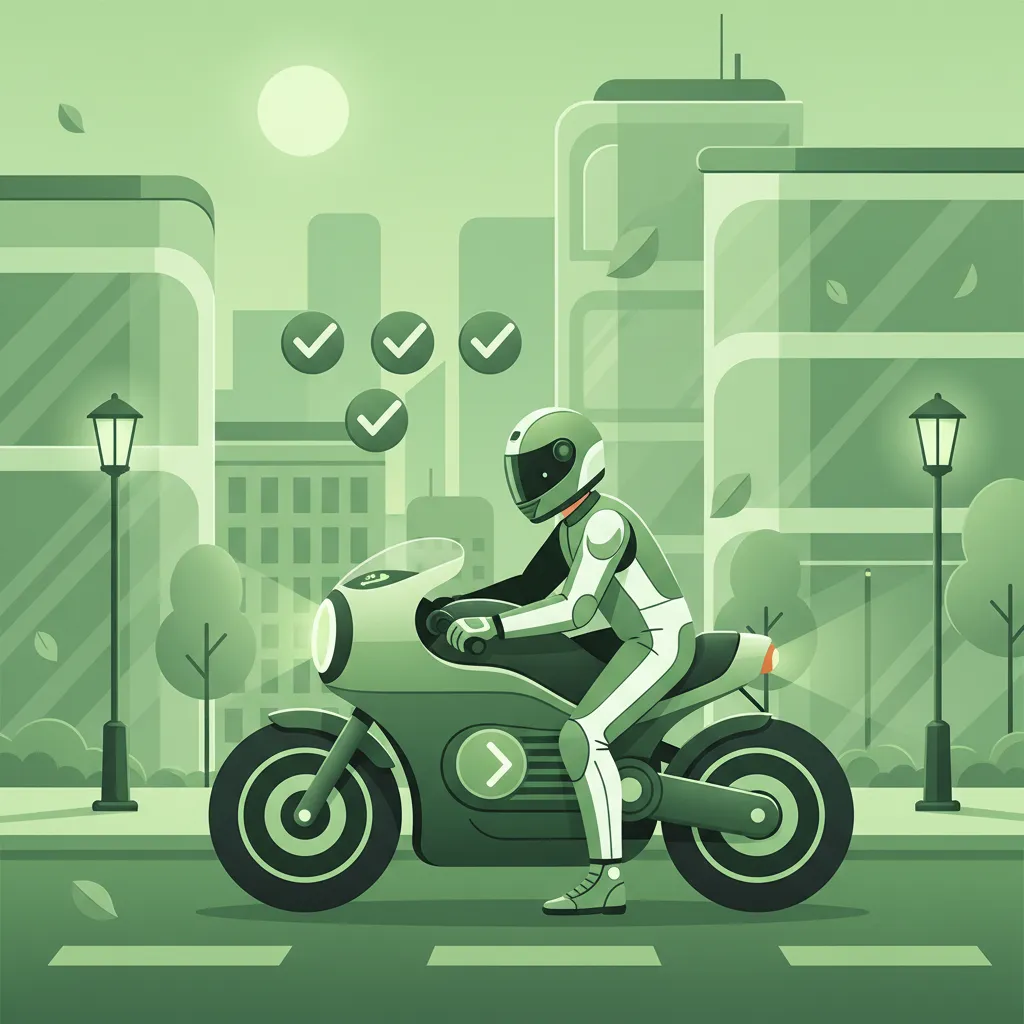
This lesson is crucial for any A2 motorcycle rider planning to carry luggage or a passenger. We'll guide you through essential pre-ride checks and mechanical adjustments, focusing on tyre pressure and suspension settings. Understanding these adjustments is vital for maintaining control and safety, especially when riding on Dutch roads.

When preparing for any motorcycle journey, a thorough pre-ride check is crucial. This becomes even more critical when you intend to carry significant additional weight, whether in the form of luggage, equipment, or a passenger. Added load fundamentally alters your motorcycle's static and dynamic characteristics, influencing everything from handling and stability to braking performance and even headlight visibility. Failing to make the necessary adjustments can compromise safety, accelerate wear on components, and even lead to legal penalties under Dutch traffic law.
This lesson, part of your journey through the Complete CBR Theory Course for the Dutch Motorcycle License (Category A2), will guide you through the mandatory inspections and mechanical adjustments required to maintain your motorcycle's roadworthiness and ensure a safe ride when loaded. We will delve into specific adjustments like tyre pressure, suspension preload, load security, and headlight aim, all in accordance with manufacturer specifications and Dutch regulations.
Adding weight to your motorcycle changes its fundamental physics. The increased mass shifts the vehicle's center of gravity (CG), alters the load distribution across the wheels, and compresses the suspension. These changes have profound implications for how your motorcycle handles:
Proper adjustments are not merely recommendations; they are vital to prevent loss of control, ensure optimal performance, and comply with Dutch traffic regulations (e.g., the Reglement Verkeersregels en Verkeerstekens 1990 or RVV 1990). The rider bears the responsibility for ensuring the motorcycle is roadworthy for the intended load before every journey.
The core idea behind pre-ride checks for added load is to counteract the physical changes introduced by extra mass. When you add weight, the motorcycle's overall mass increases, and its center of gravity typically shifts. For instance, adding a passenger or luggage to the rear moves the CG rearward and often slightly upward. This shift can lighten the front wheel, affecting steering precision, and place greater stress on the rear suspension and tyre.
Physics dictates that increased load leads to higher tyre deformation, which can alter the tyre's contact patch – the area of rubber touching the road. An incorrect contact patch affects rolling resistance, grip, and heat generation. Similarly, the suspension is designed to operate within a specific range of travel, and exceeding this range due to excessive load without adjustment can lead to bottoming out or an overly compressed state, compromising handling and comfort. By adjusting tyre pressures and suspension preload, you restore the motorcycle's intended geometry and ensure components operate within their design parameters, preserving grip, stability, and maneuverability.
To safely accommodate additional weight, several critical adjustments must be made. These adjustments are designed to restore the motorcycle's intended handling characteristics and comply with safety standards.
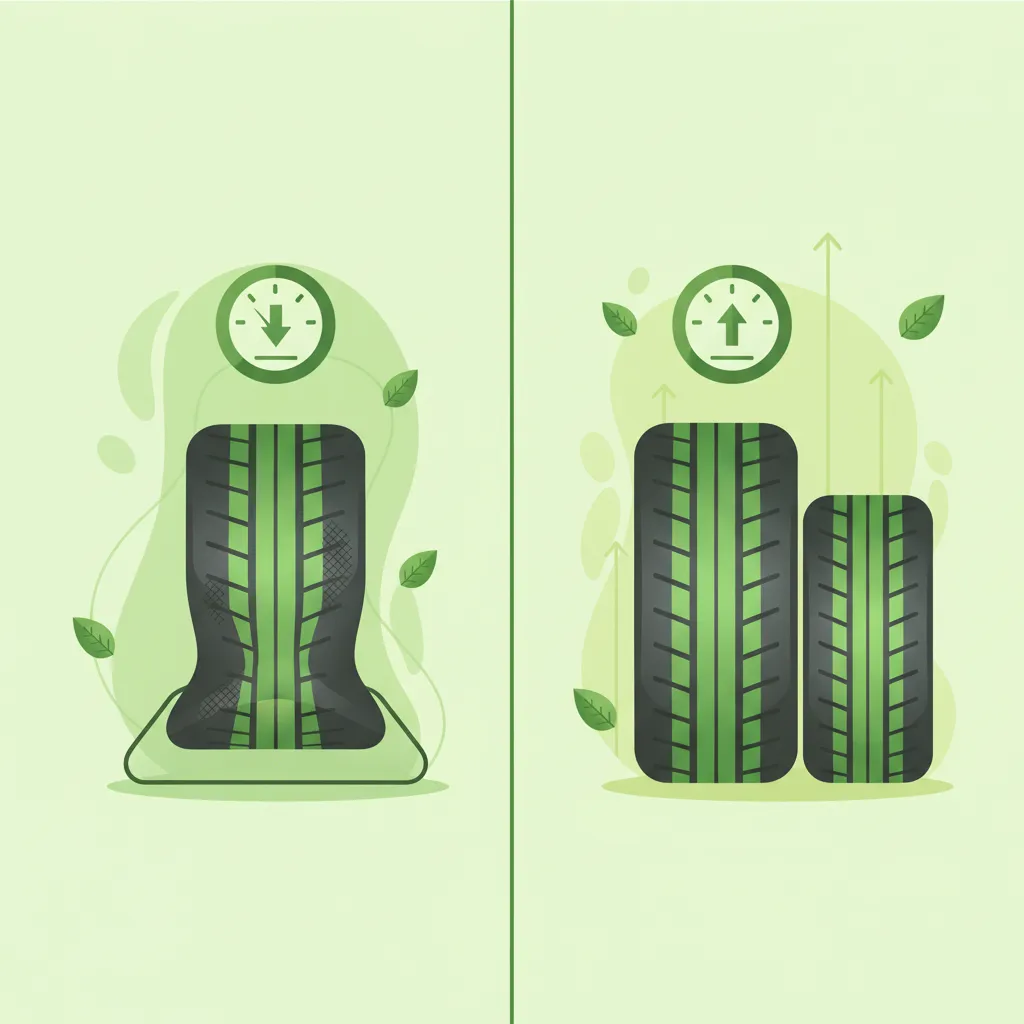
Tyre pressure, also known as inflation pressure, is the amount of air inside a tyre, typically measured in bar (or psi). This pressure determines the tyre's stiffness and the size and shape of its contact patch. When you add weight, the tyre compresses more, increasing the contact patch and generating more heat, which can lead to premature wear or even catastrophic failure.
The specific air pressure recommended by the motorcycle manufacturer for the front and rear tyres when a defined additional load (e.g., luggage, passenger) is present.
Every motorcycle owner's manual contains a table of recommended tyre pressures for different loading conditions, including a standard load pressure (for rider only) and increased load pressures (for luggage, a passenger, or both).
Identify Total Load: Accurately determine the combined weight of the rider, any passenger, and all luggage.
Consult Owner's Manual: Locate the tyre pressure table specific to your motorcycle model and the identified total load.
Use a Reliable Gauge: Check tyre pressure when tyres are cold (before riding).
Inflate to Recommended Pressure: Add or release air until both front and rear tyres match the load-adjusted values.
Dutch Road Traffic Act (Wet Wegverkeer) mandates that tyres must be inflated to the pressure stipulated by the manufacturer for the vehicle’s current load. Failing to do so can result in fines and compromises your safety.
Common Misunderstandings: Many riders mistakenly believe that "higher pressure always means better handling." In reality, excessive pressure reduces the tyre's contact patch, leading to reduced grip, especially in wet conditions, and a harsher ride. Conversely, under-inflation for a given load can cause excessive tyre flexing, leading to overheating, poor handling, and increased risk of a blow-out.
Suspension preload is the initial compression applied to the springs within your front forks and rear shock absorber before any external weight (like the motorcycle itself, rider, or luggage) is applied. It's adjusted to compensate for added static weight, ensuring that the suspension operates within its optimal range of travel.
The amount by which a motorcycle's suspension compresses under its own weight (static sag) and then further under the weight of the rider and any load (rider sag), measured as a percentage of total suspension travel.
When you add weight, the suspension compresses more, causing the motorcycle to "sag" lower. This changes the motorcycle's ride height, which in turn alters the steering geometry (caster, trail, and rake) and the alignment of the swingarm. Incorrect sag can lead to vague steering, reduced stability, and compromised ability to absorb bumps. Adjusting preload ensures the sag remains within the manufacturer's recommended limits, typically 20-30% of total suspension travel, thereby preserving the motorcycle's designed handling characteristics.
Measure Total Suspension Travel: Fully extend the suspension (e.g., lift the rear wheel off the ground) and measure the distance from the axle to a fixed point on the frame.
Measure Static Sag: Lower the bike onto its wheels (without rider/load) and measure the same distance. The difference is static sag.
Measure Rider Sag: With the rider and all intended load in place, measure the distance again. The difference from the fully extended measurement is rider sag.
Adjust Preload: Use the preload adjusters (often threaded collars or clickers on the shock/forks) to increase or decrease spring compression. Increasing preload raises the ride height and reduces sag; decreasing preload lowers it and increases sag.
Re-measure and Fine-tune: Continue adjusting until the rider sag falls within the manufacturer's specified percentage (e.g., 25% of total travel).
Preload does NOT equal stiffness. Preload only adjusts the initial ride height and sag. The spring's stiffness (spring rate) remains unchanged. Adjusting preload helps maintain correct geometry, allowing the suspension to absorb bumps effectively without bottoming out or feeling too soft.
The security of your load is paramount. Any item added to the motorcycle must be fastened securely to prevent it from shifting or detaching during normal riding or in the event of an accident. An unsecured load can suddenly alter the motorcycle's center of gravity, causing instability or even becoming a dangerous projectile for other road users.
Dutch traffic regulations (RVV 1990 § 23) strictly prohibit unsecured loads that could fall off and endanger other road users. Violations can lead to fines and, more importantly, severe accidents.
When you add weight to your motorcycle, particularly to the rear, the motorcycle's ride height changes. This causes the headlight beam to dip, pointing either too high or too low relative to the road. A mis-aimed headlight can have two critical negative consequences:
The adjustment of the headlight’s vertical and horizontal angles to produce a beam pattern that adequately illuminates the road ahead while staying within legal glare limits for other road users.
After any significant change in load that affects the motorcycle's ride height, you must check and adjust your headlight aim.
Park on a Level Surface: Position your motorcycle 25 meters from a flat, vertical wall or garage door.
Mark Reference Points: With the rider and load on the bike, measure the height of the headlight's center from the ground and mark this on the wall.
Observe the Low-Beam Cut-Off: Turn on your low beam (dipped beam). The top edge of the bright part of the beam (the "cut-off line") should fall within legal limits.
Adjust: Most motorcycles have screws or adjusters on the headlight housing for vertical and sometimes horizontal alignment. Adjust until the cut-off line is at the correct height, typically around 1 meter below the headlight's center at 25 meters.
Load distribution balance refers to how the total weight (motorcycle, rider, passenger, and cargo) is distributed across the front and rear axles, and also laterally (left to right). Optimal distribution is crucial for predictable handling, even tyre wear, and braking efficiency.
While not always explicitly codified in detailed percentages, the principle of balanced load distribution is embedded in the requirement for a vehicle to be "roadworthy" and to handle safely under all conditions, as per general Dutch traffic law.
Riding with an added load on your motorcycle is not just about comfort and performance; it's also about legal compliance. Dutch traffic law, primarily the RVV 1990 and the Wet Wegverkeer (Road Traffic Act), contains specific provisions that apply to vehicle condition and load security.
The overarching principle is that your motorcycle must be roadworthy for its intended use, including carrying passengers or cargo. This means all components must function correctly and be adjusted for the current conditions.
The highest total static weight (motorcycle + rider + passengers + cargo) allowed by the vehicle's type-approval. This value is typically found on the motorcycle's identification plate or in the owner's manual.
This is a critical legal limit. Exceeding the maximum permissible loaded mass can lead to:
Always verify the total weight against your motorcycle's type-approval plate before carrying heavy loads.
Many riders overlook the importance of proper adjustments when adding weight. Understanding these common pitfalls can help you avoid dangerous situations and legal infractions.
| Violation | Why It’s Wrong | Correct Behaviour | Consequence |
|---|---|---|---|
| Under-inflated rear tyre after adding heavy luggage | Reduces contact patch and increases tyre flex, leading to overheating, loss of grip, and potential tyre failure. | Inflate both front and rear tyres to the manufacturer's load-adjusted pressures before departure. | Longer braking distance, reduced stability, rapid tyre wear, possible blow-out. |
| Neglecting to secure a front top case or tank bag | Case can loosen, shift the center of gravity (CG) forward unexpectedly, obstruct vision, or fall off, creating a road hazard. | Always re-tighten fastening bolts and check strap tension for all luggage before each ride. | Sudden CG shift leading to front-wheel dive or instability, potential accident. |
| Using a single strap for multiple panniers or bags | Allows individual items to move laterally or shift weight unevenly, destabilizing the bike. | Use individual straps or a cross-brace to keep each piece of luggage fixed and secure. | Uneven tyre wear, unpredictable handling, wobble during cornering. |
| Failing to re-aim headlights after installing a heavy front rack or tank bag | Changes ride height, causing the headlight beam to point either too low (poor visibility) or too high (dazzling oncoming traffic). | Perform a headlight alignment test (e.g., wall test at 25m) after any change in ride height. | Fine from police; increased accident risk due to poor visibility or blinding other motorists. |
| Over-preloading rear suspension beyond recommended limits | Raises the rear ride height too much, reducing rear tyre load and causing instability, especially evident as "rear-wheel hop" during acceleration or over bumps. | Adjust preload only until sag meets the manufacturer's recommended 20-30% of total travel. | Unstable acceleration, reduced rear-wheel traction, harsh ride, rider fatigue. |
| Exceeding the maximum permissible loaded mass | Overloads the chassis, strains suspension and brakes, increases stopping distance, and can lead to structural failure. | Always verify total mass (bike + rider + passenger + cargo) against the vehicle's type-approval plate before loading. | Legal penalty; structural damage; potential catastrophic component failure. |
| Loading only the rear of the motorcycle and ignoring front passenger weight | Shifts the overall CG significantly rearward, making the front wheel light and prone to wobble, especially at lower speeds or during acceleration. | Distribute weight to maintain a balanced front-rear ratio, possibly by placing some lighter items forward or ensuring the passenger is positioned correctly. | Front-wheel instability, vague steering, reduced braking efficiency. |
| Leaving luggage uncovered in rain without waterproof protection | Water adds significant additional mass to the load, softens mounting points over time, and can cause corrosion to hardware. | Use waterproof covers or ensure all luggage is sealed against water ingress. | Unexpected weight increase; corrosion leading to failure of mounting hardware; damage to cargo. |
The ideal adjustments and riding techniques can also vary depending on specific external conditions and the type of load.
The adjustments discussed in this lesson directly influence the physics of load transfer, human perception, and reaction times, all critical elements of road safety.
Studies by transportation safety bodies often highlight that a significant percentage of motorcycle incidents involve factors like tyre condition or inappropriate vehicle setup. Adhering to manufacturer guidelines for load adjustment is a direct, data-driven method to reduce accident risk.
Let's look at a few common scenarios to solidify your understanding of pre-ride checks and adjustments for added load.
Setting: A rider is preparing for an urban delivery route, carrying two 10 kg panniers (one front, one rear) on their motorcycle. The weather is dry.
Decision Point: What pre-ride checks and adjustments are essential before departing?
Correct Behavior: The rider first calculates the total added load (20 kg). They consult their motorcycle's owner's manual to find the load-adjusted tyre pressures for this weight, inflating the front tyre to 2.3 bar and the rear tyre to 2.6 bar. They then check the rear suspension sag and adjust the preload by one click, achieving 28% sag, which is within the manufacturer's recommended range. Finally, they ensure both panniers are securely fastened to their mounts and locked.
Incorrect Behavior: The rider leaves the tyres at the standard pressure of 2.0 bar (for rider only) and makes no adjustments to the suspension preload. They quickly check that the panniers are closed but do not verify their secure attachment.
Explanation: The correct actions maintain optimal grip and handling, ensuring stability in urban traffic with frequent stops and turns. The incorrect actions lead to under-inflated rear tyres and excessive rear sag, causing a "wobbly" feel in corners, reduced braking efficiency, and faster tyre wear. Unsecured panniers could also shift or detach.
Setting: A rider plans a night ride on a two-lane rural road, having recently installed a 15 kg rear top case for extra storage.
Decision Point: What specific check becomes critical after adding the rear top case, especially for a night ride?
Correct Behavior: Recognizing that the added rear weight will change the motorcycle's ride height, the rider performs a headlight aim check. They park 25 meters from a wall, measure the low-beam cut-off line, and find it is now too low. They then adjust the vertical aim screw on the headlight, raising the beam by 0.4 mm until the cut-off line is at the legally specified height (e.g., 1 meter above the ground at 25 meters).
Incorrect Behavior: The rider assumes the headlight aim is unchanged or that the slight difference won't matter. They ride off without checking.
Explanation: The added rear load lowers the motorcycle's rear, causing the headlight to dip and aim higher than intended. The correct aim prevents dazzling oncoming drivers, which is crucial for safety on unlit rural roads, and ensures adequate road illumination for the rider. The incorrect behavior significantly increases the risk of an accident due to glare or insufficient visibility.
Setting: A rider is embarking on a long journey on the autosnelweg (motorway), carrying a passenger (80 kg) and a 12 kg rear luggage bag. They will be cruising at 100 km/h.
Decision Point: What pre-ride adjustments are necessary for this combined, heavy load and high-speed scenario?
Correct Behavior: The rider calculates the total added weight (passenger + luggage). They consult their manual for the passenger-and-luggage-specific tyre pressures, inflating the rear tyre to 2.8 bar and the front to 2.4 bar. They then add two clicks of rear suspension preload, ensuring the sag stays within 30% of total travel, which is ideal for high-speed stability. They also double-check that the luggage is securely mounted and locked.
Incorrect Behavior: The rider only adds the passenger but forgets the luggage, keeping the rear tyre at 2.5 bar (for a single rider) and making no suspension adjustments. This results in excessive rear sag and an under-inflated tyre for the actual load.
Explanation: Proper adjustments are critical for maintaining high-speed stability and safe braking on the autosnelweg. Insufficient tyre pressure and excessive sag lead to reduced stability, poor cornering characteristics, increased braking distances, and potential rear-wheel slip during lane changes or emergency maneuvers. The correct adjustments ensure the motorcycle handles predictably and safely under the combined weight and at speed.
Mastering the art of preparing your motorcycle for added load is a fundamental aspect of responsible riding and compliance with Dutch traffic law. By consistently applying these principles, you ensure your motorcycle remains roadworthy, stable, and safe under any conditions.
Identify Total Load: Accurately sum the weight of the motorcycle, rider, any passenger, and all cargo.
Consult Owner's Manual: Always refer to your motorcycle's specific owner's manual for:
Recommended suspension preload settings (e.g., number of clicks or turns).
Adjust Tyre Pressure: Measure and set both front and rear tyre pressures to the exact values specified for your current load, using a reliable gauge on cold tyres.
Check and Adjust Suspension Sag: Measure your suspension sag with the rider and full load. Adjust preload until the sag falls within the manufacturer’s recommended 20-30% of total travel.
Secure All Luggage: Ensure all cargo, panniers, top cases, and soft bags are fastened using designated mounting points, correct bolts, straps, and specified torque values. Verify all locks and latches are engaged.
Re-aim Headlights: After any load-induced change in ride height, perform a headlight alignment check. Adjust the vertical aim of your low beam to ensure it illuminates the road effectively without dazzling oncoming traffic, meeting Dutch legal requirements (RVV 1990 § 25).
Verify Load Distribution: Aim for a balanced front-rear weight ratio and symmetrical lateral distribution to maintain predictable handling.
Confirm Total Weight: Double-check that your total static weight does not exceed the maximum permissible loaded mass specified on your motorcycle's type-approval plate.
Consider Contextual Factors: Account for variations due to weather (e.g., slight pressure increase in rain), road type (e.g., softer preload on rough roads), night-time conditions, and the presence of a passenger, making minor adjustments as needed.
Final Inspection: Always perform a quick visual and functional pre-ride inspection before each journey, especially after loading or unloading, to ensure all adjustments remain within specifications.
By diligently performing these pre-ride checks and adjustments, you not only enhance your safety and riding comfort but also fully comply with Dutch traffic regulations for the responsible operation of your Category A2 motorcycle.
Lesson content overview
Explore all units and lessons included in this driving theory course.
Explore search topics learners often look for when studying Pre-Ride Checks and Adjustments for Added Load. These topics reflect common questions about road rules, driving situations, safety guidance, and lesson level theory preparation for learners in the Netherlands.
Browse additional driving theory lessons that cover connected traffic rules, road signs, and common driving situations related to this topic. Improve your understanding of how different rules interact across everyday traffic scenarios.
Understand the physics behind how added weight like passengers or luggage impacts your motorcycle's center of gravity, tyre contact, and overall stability. Learn how proper load distribution is key to safe motorcycle operation in the Netherlands.

This lesson examines how adding weight, such as a pillion passenger or luggage, and changes in aerodynamics affect a motorcycle's performance and stability at speed. It explains the impact on acceleration, braking distances, and cornering ability due to a higher center of gravity and increased mass. Riders will learn how to adjust their speed and control inputs to safely manage the altered handling characteristics, especially when riding in windy conditions or at high motorway speeds.

This lesson focuses on how you must adapt your riding style when the motorcycle is heavily loaded. You will learn that your braking distances will be significantly longer, requiring you to increase your following distance and begin braking earlier. The content also explains that acceleration will be slower, and cornering will require smoother, more deliberate inputs to avoid upsetting the motorcycle's altered balance.

This lesson explains the physics of how weight distribution affects a motorcycle's stability. You will learn the golden rule of packing: keep the weight as low and as close to the motorcycle's center of gravity as possible. The content provides practical advice on loading panniers evenly, placing heavier items in a tank bag rather than a high top case, and respecting the manufacturer's maximum load capacity.

This lesson explains the critical role of the rider's body in controlling the motorcycle's dynamics, especially during cornering. It details how shifting body weight alters the combined center of gravity, allowing for greater cornering speed at a given lean angle or a safer lean angle for a given speed. Techniques for correct posture, footpeg weighting, and active body positioning are covered to enhance stability, maximize grip, and provide more precise control.

Carrying a passenger or heavy luggage significantly changes how your vehicle handles. This lesson covers the legal regulations for carrying a passenger, including the requirement for proper seating and footpegs. It also explains the importance of adhering to the vehicle's maximum load limit. You will learn how extra weight, especially when positioned high up, raises the center of gravity and affects balance, steering, and braking distances, requiring adjustments to your riding style.

This lesson explores the psychological factors that underpin safe riding, focusing on the concept of cognitive load—the amount of mental effort required to process information. It explains how fatigue, stress, and distractions can overload a rider's capacity to process information, leading to a loss of situational awareness and poor decisions. The content provides strategies for managing mental resources, maintaining focus, and ensuring that the rider's brain is always ahead of the motorcycle.

This lesson focuses on the critical skill of throttle control, which directly influences the motorcycle's stability and traction. It covers the techniques for smooth roll-on and roll-off of the throttle to prevent abrupt weight shifts and potential loss of grip. Learners will understand the relationship between throttle input, engine response, and power delivery to the rear wheel, a concept essential for safe riding in all conditions, especially during cornering and on wet surfaces.

This lesson explains how you, the rider, are an active part of the motorcycle's dynamics. You will learn how shifting your body weight into the turn can reduce the required lean angle of the motorcycle itself, increasing the margin of safety and grip. The content covers correct posture, the importance of looking through the turn with your head up, and how to stay relaxed on the controls to allow the bike to work effectively.
Discover the specific Dutch legal requirements for carrying loads on motorcycles, including mandatory tyre pressure, suspension adjustments, and headlight alignment. Ensure your motorcycle is roadworthy and compliant with traffic laws for safety.
This lesson covers the mandatory lighting and signaling equipment for A2 motorcycles under Dutch law, ensuring you remain visible and communicate your intentions correctly. You will learn the rules for using headlights, taillights, turn signals, and brake lights in various conditions, including daytime and adverse weather. The content also addresses the importance of maintaining this equipment and using hand signals as a valid secondary method of communication in traffic.

This lesson details the Dutch regulations for carrying passengers on a motorcycle, including the minimum age for the passenger and the mandatory use of approved helmets. It explains the rider's legal responsibility for the passenger's safety and how to properly secure loads to avoid affecting the motorcycle's stability and balance. Understanding these rules is crucial for ensuring safety and legality when riding with a pillion or luggage.
This lesson emphasizes that tires are the single most critical safety component on a motorcycle, being the only connection to the road. It provides detailed instructions on how to correctly check tire pressure ('bandenspanning') when the tires are cold and explains how to read tire wear indicators to assess remaining tread depth. The content also covers the legal minimum tread depth and the severe impact that incorrect pressure or excessive wear has on handling, braking, and overall safety.
Carrying a passenger or heavy luggage significantly changes how your vehicle handles. This lesson covers the legal regulations for carrying a passenger, including the requirement for proper seating and footpegs. It also explains the importance of adhering to the vehicle's maximum load limit. You will learn how extra weight, especially when positioned high up, raises the center of gravity and affects balance, steering, and braking distances, requiring adjustments to your riding style.

Your vehicle's lights and horn are your primary tools for seeing, being seen, and communicating warnings. This lesson guides you through a simple but vital check of all electrical components before you ride. You will learn how to verify the function of your headlight (high and low beam), taillight, brake light (using both front and rear brake levers), and turn signals. It also covers checking the horn's operation and ensuring all mandatory reflectors are clean and intact.

This lesson outlines the rider's responsibility for ensuring their motorcycle's engine and exhaust system comply with Dutch legal standards. It covers basic but vital pre-ride checks, such as verifying engine oil and coolant levels. A significant focus is placed on exhaust compliance, explaining the regulations regarding noise levels ('geluidseisen') and the rules surrounding aftermarket exhaust systems, including the requirement for approved markings and the use of 'dB-killers'.

This lesson details the systematic procedure for checking the functionality of all lights and indicators before a ride. This simple but critical safety check includes verifying the operation of the high and low beam headlight, the taillight, the brake light (using both front and rear brake activators), and all four turn signals. Ensuring all lights are working is a legal requirement and fundamental for visibility and communicating intentions to other road users.

This lesson details the critical role that tires play in motorcycle safety, as they are the only connection to the road. It explains the importance of selecting the right type of tire for the season and expected riding conditions. The content provides a guide on how to perform regular pre-ride checks, including inspecting for correct inflation pressure, checking tread depth, and looking for any signs of damage or wear.

Riding at night presents two main challenges: seeing the road and being seen by others. This lesson covers the legal requirements for your vehicle's lighting system and how to use it effectively, including when to use high beams. It also emphasizes strategies to increase your own conspicuity, such as wearing bright or reflective clothing. You will learn how darkness affects your perception of speed and distance and how to adapt your riding to compensate for these limitations.

This lesson covers the universal Dutch road rules with a specific focus on their application to light motorcycles. It details the various speed limits for different road types, from urban areas to motorways, and explains the correct procedures for overtaking and lane positioning. The legal aspects of lane filtering in congestion are also examined, alongside mandatory equipment use like daytime running lights, to ensure riders can integrate safely and legally into traffic flow.
Find clear answers to common questions learners have about Pre-Ride Checks and Adjustments for Added Load. Learn how the lesson is structured, which driving theory objectives it supports, and how it fits into the overall learning path of units and curriculum progression in the Netherlands. These explanations help you understand key concepts, lesson flow, and exam focused study goals.
When you add weight to your motorcycle, the tyres compress more. Incorrect tyre pressure can lead to overheating, premature wear, and significantly compromised handling. Over-inflating can reduce grip, while under-inflating leads to instability and increased risk of tyre failure. Consulting your owner's manual for the correct pressure for the specific load is crucial for safety and optimal performance on Dutch roads.
Your motorcycle's owner's manual is the primary source for recommended suspension settings, specifically preload adjustments, for carrying different loads. Some motorcycles may have indicators on the suspension components themselves. If unsure, consult a qualified mechanic, but for the theory exam, focus on knowing that adjustments are necessary and where to find the information.
Yes, carrying a passenger significantly increases the load and changes the weight distribution, impacting handling, braking, and acceleration similarly to luggage. You'll need to make comparable adjustments to tyre pressures and suspension. It's vital to communicate with your passenger about staying balanced and moving with the motorcycle, especially during cornering and braking.
Carrying luggage or a passenger can often raise the rear of the motorcycle or shift weight, which can cause the headlight beam to aim higher. This can dazzle oncoming drivers and cyclists, reducing their visibility and increasing the risk of an accident. Most motorcycles have an adjustment mechanism for the headlight aim; you must use it when the load changes the bike's attitude.
Ensure all luggage is firmly attached and cannot shift, slide, or detach during the ride. Use strong straps, bungee cords with safety hooks, or purpose-built luggage systems. Test the security by gently trying to move the luggage by hand. Loose items can affect your balance, distract you, or worse, fall off and create a hazard for other road users.