
Welcome to the lesson on Calculating Safe Speed in Curves, a vital part of your Category A motorcycle theory preparation in the Netherlands. This module builds on your understanding of speed management and intersection navigation, equipping you to handle bends and corners safely and confidently on the road and in your CBR exam.

Navigating curves and bends safely is a fundamental skill for every motorcyclist. The speed at which you enter, maintain, and exit a curve – often referred to as bochtsnelheid in Dutch – is critical for control, safety, and legal compliance. This lesson of the Dutch Motorcycle Theory course will delve into the physics, perception, and legal aspects that determine a safe bochtsnelheid, equipping you with the knowledge to handle any curve with confidence.
Selecting the correct speed for a curve prevents a range of dangerous situations. Too much speed can lead to a loss of traction, causing your motorcycle to slide outwards (low-side) or, more dramatically, to unexpectedly regain grip and flip you off (high-side). Such incidents can result in severe injury or even fatal collisions with roadside objects, other vehicles, or oncoming traffic.
Beyond immediate physical dangers, incorrect speed selection can also violate Dutch traffic law. The principle of "reasonable speed" (redelijkheid), enshrined in the RVV 1990, mandates that you adapt your speed to all prevailing circumstances. Mastering bochtsnelheid is therefore not just about becoming a skilled rider but also about being a responsible and law-abiding participant in Dutch traffic. It forms a vital prerequisite for advanced riding techniques and emergency maneuvers.
To understand safe cornering speed, we must first grasp the physical forces at play. A motorcycle relies on a delicate balance of forces to maintain its trajectory through a bend.
When a motorcycle moves in a curve, it is constantly changing direction. This change requires an inward force, known as centripetal force (), which pulls the motorcycle towards the center of the curve. Without this force, the bike would simply continue in a straight line due to inertia.
The magnitude of the required centripetal force is directly proportional to the motorcycle's mass () and the square of its speed (), and inversely proportional to the curve's radius (). This relationship is expressed by the formula: . This means that doubling your speed quadruples the required centripetal force, while a tighter curve (smaller radius) also demands a much larger inward force. The centripetal force is primarily provided by the lateral grip of your tyres on the road surface.
Motorcycle tyres are designed to generate forces in multiple directions: forward (acceleration), backward (braking), and sideways (cornering). However, the total grip a tyre can generate is limited, typically visualized by the friction circle (also known as the traction circle).
This conceptual circle represents the maximum combined force the tyre can produce before losing traction. If you are braking or accelerating heavily, a significant portion of the available grip is used longitudinally, leaving less for lateral (cornering) forces. Conversely, when you are cornering at maximum lateral grip, there is very little capacity left for braking or acceleration. Understanding this trade-off is vital: any braking or sharp acceleration while leaning in a curve significantly reduces your available cornering grip, increasing the risk of a slide.
Motorcycles negotiate curves by leaning into them. This lean angle () is how the bike generates the necessary centripetal force. The greater the speed for a given radius, the greater the lean angle required.
The relationship can be approximated by the formula: , where is the acceleration due to gravity. This formula highlights a crucial point: an excessive lean angle, beyond the tyre's slip angle (the point where the tyre starts to slide rather than roll) or the rider's physiological limits, will lead to a loss of control. Riders must develop a feel for appropriate lean angles for different speeds and radii, always staying within the limits of their tyres and their own capability.
Many roads, particularly on motorways or high-speed bends, are not perfectly flat in a curve. Instead, the road surface is often tilted, with the outer edge higher than the inner edge. This banking is called camber or superelevation.
Camber significantly aids cornering by providing an additional component of gravitational force that acts towards the center of the curve. This effectively reduces the amount of lateral grip the tyres need to generate, allowing for higher safe cornering speeds or a shallower lean angle for a given speed. A standard camber of 2–6% is common on well-engineered roads. However, failing to account for a lack of camber (a flat curve) can lead to underestimating the required lean and grip, potentially resulting in excess speed. Conversely, negative camber (where the curve slopes away from the turn) is extremely dangerous and must be approached with significantly reduced speed.
During cornering, the weight of the motorcycle and rider shifts. This phenomenon, known as load transfer, primarily moves weight towards the outside tyre and away from the inside tyre. This means the outer tyre must provide more of the lateral grip required to maintain the turn.
Excessive total vehicle load (e.g., carrying a passenger and heavy luggage) can exacerbate load transfer, placing higher demands on the outer tyre. This reduces the overall margin for error and lowers the maximum safe cornering speed. Proper riding posture, where the rider shifts their body weight into the turn, can help mitigate this effect by keeping the motorcycle more upright, thus reducing the lean angle required for a given speed and minimizing load transfer. Riders must always ensure they do not exceed the motorcycle’s maximum permissible laden weight (MPL), as indicated in the vehicle's documentation.
Accurately assessing a curve's characteristics while riding is a skill developed through practice and relies heavily on visual cues. Since precise measurements are impossible, riders must learn to estimate key parameters quickly.
The curve radius (R) is the distance from the center of the curve to the path you are riding. It is the single most important factor in determining safe cornering speed. Tighter curves (smaller radius) demand much lower speeds.
Riders categorize curves based on their radius:
It’s a common misconception to judge a curve's tightness by its visible length. A long curve can still have a very tight radius at some point. Always focus on the tightness rather than the overall length.
The vanishing point technique is a powerful visual method for dynamically assessing a curve's tightness. As you approach a curve, look far ahead to the point where the inner and outer edges of the road appear to meet. This is the vanishing point.
If the vanishing point is moving towards you rapidly, the curve is tightening. If it remains stationary or moves away from you, the curve is maintaining its radius or opening up. By constantly observing the vanishing point, you can adjust your speed and lean angle preemptively, ensuring you have sufficient time to slow down if the curve proves to be tighter than initially perceived. This technique helps you set your entry speed early and maintain a smooth, controlled trajectory.
The friction coefficient (µ) is a measure of how much grip your tyres have on the road. It is highly variable and directly impacts your safe speed.
Always be vigilant for changes in the road surface. A seemingly dry curve might have a patch of oil, gravel, or wet leaves, which can reduce friction suddenly and without warning. Adjusting your speed to the lowest realistic µ for the conditions is a critical safety measure.
While understanding the physics is crucial, safe cornering in the Netherlands also involves adhering to specific traffic regulations, particularly the concept of "reasonable speed."
The most important legal principle governing speed in curves is found in the Reglement Verkeersregels en Verkeerstekens (RVV 1990).
The legal standard in Dutch traffic law (RVV 1990, Article 3-2) that requires drivers to adapt their speed to the road, traffic, weather, visibility, and their own physical condition. This overrides general or posted speed limits if conditions demand a lower speed.
This article obliges you to adapt your speed to the prevailing circumstances. This means that even if a general speed limit (e.g., 80 km/h outside built-up areas) allows for a higher speed, you must reduce it if a curve is tight, the road is wet, visibility is poor, or traffic conditions demand it. Failing to drive at a reasonable speed can lead to legal liability in case of an accident and significant fines.
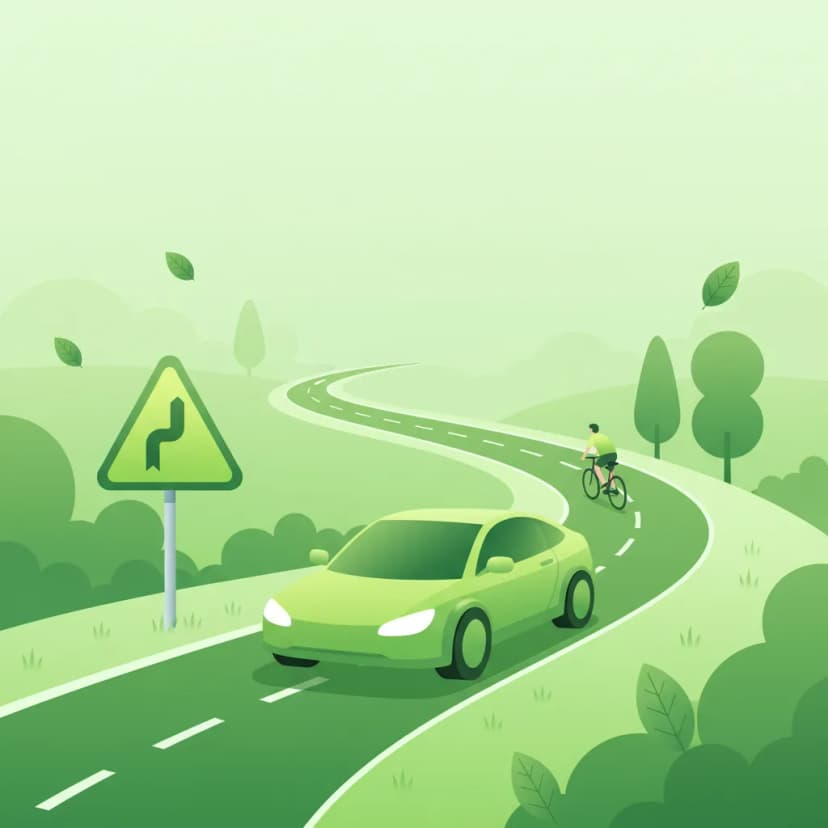
Certain road signs provide explicit warnings about upcoming curves, influencing your legally required speed.
The W1 sign, "Scherpe bocht" (Sharp Bend), specifically indicates a curve that requires a significant reduction in speed. It is often accompanied by a supplementary sign indicating a recommended maximum speed for that particular bend (e.g., "30 km/h"). When you see a W1 sign, you must not only comply with the reasonable speed principle but also respect any indicated advisory speed. Ignoring such signs is a clear violation and substantially increases crash risk.
It is a common misunderstanding that staying below the statutory speed limit (e.g., 50 km/h in built-up areas, 80 km/h outside built-up areas) automatically fulfills the legal requirements. While these limits provide a baseline, they do not replace the principle of reasonable speed. A sharp, wet curve in a 80 km/h zone might safely be navigated at only 30 km/h. Your judgment, informed by the physics of cornering and prevailing conditions, must always take precedence over the maximum allowable speed.
Driving at a speed that is "manifestly excessive" for the conditions is a serious traffic offence in the Netherlands.
This article can be applied even if you are technically below the posted speed limit but are driving unsafely for the circumstances (e.g., taking a tight curve on a motorcycle at 60 km/h in an 80 km/h zone, where the safe speed is actually 30 km/h). Such violations can lead to heavy fines, license points, and potential disqualification, especially if they result in an accident.
Your motorcycle's condition, particularly its tyres, also plays a crucial role in safe cornering and is legally mandated.
Tyres must have a minimum tread depth (1.6 mm in the Netherlands) and be appropriate for the conditions. Worn tyres, or those with incorrect pressure, offer significantly reduced grip, making it easier to exceed the friction circle limit. Regular inspection of tyre wear and pressure is therefore not just good practice but a legal obligation that directly impacts your bochtsnelheid.
Safe cornering is a dynamic skill, requiring constant adjustment based on the ever-changing environment. Here's how different conditions impact your safe speed.
Water, oil, mud, gravel, or wet leaves dramatically reduce the friction coefficient (µ) between your tyres and the road. This means your available lateral grip drops significantly.
On a wet road, the maximum safe speed for a given curve radius can be as much as 40-60% lower than on dry asphalt. Be extra cautious on painted road markings (e.g., zebra crossings, arrows) as they become exceptionally slippery when wet.
Reduce your speed well in advance of the curve, ensure smooth inputs, and increase your lean angle gently. Avoid sudden braking or acceleration, which can easily break traction.
Nighttime riding, fog, heavy rain, or even strong sunlight directly into your eyes can severely limit your ability to perceive the curve's radius, camber, and surface condition. The vanishing point may be obscured, and depth perception is reduced.
When visibility is poor, reduce your speed substantially. This provides more reaction time to unexpected hazards and allows your brain to process limited visual information more effectively. Use your headlights appropriately (low beam for fog, high beam for clear, dark roads, but dipped for oncoming traffic) to illuminate the road, but remember that even with high beams, your range of vision is limited compared to daytime.
Carrying a passenger or heavy luggage alters the motorcycle's center of gravity and increases its overall mass. This intensifies load transfer during cornering, placing higher demands on the outer tyre and reducing the motorcycle's agility.
When riding with a heavy load, you must reduce your entry speed for curves. Allow for shallower lean angles and smoother transitions. Inform your passenger about the need to remain still and lean with you to minimize sudden shifts in weight. Always check your tyre pressures and suspension settings to match the increased load before setting off.
Not all roads offer the same level of grip. Different surface materials, such as asphalt, concrete, cobblestones, or gravel, have varying friction coefficients.
Always observe the road surface ahead and adjust your speed proactively.
Strong crosswinds can significantly affect a motorcycle's stability, making it feel as if the bike is being pushed sideways. This lateral force from the wind can effectively act against your lean, increasing the required centripetal force and thus reducing your available grip margin.
Reduce your speed in windy conditions to maintain better control and a more manageable lean angle. Be prepared for sudden gusts by keeping your body relaxed and ready to counter-steer. Other external factors, such as glare from the sun or spray from other vehicles, can also temporarily impair vision and necessitate speed reduction.
Even experienced riders can fall prey to common errors when cornering. Awareness of these pitfalls is the first step to avoiding them.
The most frequent mistake is entering a curve too fast because the rider misjudged its radius. This often happens by focusing on the curve's visible length rather than its actual tightness (radius).
Correction: Consistently use the vanishing point technique. If the vanishing point is rapidly closing in, the curve is tightening, and you need to scrub off more speed before entry. Always assume a curve is tighter than it looks until you can confirm otherwise.
Applying brakes while the motorcycle is already leaned over and at or near its maximum lateral grip is extremely dangerous. As explained by the friction circle, braking demands longitudinal grip, which directly reduces the available lateral grip.
Correction: Complete all necessary braking before entering the curve, when the motorcycle is upright. Enter the curve at a speed you can maintain smoothly, using a steady throttle through the apex. If you must brake mid-corner due to an emergency, do so very gently and gradually straighten the bike as much as possible before increasing brake pressure.
Assuming that simply staying below the posted speed limit is sufficient for safety, especially in curves, is a dangerous misconception. The "reasonable speed" principle always overrides statutory limits when conditions demand slower travel.
Correction: Always assess the specific conditions of the curve (radius, surface, weather, visibility) independently of the posted speed limit. Prioritize your safety margin and the principle of "reasonable speed" above all else.
Overlooking hazards like gravel, sand, oil, diesel spills, or wet leaves can lead to sudden, catastrophic loss of traction, as these contaminants drastically reduce the friction coefficient.
Correction: Scan the road surface ahead vigilantly for any changes in texture or color. Reduce speed significantly when encountering suspect areas and ride with a light touch on the controls, ready to react to a sudden slide.
Waiting too long to assess a curve means you have less time and distance to adjust your speed and line. This can lead to panicked, abrupt inputs that destabilize the motorcycle.
Correction: Practice early observation. Look through the curve as far as you can as early as possible. Use the vanishing point technique from a distance, allowing you to gradually adjust your speed and position well before reaching the actual bend.
Beyond the fundamental principles, a deeper understanding of human factors and strategic riding approaches can further enhance your cornering safety.
Our brains are not always perfectly rational. Risk compensation means that after successfully navigating a few challenging curves, a rider might subconsciously increase their speed or lean angle in subsequent turns, believing they have a higher skill level or that the road conditions are consistently safe. Confirmation bias can lead riders to interpret visual cues in a way that confirms their pre-conceived notion of a curve's benign nature, even when evidence suggests otherwise.
Correction: Consciously apply a safety margin and critically assess each curve independently. Understand that success in one curve does not guarantee safety in the next. Regularly review your riding practices and seek feedback, rather than relying solely on subjective feelings.
Experienced riders always build in a safety margin. This means riding at a speed that is significantly below the absolute theoretical maximum for a given curve and conditions. This margin accounts for unforeseen variables like a sudden patch of gravel, an unexpected animal on the road, or a slight misjudgment of the curve's radius.
Studies suggest that reducing your speed by approximately 20% below the theoretical maximum for a given radius and surface can significantly reduce crash risks in curves. This margin provides a buffer, allowing for minor corrections or unexpected events without exceeding the tyre's grip limits.
Mastering safe cornering speed is a prerequisite for more advanced riding skills. Techniques such as counter-steering, trail braking (though generally to be avoided mid-corner for less experienced riders), and precise throttle control all rely on a solid understanding of bochtsnelheid.
Advanced riders use throttle control not just for acceleration but also to influence the motorcycle's stability and attitude through a curve, maintaining a smooth, balanced arc. Understanding how speed affects lean angle and load transfer allows riders to select optimal lines through curves, maximizing visibility and safety.
Mastering safe speed in curves is a lifelong journey for motorcyclists. Continue to practice your visual assessment skills, particularly the vanishing point technique, and consciously apply the principles of physics and reasonable speed on every ride.
Lesson content overview
Explore all units and lessons included in this driving theory course.
Explore search topics learners often look for when studying Calculating Safe Speed in Curves (bochtsnelheid). These topics reflect common questions about road rules, driving situations, safety guidance, and lesson level theory preparation for learners in the Netherlands.
Browse additional driving theory lessons that cover connected traffic rules, road signs, and common driving situations related to this topic. Improve your understanding of how different rules interact across everyday traffic scenarios.
Understand the physics of motorcycle cornering, including centripetal force, the friction circle, and lean angle limits. Learn how these factors dictate safe speeds for curves according to Dutch traffic theory.

This lesson provides a foundational understanding of the physics that govern motorcycle cornering. It explains how leaning the motorcycle shifts its center of gravity, creating a centripetal force that counteracts the outward centrifugal force of the turn. Learners will explore the relationship between speed, turn radius, and the required lean angle, as well as the critical role of tire traction in this dynamic balance.

Proper cornering technique is vital for safety and stability on a two-wheeler. This lesson explains the physics of turning, including the concepts of lean angle and counter-steering. You will learn the importance of adjusting your speed before the turn, looking where you want to go, and maintaining a smooth throttle through the corner. These techniques help you maximize grip and maintain control, ensuring you can navigate bends safely.

This lesson teaches a systematic approach to cornering by breaking it down into three distinct phases: entry, apex, and exit. It explains how to choose the correct road position and entry speed, identify the safest apex (not always the geometric one), and apply the throttle smoothly on exit to maximize stability and safety. This 'slow in, fast out' methodology provides a structured, repeatable process for navigating any corner with confidence and control.

This lesson explains the critical role of the rider's body in controlling the motorcycle's dynamics, especially during cornering. It details how shifting body weight alters the combined center of gravity, allowing for greater cornering speed at a given lean angle or a safer lean angle for a given speed. Techniques for correct posture, footpeg weighting, and active body positioning are covered to enhance stability, maximize grip, and provide more precise control.

This lesson explains how you, the rider, are an active part of the motorcycle's dynamics. You will learn how shifting your body weight into the turn can reduce the required lean angle of the motorcycle itself, increasing the margin of safety and grip. The content covers correct posture, the importance of looking through the turn with your head up, and how to stay relaxed on the controls to allow the bike to work effectively.

This lesson explains the principle of counter-steering, the primary method for steering a motorcycle at speeds above a walking pace. You will learn that to turn right, you must momentarily press forward on the right handlebar, and to turn left, you press the left one. The content demystifies the physics behind this technique, explaining how it uses gyroscopic forces to initiate a lean, which is what actually makes the motorcycle turn.

This lesson addresses the specific challenge of cornering when road grip is compromised. It teaches riders how to identify potential low-traction surfaces like wet manhole covers, painted lines, gravel, or oil patches. The content focuses on techniques to mitigate risk, such as reducing speed, minimizing lean angle, and applying all control inputs—braking, steering, and throttle—with exceptional smoothness to avoid overwhelming the available grip.

This lesson demystifies the concept of counter-steering, the primary method for steering a motorcycle at speed. It explains how a small push on the handlebar initiates a lean, allowing the bike to turn effectively. The lesson also details how a rider's body position and weight shifting are used in conjunction with steering inputs to control the motorcycle's center of gravity, ensuring stability and precision while cornering.

This lesson details the correct, systematic procedure for safely navigating a corner. It teaches the 'slow in, fast out' principle, where all necessary braking and downshifting is completed before entering the turn. The content covers how to choose the correct line, identify the apex, and use smooth throttle application on the exit to maintain stability and traction, ensuring a safe and controlled passage through the bend.

This lesson focuses on the critical relationship between speed, braking, and throttle control in cornering. You will learn the golden rule: complete your braking while the motorcycle is still upright, before initiating your lean. The content then explains how to use a neutral or slightly positive 'maintenance throttle' to keep the suspension settled mid-corner, followed by smoothly rolling on the throttle as you exit the turn to aid stability.
Learn to visually assess curve radius using techniques like the vanishing point and understand the meaning of Dutch road signs for curves. Essential knowledge for safe motorcycle riding and theory exams.
This lesson prepares you for real-world cornering challenges where conditions are not always perfect. You will learn how to identify clues that a corner may be tightening (a decreasing radius) and how to adjust your line accordingly. The content covers strategies for dealing with unexpected hazards like gravel or wet patches mid-corner and emphasizes the importance of always riding in a way that leaves you an escape route or a margin for error.

This lesson introduces the concept of the 'line'—the path your motorcycle takes through a curve. You will learn the three key parts of a corner: the entry point where you begin your turn, the apex (the innermost point of your turn), and the exit where you straighten up. The content explains how a 'wide-deep-wide' path maximizes your view through the corner and reduces the required lean angle, enhancing safety and control.
This lesson addresses the specific challenge of cornering when road grip is compromised. It teaches riders how to identify potential low-traction surfaces like wet manhole covers, painted lines, gravel, or oil patches. The content focuses on techniques to mitigate risk, such as reducing speed, minimizing lean angle, and applying all control inputs—braking, steering, and throttle—with exceptional smoothness to avoid overwhelming the available grip.
This lesson focuses on the critical relationship between speed, braking, and throttle control in cornering. You will learn the golden rule: complete your braking while the motorcycle is still upright, before initiating your lean. The content then explains how to use a neutral or slightly positive 'maintenance throttle' to keep the suspension settled mid-corner, followed by smoothly rolling on the throttle as you exit the turn to aid stability.
This lesson details the correct, systematic procedure for safely navigating a corner. It teaches the 'slow in, fast out' principle, where all necessary braking and downshifting is completed before entering the turn. The content covers how to choose the correct line, identify the apex, and use smooth throttle application on the exit to maintain stability and traction, ensuring a safe and controlled passage through the bend.
This lesson provides a detailed guide to navigating Dutch roundabouts ('rotondes'), including single-lane, multi-lane, and 'turbo' designs. It clarifies the specific priority rules that apply when entering the roundabout and the critical importance of correct signaling when changing lanes or exiting. Special attention is given to the vulnerable position of motorcyclists and the need to be aware of other vehicles' blind spots and the priority rules concerning cyclists on or near the roundabout.

This lesson focuses on the rules and techniques for safely navigating Dutch roundabouts, a common feature of the road network. You will learn that traffic circulating on the roundabout typically has priority and that you must yield before entering. The content covers correct lane selection for your intended exit, proper use of turn signals, and maintaining awareness of cyclists who may have priority on adjacent paths.

This lesson covers A-code signs, which are designed to warn drivers of potential hazards on the road ahead. For motorcyclists, warnings about sharp bends, slippery surfaces, crosswinds, or falling rocks are especially critical for maintaining control and stability. The content explains how to interpret these triangular signs to anticipate changing conditions, adjust speed, and adopt a defensive riding posture well in advance of the hazard.
This lesson teaches a systematic approach to cornering by breaking it down into three distinct phases: entry, apex, and exit. It explains how to choose the correct road position and entry speed, identify the safest apex (not always the geometric one), and apply the throttle smoothly on exit to maximize stability and safety. This 'slow in, fast out' methodology provides a structured, repeatable process for navigating any corner with confidence and control.

This lesson details the purpose and visual design of Dutch warning signs ('gevarendriehoeken') that alert riders to potential hazards ahead. It covers a wide range of scenarios, from road narrowing and dangerous curves to construction zones and the risk of falling rocks, emphasizing the need for early anticipation and speed adaptation. The content also explains how these warning signs integrate with other traffic information to help a rider form an accurate risk assessment and make safer decisions.
Find clear answers to common questions learners have about Calculating Safe Speed in Curves (bochtsnelheid). Learn how the lesson is structured, which driving theory objectives it supports, and how it fits into the overall learning path of units and curriculum progression in the Netherlands. These explanations help you understand key concepts, lesson flow, and exam focused study goals.
The vanishing point technique involves observing where the road edges appear to converge. If the vanishing point is close, the curve is sharp, requiring a slower entry speed. If it's further away, the curve is more open, allowing for a higher entry speed. This visual cue is vital for anticipating the severity of a bend ahead.
The more a motorcycle leans into a corner, the greater the centrifugal force pushing it outwards. To maintain balance and avoid sliding, the lean angle must be matched to the cornering speed and radius. Exceeding the safe lean angle for a given speed will lead to a loss of traction and potentially a crash. This lesson teaches you how to select a speed that allows for a safe lean angle.
Yes, the CBR theory exam for Category A frequently includes questions that test your understanding of safe speed selection in various scenarios, including curves. You might be shown an image and asked to choose the safest speed or identify potential hazards related to speed and cornering.
Damp, gravelly, or oily road surfaces significantly reduce available traction. On such surfaces, you must reduce your speed and lean angle considerably to maintain grip. This lesson covers how to adjust your speed for compromised road conditions to prevent skidding or loss of control.
While ABS prevents wheel lock-up, it's generally safest to avoid heavy braking in sharp corners, especially when leaning. The primary focus should be on selecting a safe entry speed before the corner. This lesson emphasizes pre-corner speed management rather than relying solely on ABS during the turn itself.